Patricia A. Mayer's 3.0 CS / Paul Cain's Fjord project / The 300 mile Test Drive / VIII / Final Punch List

paul cain

Well-Known Member
Site Donor $$
Messages
681
Reaction score
1,340
Location
Orange County
We've got a lot of ground to cover, we've got to keep moving.

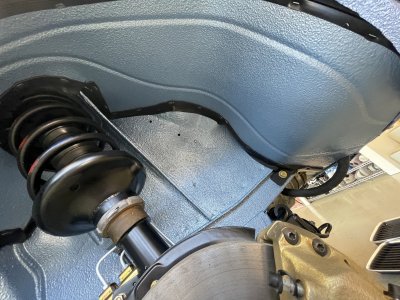
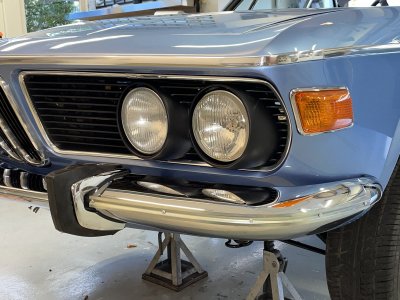
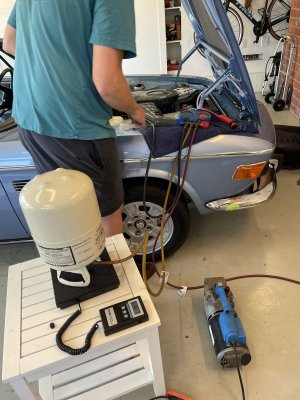
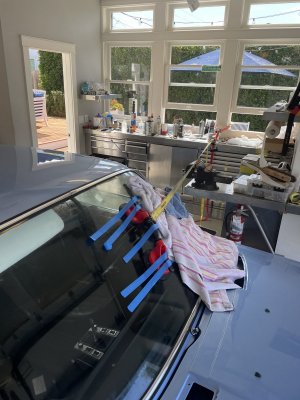
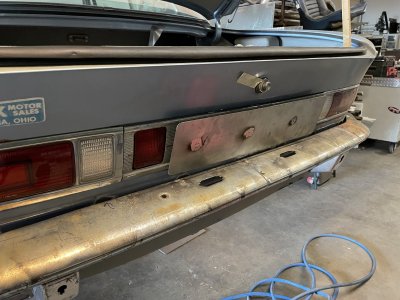
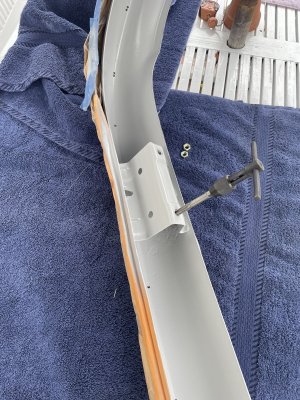
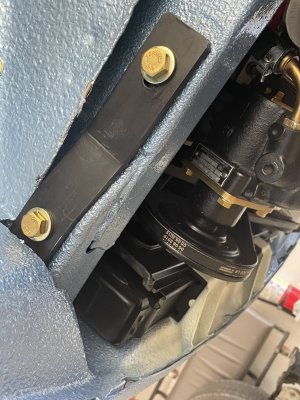
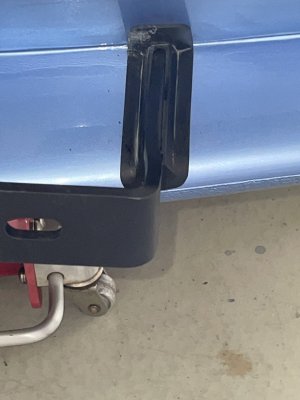
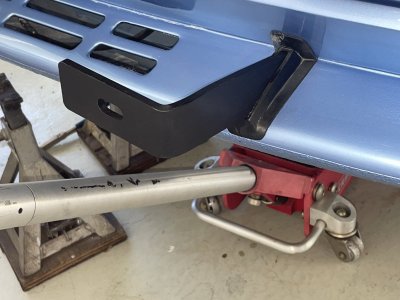
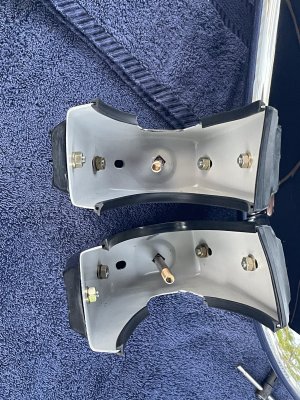
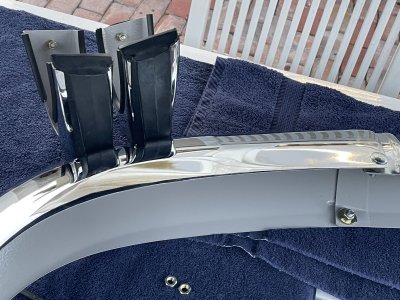
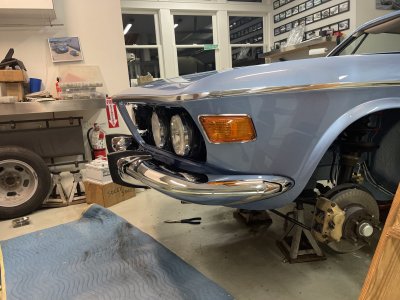
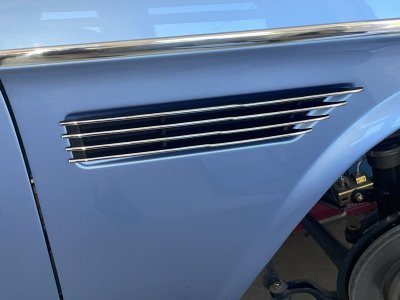
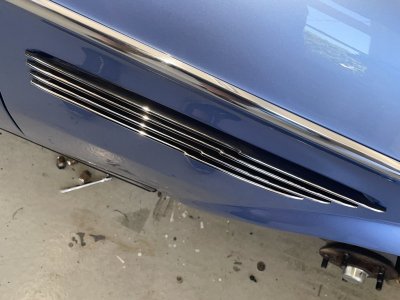
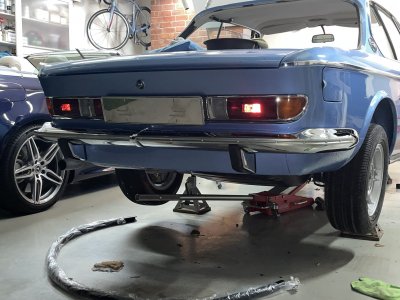
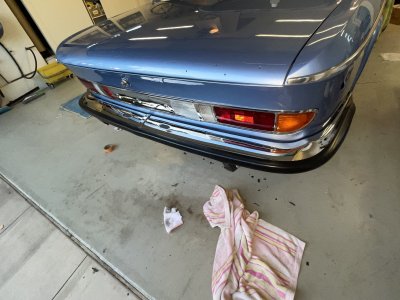
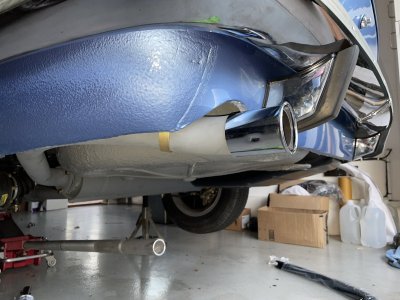
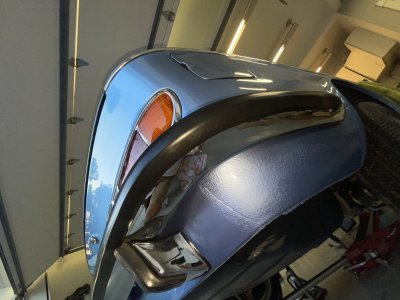
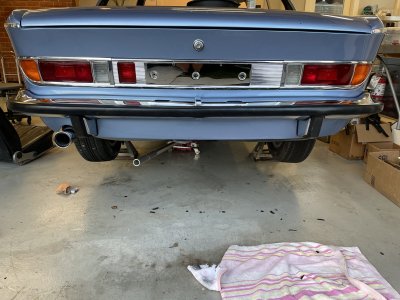
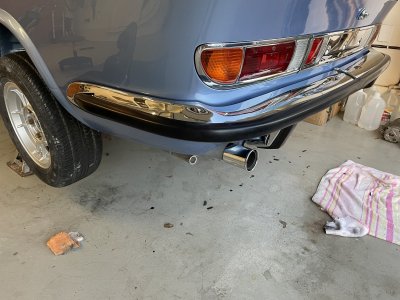
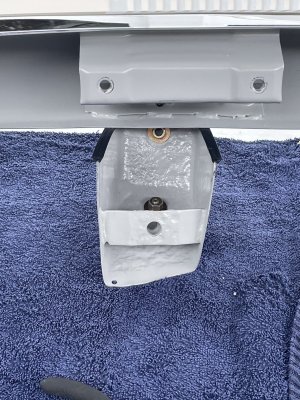
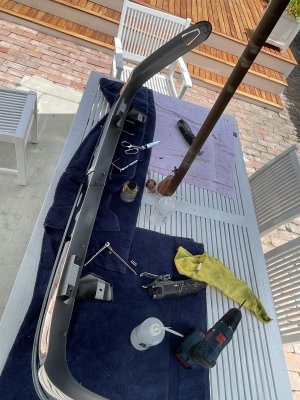
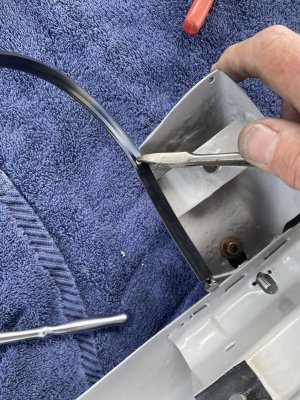
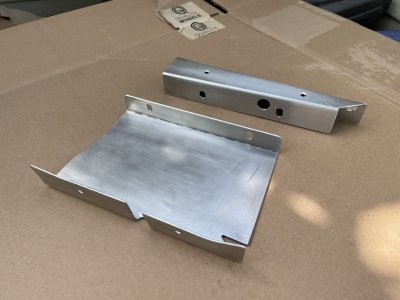
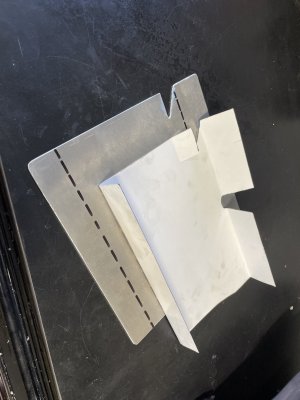
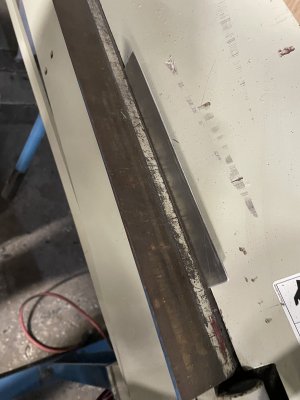
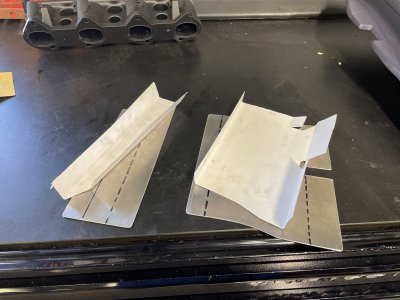
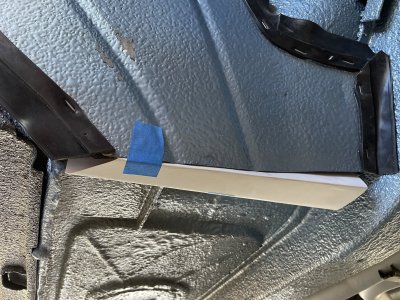
Lots of dry fitting of the raw bumpers was completed back in December of 2021. The front bumper took approximately 5 test fits to get everything aligned, starting with the plate bumper brackets. In Feb the bumpers went out for chrome, with strict instructions, No Further Straightening!. Just fill a few holes and chrome 'em. In May I painted the back side of the bumpers with the DTM primer and then that taupey / green flat paint. This past weekend I took them out for final assembly. Starting with cleaning and thread chasing. Then I joined the front three sections together on the bench, followed by the bumperettes and rubber gasketing. With everything in place and Mrs. Cain assisting with holding the bumpers, they went back on with no drama. All the holes lined up and each of the pieces squared up. I wont do final adjustment until the car is on the street and I can get 30' back to confirm final alignment. As a 'reward' for eating my bumper vegetables for 5 hours, I installed the side grilles.
 

Attachments

  • back in December.jpg
    back in December.jpg
    305.8 KB · Views: 374
  • IMG_1879.jpg
    IMG_1879.jpg
    653.7 KB · Views: 302
  • IMG_1861.jpg
    IMG_1861.jpg
    385.7 KB · Views: 243
  • IMG_1864.jpg
    IMG_1864.jpg
    256.5 KB · Views: 210
  • IMG_1865.jpg
    IMG_1865.jpg
    258.2 KB · Views: 208
  • IMG_1871.jpg
    IMG_1871.jpg
    532.7 KB · Views: 204
  • IMG_1872.jpg
    IMG_1872.jpg
    397.7 KB · Views: 216
  • 67920655980__8A75EAC2-EFC3-4A38-85C0-ED4D754A85D0.jpg
    67920655980__8A75EAC2-EFC3-4A38-85C0-ED4D754A85D0.jpg
    308.6 KB · Views: 212
  • IMG_1866 (1).jpg
    IMG_1866 (1).jpg
    239.7 KB · Views: 207
  • IMG_1867.jpg
    IMG_1867.jpg
    269.1 KB · Views: 233

paul cain

Well-Known Member
Site Donor $$
Messages
681
Reaction score
1,340
Location
Orange County
In the hierarchy of unpleasantness, yesterday I chose to do the motor lift servicing on the last rear window. If you are new to E9's, here is a geometry lesson in complex arc's only the German's could come up with.


It's a beautiful sweep that places the rear quarter glass in the precise position without the crutch of having a 'B' pillar. From an engineering and design exercise this is an exceedingly difficult design challenge. Unsupported glass, moving through a series of arc's to land precisely as a exterior sealing surface. It's truly the 'guts' of what makes an E9 so beautiful. A tip of the Chapeau to the window lift engineering team in the bowels of BMW circa 1963-66. Extremely impressive.
 

paul cain

Well-Known Member
Site Donor $$
Messages
681
Reaction score
1,340
Location
Orange County
Rear bumper is complete. All of the dry fitting in December was the big time saver at assembly. The rubber impact strip was from W&N and it went on when the bumper was back on the car, given the amount of wrestling required to get both the upper and lower sections to grab on the riveted rail. License plate lamps have been rewired through a new hole behind the bumper. Bumperettes lined up beautifully and are well fastened the lower rear valence. The reward after this effort, was another small and visually gratifying task -installing a new red tip on the original Hirshmann antenna.
 

Attachments

  • IMG_1898.jpg
    IMG_1898.jpg
    301.3 KB · Views: 209
  • IMG_1922.jpg
    IMG_1922.jpg
    311.2 KB · Views: 210
  • IMG_1911.jpg
    IMG_1911.jpg
    283.9 KB · Views: 203
  • IMG_1920.jpg
    IMG_1920.jpg
    306.6 KB · Views: 201
  • IMG_1915.jpg
    IMG_1915.jpg
    336.8 KB · Views: 199
  • IMG_1914.jpg
    IMG_1914.jpg
    349.5 KB · Views: 204
  • IMG_1880.jpg
    IMG_1880.jpg
    264.2 KB · Views: 202
  • IMG_1886.jpg
    IMG_1886.jpg
    305.2 KB · Views: 195
  • IMG_1894.jpg
    IMG_1894.jpg
    306.9 KB · Views: 206
  • IMG_1885.jpg
    IMG_1885.jpg
    489.6 KB · Views: 197
  • IMG_1889.jpg
    IMG_1889.jpg
    443.7 KB · Views: 196
  • IMG_1887.jpg
    IMG_1887.jpg
    463.9 KB · Views: 191
  • IMG_1924.jpg
    IMG_1924.jpg
    231.1 KB · Views: 213

paul cain

Well-Known Member
Site Donor $$
Messages
681
Reaction score
1,340
Location
Orange County
Starting to close in on final assembly. These are the original rear seats with the original leather. A very light cleaning and some Hyde food is all they required. Note the ash tray.
 

Attachments

  • IMG_1974.jpg
    IMG_1974.jpg
    270.5 KB · Views: 198
  • IMG_1975.jpg
    IMG_1975.jpg
    345.1 KB · Views: 218

paul cain

Well-Known Member
Site Donor $$
Messages
681
Reaction score
1,340
Location
Orange County
Today's topic is more rust prevention and then final install on the Lokari wheel well / fender liners. Great product, too bad they had already fired the engineer responsible for fastening.
After three test fits my conclusion is the Lokari product is really good at sealing off the extreme edges of the inner fenders. The 'fastening kit' they provide is comical in it's ability to hold the liner in place. This needs fastening at both ends and fasteners that don't perforate the cabin. After some head scratching, the solution became a set of custom brackets at the back end of the wheel well and a simple single fastener at the front end. Here goes:
 

Attachments

  • bending them 90 degrees.jpg
    bending them 90 degrees.jpg
    271.4 KB · Views: 194
  • Pass side at final installation.jpg
    Pass side at final installation.jpg
    411.2 KB · Views: 202
  • drivers side at final installation.jpg
    drivers side at final installation.jpg
    410.4 KB · Views: 191
  • stoneguard then primer then base coat then clear coat x 2.jpg
    stoneguard then primer then base coat then clear coat x 2.jpg
    482.7 KB · Views: 183
  • test fit no. 3 on the pass side.jpg
    test fit no. 3 on the pass side.jpg
    374.7 KB · Views: 179
  • Etching Primer.jpg
    Etching Primer.jpg
    266.1 KB · Views: 175
  • On average it takes about 4 test fits to fabricate a part into the correct and final position.jpg
    On average it takes about 4 test fits to fabricate a part into the correct and final position.jpg
    299.4 KB · Views: 163
  • drivers side braket before bending.jpg
    drivers side braket before bending.jpg
    233.8 KB · Views: 168
  • bent.jpg
    bent.jpg
    248.5 KB · Views: 166
  • Drivers side is the large one small one on the pass. side.jpg
    Drivers side is the large one small one on the pass. side.jpg
    299 KB · Views: 164
  • Art board pattern of the new bracket.jpg
    Art board pattern of the new bracket.jpg
    483.5 KB · Views: 170
  • No fastening method provided from Lokari.jpg
    No fastening method provided from Lokari.jpg
    440.6 KB · Views: 194
  • both sides plus a spare after fabricating.jpg
    both sides plus a spare after fabricating.jpg
    405.6 KB · Views: 187

mulberryworks

Mr. Fixity
Site Donor
Messages
1,245
Reaction score
614
Location
Jacksonville FL
I was thinking that while I'm doing the rust work on my car I'd weld on some fastening points for fender liners so I could easily bolt them on and keep the body weathertight. Exactly how that will be done is TBD, but you've given me some ideas.
 

paul cain

Well-Known Member
Site Donor $$
Messages
681
Reaction score
1,340
Location
Orange County
I was thinking that while I'm doing the rust work on my car I'd weld on some fastening points for fender liners so I could easily bolt them on and keep the body weathertight. Exactly how that will be done is TBD, but you've given me some ideas.
regarding: "but you've given me some ideas' -another fine example of just how wonderful the e9 forum true is.

Happy it spawned some grey matter activity.

Welding on a set of fasteners is a brilliant idea and would me much more elegant then these large brackets. You are welcome to my templates if that helps as a starting point.
 

JFENG

Well-Known Member
Site Donor
Messages
3,182
Reaction score
1,398
Location
Bahston (Boston)
Welding on a set of fasteners is a brilliant idea
VSR1 (Mario) adds a couple discrete “mounts” to the inner wheel well sheet metal to make installation and removal of these liners easier. I’m pretty sure both Stan and Andrew’s cars have been setup this way. maybe ask A and S for some pics?
 

Candia4441

Well-Known Member
Site Donor $
Site Donor $$
Messages
919
Reaction score
311
Location
California
VSR1 (Mario) adds a couple discrete “mounts” to the inner wheel well sheet metal to make installation and removal of these liners easier. I’m pretty sure both Stan and Andrew’s cars have been setup this way. maybe ask A and S for some pics?
Hi Paul, I buy the same thing when I saw yours installed that is very nice but it is to hard for me to install it and it is sitting in my garage if you can use it I will send it to you
 

paul cain

Well-Known Member
Site Donor $$
Messages
681
Reaction score
1,340
Location
Orange County
Hi Paul, I buy the same thing when I saw yours installed that is very nice but it is to hard for me to install it and it is sitting in my garage if you can use it I will send it to you
Thank you for your gracious offer, however I am done, moving on and not in the market. You should post an ad in the For Sale section of this forum. Somebody would love to have them and not suffer the shipping cost from Europe.

Whomever is interested, this is what the final fit will look like (attachments). This is a very well thought out product, short of the fastening.
 

Attachments

  • IMG_1979.jpg
    IMG_1979.jpg
    464.2 KB · Views: 158
  • IMG_1981.jpg
    IMG_1981.jpg
    396 KB · Views: 168
  • IMG_1986.jpg
    IMG_1986.jpg
    386.7 KB · Views: 155
  • IMG_1982.jpg
    IMG_1982.jpg
    322.7 KB · Views: 181

paul cain

Well-Known Member
Site Donor $$
Messages
681
Reaction score
1,340
Location
Orange County
For the E9 Veterans on the forum they will understand just how significant this boring picture is of the door. It includes the vapor barrier, the fourth vapor barrier. Which means I am D.O.N.E. with the doors. Lock mechanisms, striker plates, door stops, wiring, window lifts guides, felt lining, motor servicing, and the all important alignment of the window guide and glass. All four windows are in the can. The treat for getting all this done? I got to install the front headlamp grilles. Minutes of assembly, instant endorphin rush.
 

Attachments

  • IMG_2009.jpg
    IMG_2009.jpg
    335.8 KB · Views: 167
  • IMG_2011.jpg
    IMG_2011.jpg
    325.5 KB · Views: 198

paul cain

Well-Known Member
Site Donor $$
Messages
681
Reaction score
1,340
Location
Orange County
36 hours after the clear coat was applied the car was sanded with 2000 grit and then buffed. Just enough to get the gloss back. There was no point in going further until the rest of shrinkage has occurred. Its been exactly a month and its now time to finish the polishing, before any more final assembly, glass, etc. is completed.

I find that color sanding and buffing is really fun and gratifying for about 1.5 panels. Then burn out and block sanding high build primer flash backs start to flair up. It was time to leave this to a serious professional. Someone who will get every available surface on each panel.

This process will take three days. First step is color sanding with 3M Trizack 3000 grit, followed immediately by 3M 5000 Grit. Both using an interface pad. Then 3M cutting compound, then polishing compound, then a through washing, then inspection, then touch up polishing. We will finish with a full ceramic coating as final protection. This video clip is working with the initial cutting compound just after the 5000 grit sanding. Ed is on the polisher.

The still image of the trunk is after 3000 grit sanding.

https://youtu.be/TVuqDaJUjnM
 

Attachments

  • 3000 grit sanding .jpg
    3000 grit sanding .jpg
    259.5 KB · Views: 191
Last edited:

paul cain

Well-Known Member
Site Donor $$
Messages
681
Reaction score
1,340
Location
Orange County
Polishing and ceramic coating has been delayed due to a power outage in the area. Maybe back home tomorrow.

While waiting I got a good coat of hyde food on the leather on both front seats. This is all original leather. Chrome hinges are in very good condition. I have replated the seat tracks in the original bright clear zinc, lubricated the recline mechanisms and cleaned out the hinge internals. They are ready to go.

IMG_2033.jpg
IMG_2035.jpg
IMG_2037.jpg
 

vince

Well-Known Member
Site Donor
Messages
1,469
Reaction score
1,454
Location
West Linn, Oregon
Polishing and ceramic coating has been delayed due to a power outage in the area. Maybe back home tomorrow.

While waiting I got a good coat of hyde food on the leather on both front seats. This is all original leather. Chrome hinges are in very good condition. I have replated the seat tracks in the original bright clear zinc, lubricated the recline mechanisms and cleaned out the hinge internals. They are ready to go.

Seats look beautiful!!
 

Stan

Well-Known Member
Site Donor $$
Messages
7,008
Reaction score
1,526
Location
Newmarket, New Hampshire
Polishing and ceramic coating has been delayed due to a power outage in the area. Maybe back home tomorrow.

While waiting I got a good coat of hyde food on the leather on both front seats. This is all original leather. Chrome hinges are in very good condition. I have replated the seat tracks in the original bright clear zinc, lubricated the recline mechanisms and cleaned out the hinge internals. They are ready to go.
Is that Byron's Hyde food?
Better than Leatherique?
 

paul cain

Well-Known Member
Site Donor $$
Messages
681
Reaction score
1,340
Location
Orange County
The A/C compressor was rebuilt for a Porsche 928 project last year. It was a spare and it is the same part no. as on 1974 Coupes. This I believe is the first Munich engineered A/C system with a rotary compressor and with a compressor bracket made by BMW. Prior years had dealer installed welded brackets that were were fatigued to death by York piston compressors. I was bracing for a really difficult project but it pulled and held a solid vacuum overnight. So last night Rob Edwards (licensed refrigerant professional) brought over the heavy equipment and dispensed 800 grams of virgin R12 into the system. I was over the moon when the register temp crossed under 40 Degrees F. That's a massive item off the list.
 

Attachments

  • no molesting here. first direct sunlight in 48 years.jpg
    no molesting here. first direct sunlight in 48 years.jpg
    430.8 KB · Views: 119
  • poor mans thermo plate to get a temp reading.JPG
    poor mans thermo plate to get a temp reading.JPG
    106.1 KB · Views: 117
  • Rob Edwards at the R12 valve we stopped at 800 grams.jpg
    Rob Edwards at the R12 valve we stopped at 800 grams.jpg
    317.8 KB · Views: 132

paul cain

Well-Known Member
Site Donor $$
Messages
681
Reaction score
1,340
Location
Orange County
The rear back light when in in ten minutes. Easy, as it was original glass, original trim and the original weatherstripping.

The front glass is original as is the brightwork. The gasket is new (BMW OEM). This was the most difficult piece of glass I've ever installed. After 3 attempts with Henry (extremely experienced vintage glass installer) we gave up. 1.5 hours into it and Henry had to leave for another job. We agreed that the galvanized "U" channel on the sides and top had to go. So, I reglued the "A" pillar vinyl trim and edge of the headliner back down with Wurth adhesive. I clamped this with wood stir sticks and let it dry for 48 hrs. Then Henry returned this morning and we took two more attempts to get the glass in. The corner of the brightwork kept popping out. More Wurth adhesive solved that issue. Once it was in, we noticed it was, ever so slightly, too far to the right. By 4 or 5 mm. Many attempts with the vacuum handles and spanking the glass were not successful.

So, desperate times call for desperate measures. Using time as our ally, I rigged ratcheting belt to the glass handle and leveraged the girth of the local 4x4 in the window frame of the house. With lite tugging planned, I picked reference feature of the antenna anchor to the edge of the weatherstripping. We are starting with a gap of 4.57mm. After 30 minutes this had closed to 4.21 mm.

Not in a hurry, lets see where this is in 12 and 24 hours.
 

Attachments

  • IMG_2086.jpg
    IMG_2086.jpg
    266.6 KB · Views: 135
  • starting ref. dimension is 4.57mm.jpg
    starting ref. dimension is 4.57mm.jpg
    258.5 KB · Views: 124
  • IMG_2090.jpg
    IMG_2090.jpg
    277.7 KB · Views: 132
  • A light tug over 48 hours looking for 4 mm to the left.jpg
    A light tug over 48 hours looking for 4 mm to the left.jpg
    311.1 KB · Views: 143

paul cain

Well-Known Member
Site Donor $$
Messages
681
Reaction score
1,340
Location
Orange County
I am trying to envision Patricia Mayer speeding on the Ohio Turnpike, in third gear at 85 mph....... "Breaker 1 - 9, what's the smokey position at exit 43?" A comical piece of vintage American sports car lore - The CB radio. Visions of Burt Reynolds in flammable polyester shirt buttoned down to his navel, fake smile as glances over at Patricia from his bitchin' Firebird. Patricia, looking ever more elegant in her 3.0 CS, 'floors it' and leaves Burt in the dust*.

For Sale: One low hours CB radio. Craftily installed in glove box with sheet metal screws from the local hardware store and fitted with a modified FM antenna.

No. It's not staying in the car.

Comes complete with the "How To Talk Trucker'' handbook, copyrighted in 1972. Good buddy. :)

*1974 Firebirds had over 6 liters of displacement and something like 145 horsepower.

This is why we love E9's.
 

Attachments

  • Breaker 1 9.jpg
    Breaker 1 9.jpg
    703.8 KB · Views: 143
Top