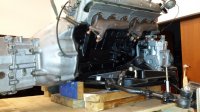
Peter,
the engine and subframe look great ... now about that bellcrank for the throttle ...
you beat me to it...Peter really loves those comments...
Peter,
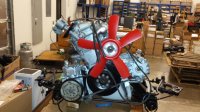
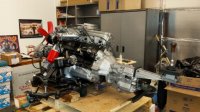
the engine and subframe look great ... now about that bellcrank for the throttle ...
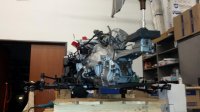
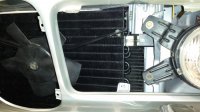
You guys will think I'm sick(er) but the throttle crank has some kind of "coating" on it and if I sanded all the rust off it it would just rust faster so I polished it up as best I could and clear-coated it. This way I hope to achieve the "clean but old" look. I could not do that to any parts that would get extremely hot because I don't think they make 400 degree clear coat- but it would be nice. Thanks for the comments, hope to really get things done this week, just waiting on some parts.
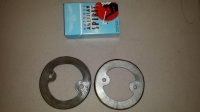
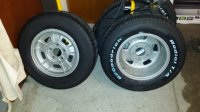
") I'll try it and report back. I tried to match the trunk badge gasket up to an old one I had but yes, it seemed a little small. I included a picture. I left it off the blue coupe probably for that reason.
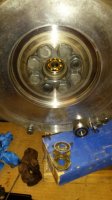
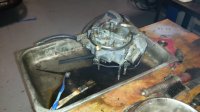
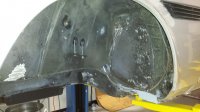
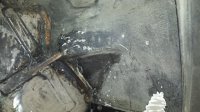
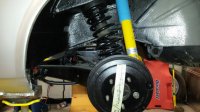
I'll try it and report back. I tried to match the trunk badge gasket up to an old one I had but yes, it seemed a little small. I included a picture. I left it off the blue coupe probably for that reason.So I got my new pilot bearing and when I took the old one out- sort of, this is what I see. If you look at the bottom of the picture you will see the order the pieces came out and the new bearing beside those pieces, then in the center of the crank there is a ball bearing.
Please help me with the process from here -
And thanks!!
I haven't pulled mine yet, but the shop manual recommends using a kukko puller -- http://www.automotive-toolzone.co.u...en-group-united-kingdom-ltd-puller-set-1.html
. I just wanted to be sure that I was not pulling out a main bearing You guys will think I'm sick(er) but the throttle crank has some kind of "coating" on it and if I sanded all the rust off it it would just rust faster so I polished it up as best I could and clear-coated it.