What did you do to your E9 today?

BikeRider

Active Member
Site Donor
Messages
57
Reaction score
54
Location
Maryland
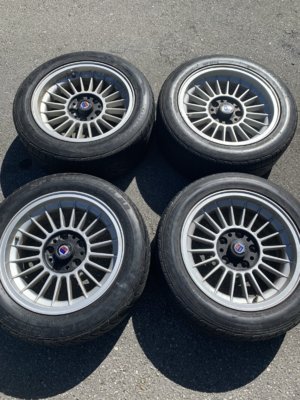
using Motul 20-50 and parts from Wallothnesch; changed oil & filter & fuel filter for the first time since delivery in January...and the car still runs! oil was really black and somewhat thick inside the filter housing...learned as I went...had car on lift; realized a bolt bottom oil housing does not come out from the bottom of the car. Lowered the car and wiggled it out from the top...re-installed from top with internal parts - lifted the car again to re-install from bottom. I didn't want to get into removing the bracket for the filter...Next up; changing plugs and coolant. Any advise for plug gap on a 73' CSi would be appreciated.
 
Last edited:

offpage

Active Member
Site Donor
Messages
72
Reaction score
114
Location
Los Angeles, CA, USA
Very happy with this 380mm Petri I had installed. Feels better for me than the 400mm, which I also tried.
 

Attachments

  • IMG_3561.JPG
    IMG_3561.JPG
    308.2 KB · Views: 139

Barry.b

Well-Known Member
Messages
627
Reaction score
439
Location
Ireland
I started to strip my RC090’s
I have all 5 completely taken apart, I have started down the road of refurbing them.
I think I’ll actually send the barrels/ rims off to be metal polished.
I don’t think I have the patience for polishing rims myself, I think , I do change my mind a bit on that.
I normally do my own work, but I might make an exception this time.
I have been quoted €75 per rim to mirror polish them , and at home I think I can’t match the finish that the polisher promises so I think it’s a no brainer really.
I have ordered 170 new bolts and 170 new nuts , new valves new centering rings and I am planning on sandblasting the cast centers and etch priming them and spray painting them myself then rebuilding them .
I got my rims back from being polished and I am delighted with the finish , I could never have gotten them that good myself.
He took some photos of the work in progress too.
 

Attachments

  • 92E3DEB5-0AA3-4518-B2A3-0B61A504304D.jpeg
    92E3DEB5-0AA3-4518-B2A3-0B61A504304D.jpeg
    134.9 KB · Views: 116
  • 6EECB68B-7108-41B8-894C-50A290602878.jpeg
    6EECB68B-7108-41B8-894C-50A290602878.jpeg
    204.7 KB · Views: 110
  • 891BF00B-4686-4181-AE4B-25886EBC885D.jpeg
    891BF00B-4686-4181-AE4B-25886EBC885D.jpeg
    258.8 KB · Views: 110
  • B49A44AE-A2B3-4DFE-85E1-9B0C43447D0A.jpeg
    B49A44AE-A2B3-4DFE-85E1-9B0C43447D0A.jpeg
    210.5 KB · Views: 118
  • D6A2F0EB-3C78-44DE-BDD6-7DFC18662DF9.jpeg
    D6A2F0EB-3C78-44DE-BDD6-7DFC18662DF9.jpeg
    212.3 KB · Views: 100
  • D6B8B06B-628D-457B-8F2F-80DC089F733C.jpeg
    D6B8B06B-628D-457B-8F2F-80DC089F733C.jpeg
    226.7 KB · Views: 105

grnder95

Well-Known Member
Site Donor
Messages
174
Reaction score
46
Location
Houston, Tx
Hello Barry,
Those wheels look amazing, I'm just glad that they didn't get damaged, Take a look at picture no. 3, the jaws on the chuck are almost all the way out and if you think how fast it needs to turn to get them polished, Very scary.
Regards
 

Drew Gregg

Well-Known Member
Site Donor
Messages
1,580
Reaction score
1,213
Location
Ft. Lauderdale
Ref. Stan's E28 rear window motors: The BMW CCCA Florida tour a few weeks ago had a 1988 M5 as one of the cars. I wanted to see how the E28 motors in my windows performed compared to the motors in his back windows. The result--they both went up and down at the same speed.
 

Stevehose

Well-Known Member
Site Donor $$
Messages
13,032
Reaction score
5,725
Location
Sarasota, FL
Out with the old rusty pos mufflers held together with JB Weld and POR-15 paint:

IMG_1305.jpg


In with the new W&N stainless, sounds great, it's also significantly lighter:

IMG_1298.jpg


A lot of time spent getting the rear tail pipe piece to line up correctly, I had to heat and bend it so it would curve towards the hole correctly, it bugs me if the pipe isn't centered with the opening:

IMG_1300.jpg


Bought a new yellow zinc pipe clamp from BMW:

IMG_1302.jpg


I could stand it a little louder but all in all I love it, nice burble at idle and not annoying at speed.
 

Attachments

  • IMG_1306.jpg
    IMG_1306.jpg
    369.8 KB · Views: 125
Last edited:

boonies

Boonies
Site Donor $$
Messages
1,146
Reaction score
819
Location
US - Philadelphia suburbs
Out with the old rusty pos mufflers held together with JB Weld and POR-15 paint:

View attachment 138357


In with the new W&N stainless, sounds great, it's also significantly lighter:

View attachment 138358


A lot of time spent getting the rear tail pipe piece to line up correctly, I had to heat and bend it so it would curve towards the hole correctly, it bugs me if the pipe isn't centered with the opening:

View attachment 138359


Bought a new yellow zinc pipe clamp from BMW:

View attachment 138361

I could stand it a little louder but all in all I love it, nice burble at idle and not annoying at speed. I'd be happy to sell my tail pipe and down pipes cheap to someone in need, they are in good shape, the downpipes were recently bead blasted and coated with POR-15 grey exhaust paint and the tail pipe piece would clean up nicely, I think they are unobtanium these days.
Looks very nice!
 

Stevehose

Well-Known Member
Site Donor $$
Messages
13,032
Reaction score
5,725
Location
Sarasota, FL
Looks very nice!
Thanks I may raise the exhaust tip a 1/2" or so, it's as high as it can go with the oem rubber hanger there, I'd have to slot the holes to allow it to slide higher up and pull the exhaust pipe with it. But good enough for now.
 

restart

Well-Known Member
Messages
1,214
Reaction score
180
Location
KANADA, Roberts Creek, BC
Yes, all of the fasteners were tamper-resitant torx bolts, but one that was a 6mm hex key. The shield came with the driver for the torx. I'd never used tamper-resistant ones. Worked really well. I think the one hex key was because they couldn't get a long enough bolt with the torx head. It was several inches long.
AND YOU CAN DO YOUR BRAKES!-)

C7BFA4E5-3429-43A6-AD91-A4FB6358F887.jpeg


4CD3B981-BE01-45B6-9237-5B9286F137E5.jpeg
 

day66

Well-Known Member
Messages
252
Reaction score
228
Location
Manchester, UK
You think it will never happen, but it has .... the last of the welding is done!

With the underside cleaned up I spotted the start of a couple of small cracks around the diff mount, so that's been beefed up with a couple of webs, and that's it.

I've probably got off pretty lightly parts-wise, just needing front wing mounting rails, front floor pans, outer sills both sides, right hand central sill membrane and A and B-post bottoms (curiously the LH side was much better and these didn't need replacing), spare wheel well, right hand rear wing lower corner and a pair of rear wing repair panels.
 

Attachments

  • SDC14647.JPG
    SDC14647.JPG
    166.1 KB · Views: 105
Top