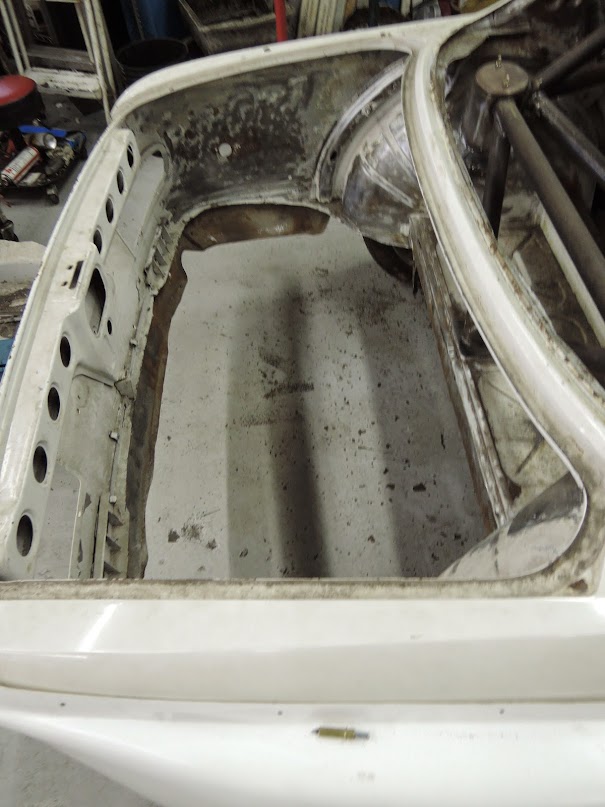
Did this for my car. Don't forget to make a hole for the brake lines if you are running them through there.
You are using an out of date browser. It may not display this or other websites correctly.
You should upgrade or use an alternative browser.
You should upgrade or use an alternative browser.
72 Restomod clubracer build
- Thread starter bdigel
- Start date
-
- Tags
- restoration list
Tierfreund
Well-Known Member
Filthy, naughty, wonderfull gearhead porn. Love it.
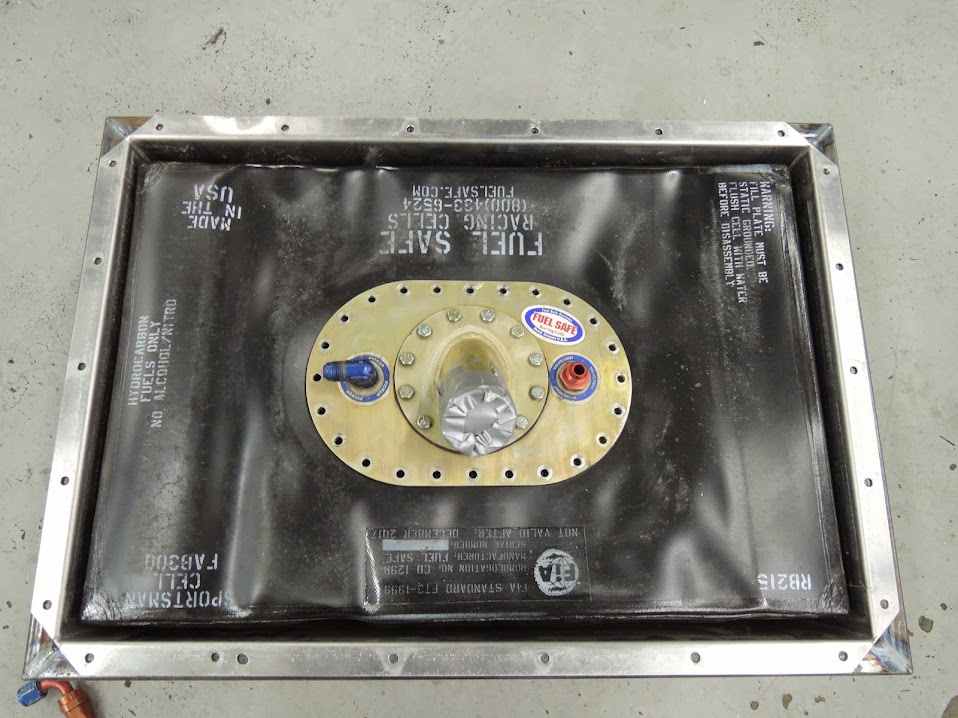
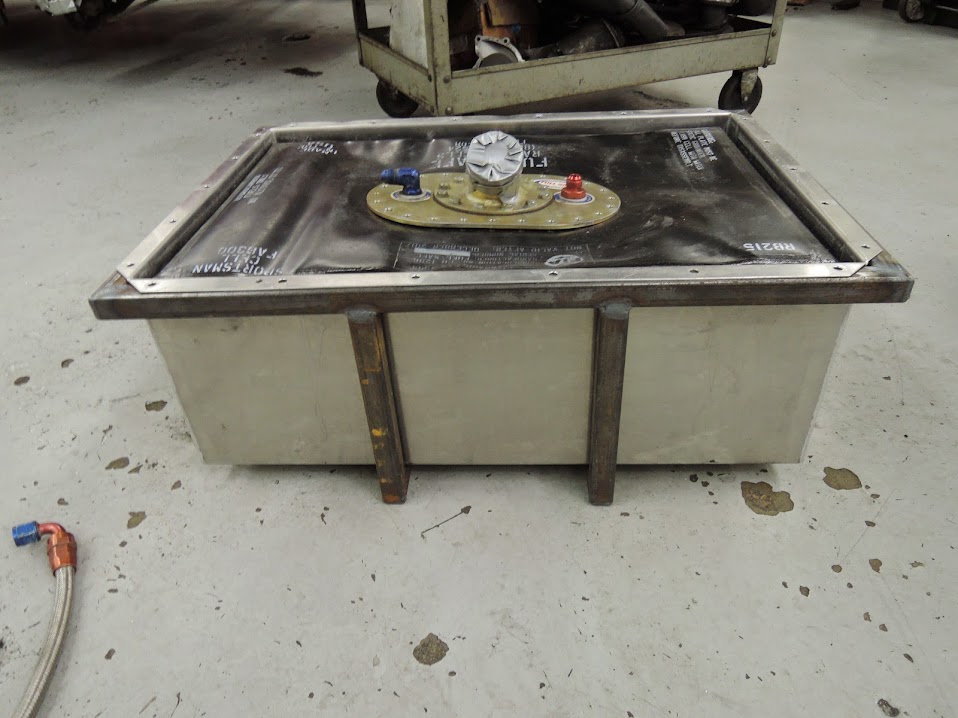
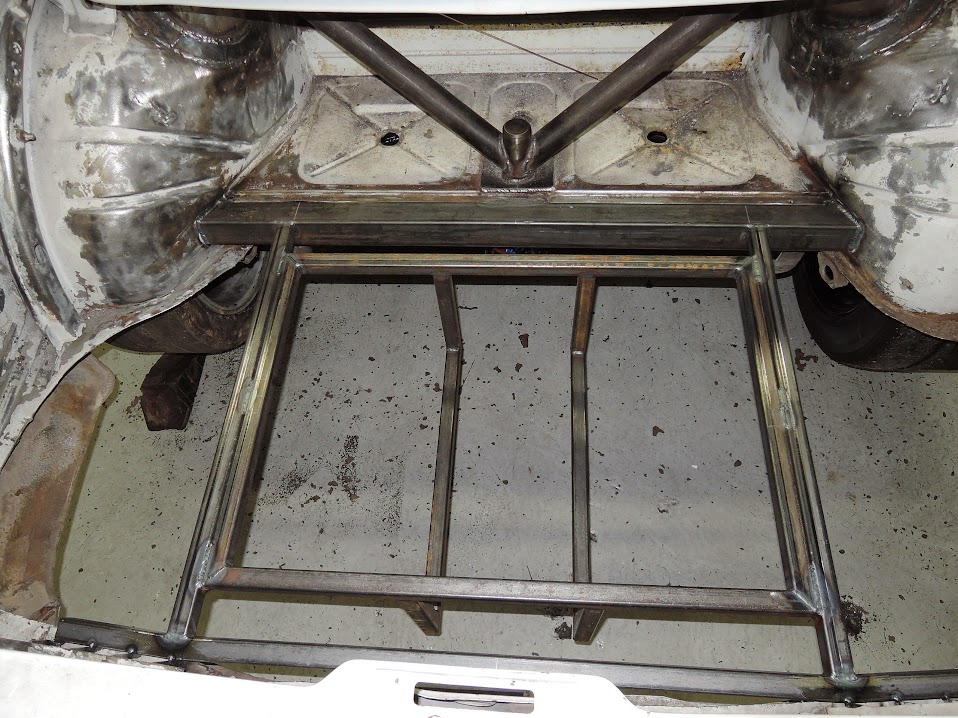
got started on the fuel system , Scored an aluminum 15 gallon fuel cell. so I cut out the trunk where I will build a frame to hold the fuel cell cage.
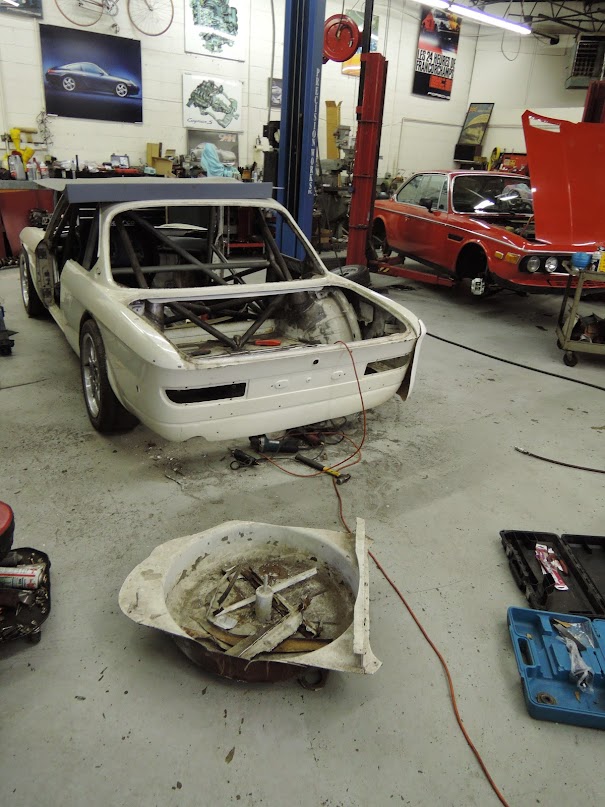
one spare tire well gone !
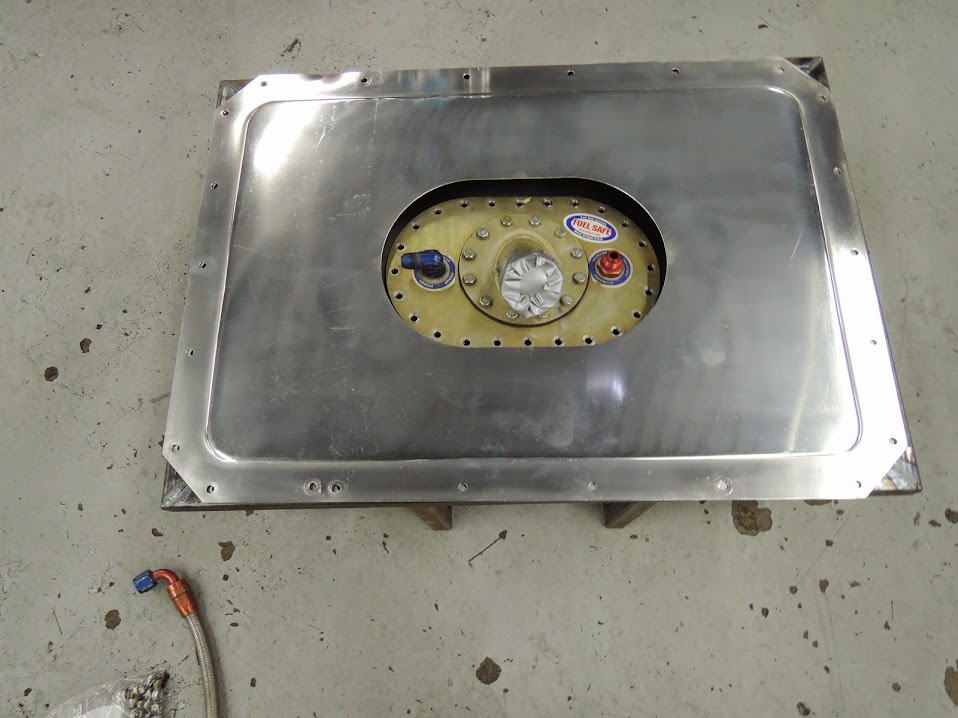
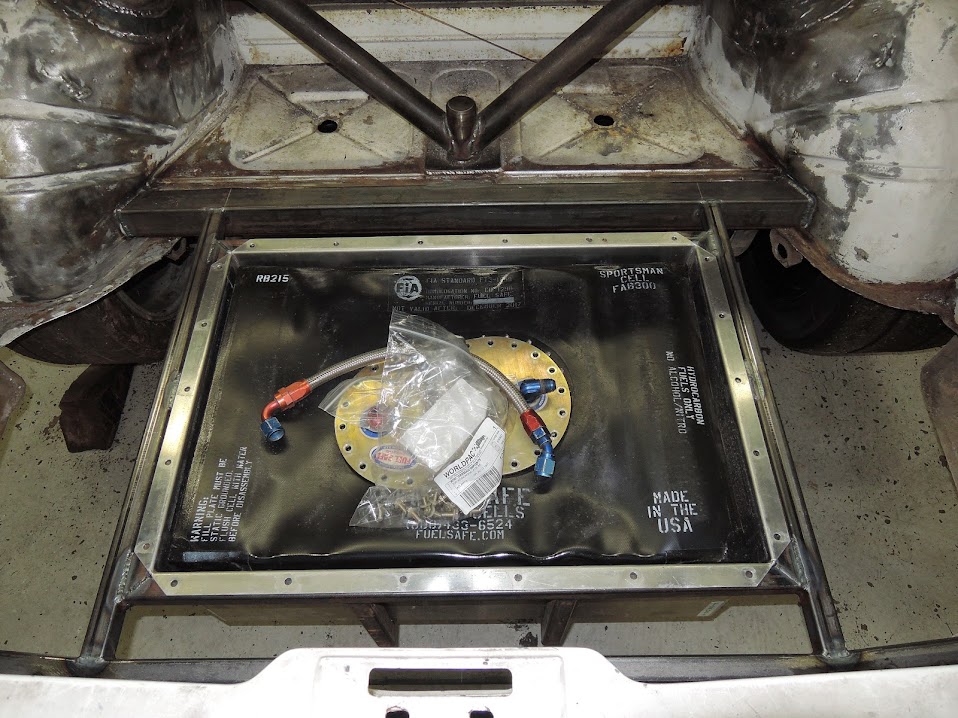
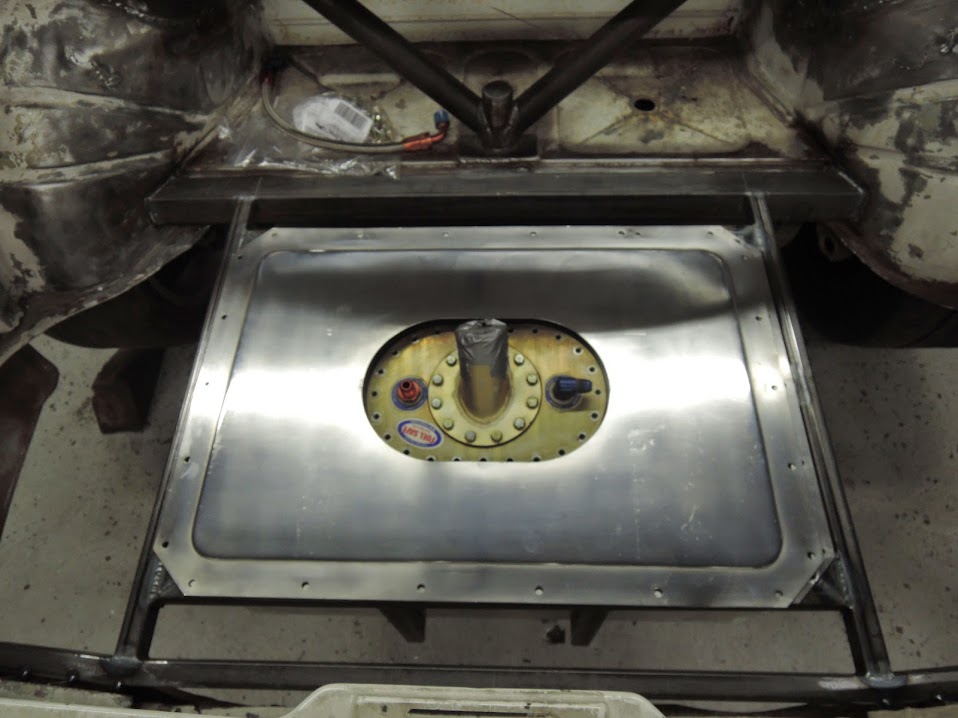
new fuel cell
fuel cell cage
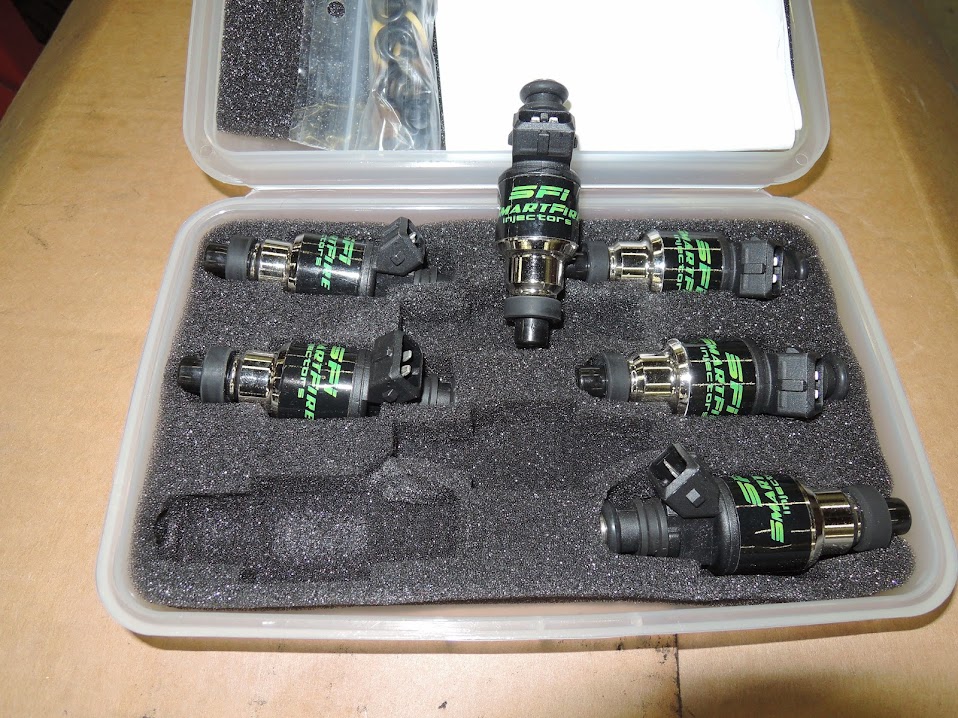
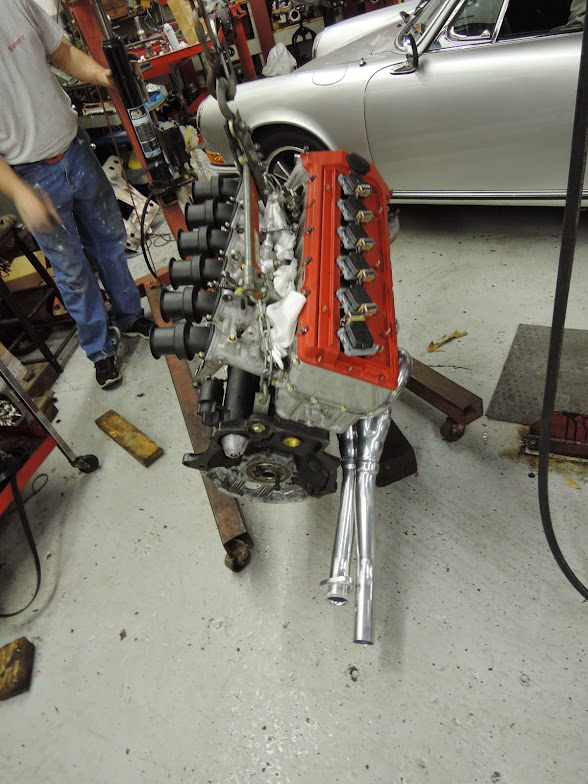
sneak peak at new injectors
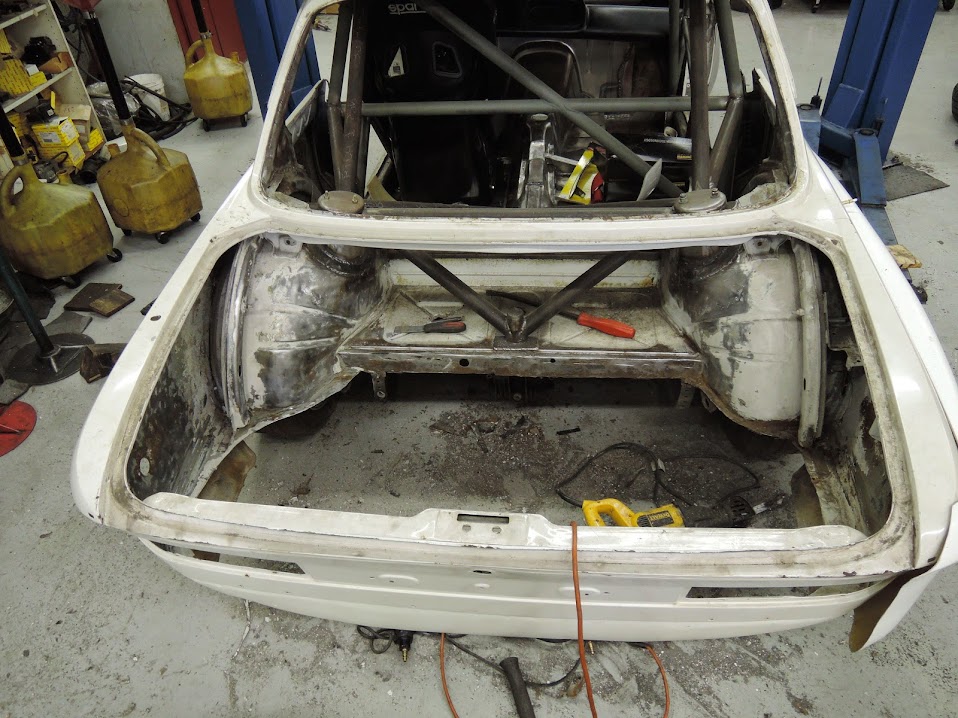
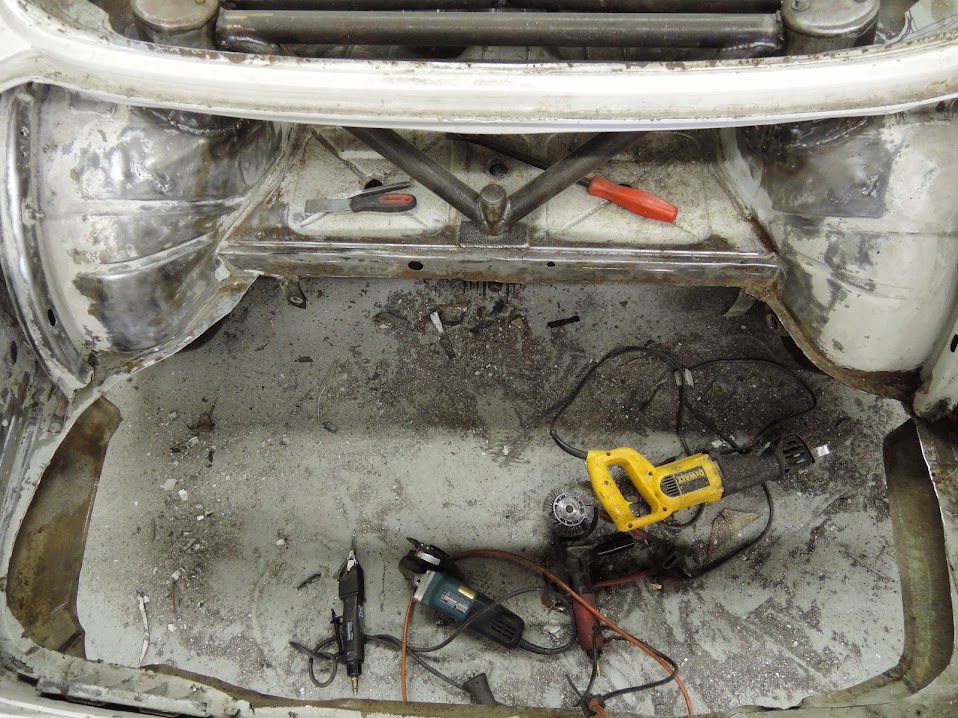
gapeing hole where there use to be a trunk
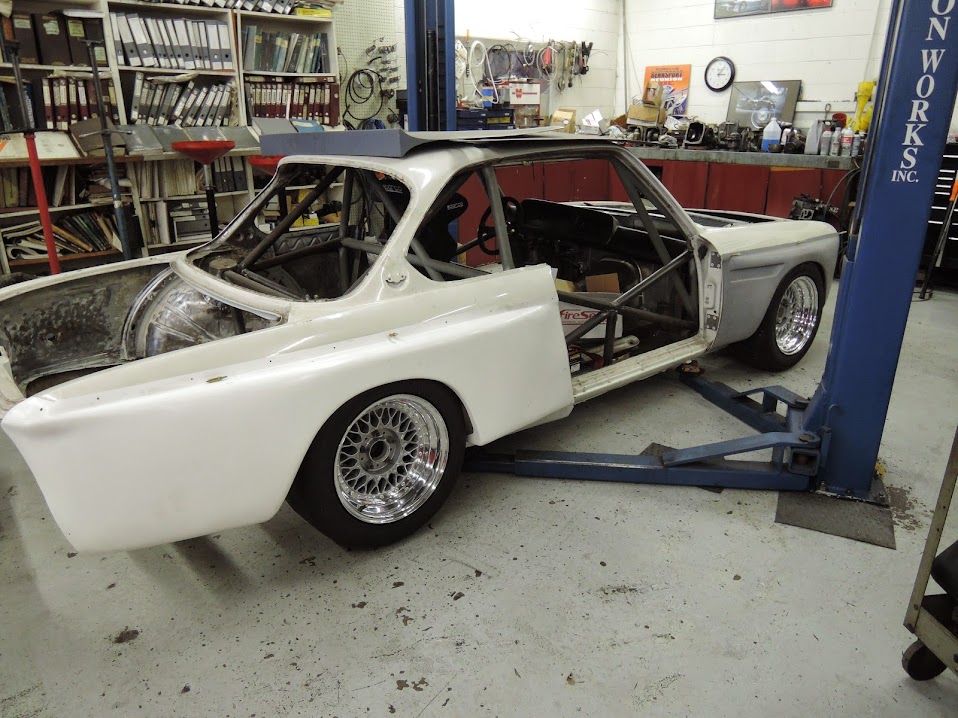
and a test fit of the wheels with the 275 /16 tires Ill be running
one spare tire well gone !
new fuel cell
fuel cell cage
sneak peak at new injectors
gapeing hole where there use to be a trunk
and a test fit of the wheels with the 275 /16 tires Ill be running
threewebers
Well-Known Member
Coupe
Looks awesome! Giving me motivation to work on mine..
Looks awesome! Giving me motivation to work on mine..
spare tire well
If that spare tire well is not rusted, I bet someone would want it to cut and replace one with holes in it...
If that spare tire well is not rusted, I bet someone would want it to cut and replace one with holes in it...
If that spare tire well is not rusted, I bet someone would want it to cut and replace one with holes in it...
I almost ask him about that but already have a wheel well to replace mine that has a couple holes in it.
But I bet someone else might buy it.
PM Sent regarding the well
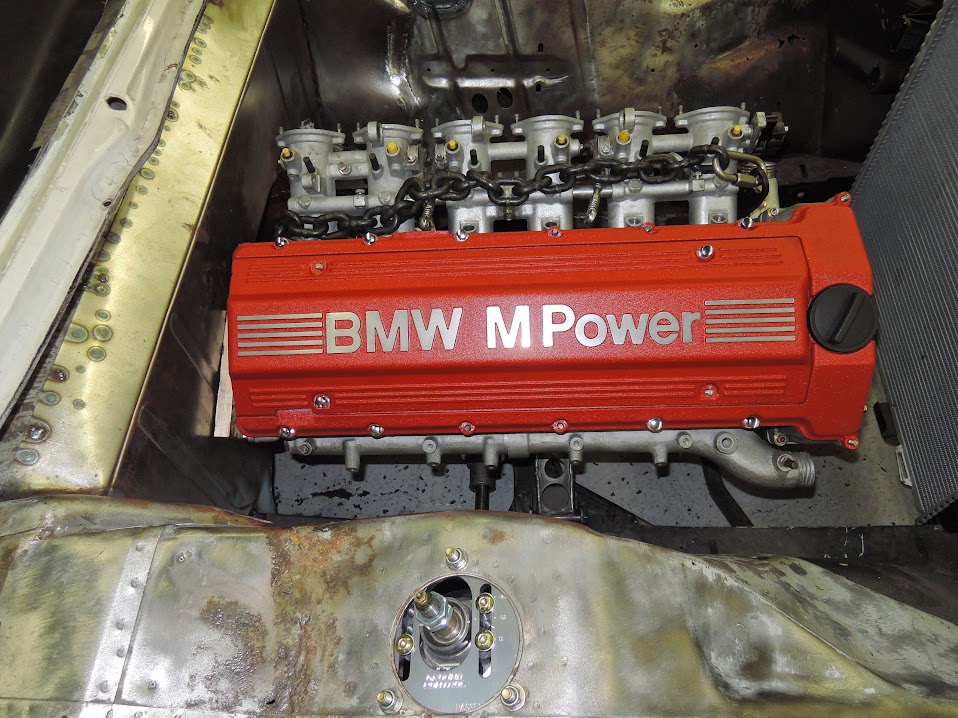
We finally got the cams degreed in today, got most of the valves adj. Ran out of shims for the size I needed so a few will have to be done later . for the most part the engine is done .
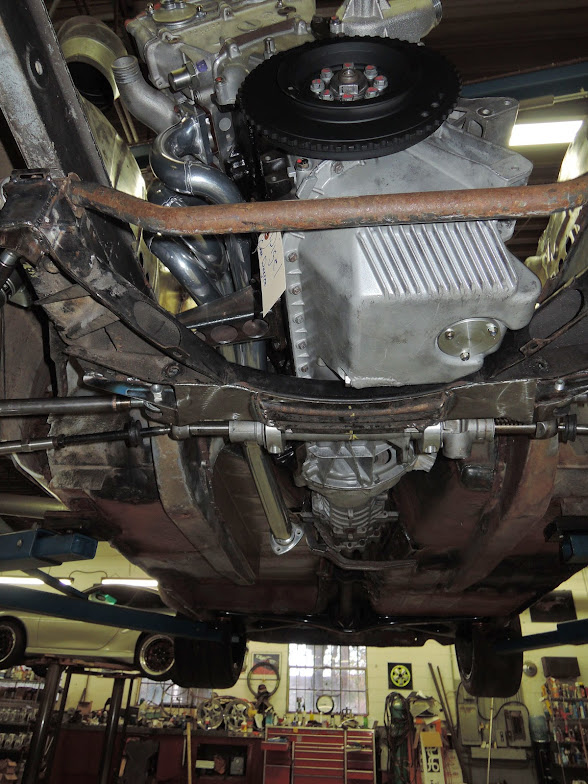
I went ahead and stuck it back in the car to finish up mock up of the drive train, Now I can route the cooling system , find a radiator , start plumbing the oil cooler, and fuel line
I went ahead and stuck it back in the car to finish up mock up of the drive train, Now I can route the cooling system , find a radiator , start plumbing the oil cooler, and fuel line
another mock up of the drivetrain , so that I can tweek on stuff, and get things sitting just right, got the bolt holes on the motor mount s drilled , , a few more tweeks and the last batch of stuff will be off to the powder coaters
spent most of the day tweeking on the front suspension, , think I got the bump steer set , and fixed a few other issues ,
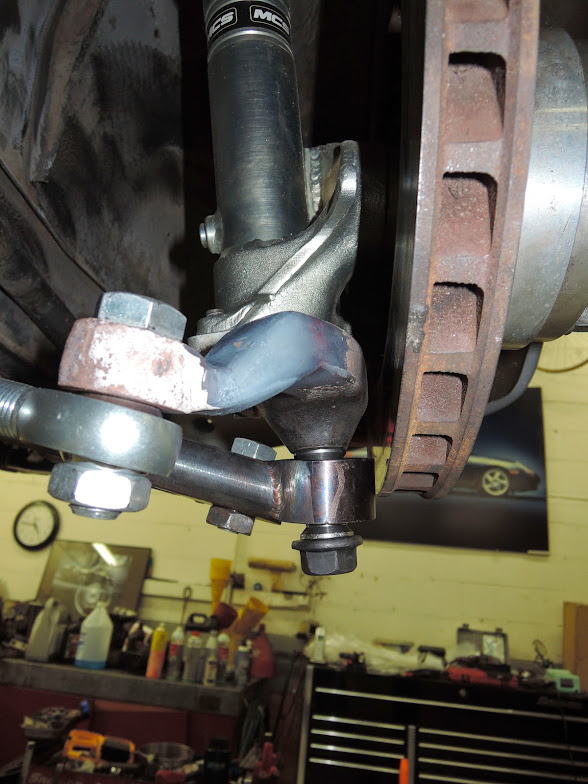
spent most of the day tweeking on the front suspension, , think I got the bump steer set , and fixed a few other issues ,
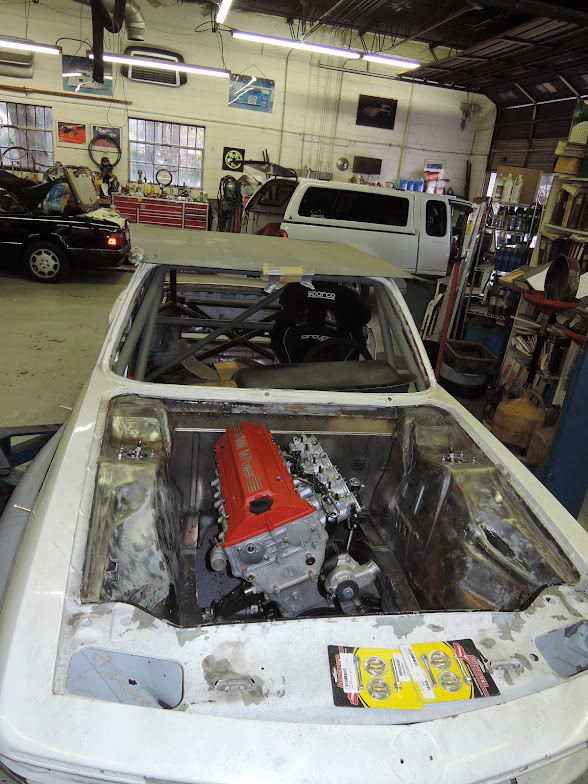
A long day with a bit of progress. First we pulled the engine back out ( its going to be out and in a dozen or so more times before it's totally done ) with all the exhaust studs I just couldn't get the headers on in the car, so out the engine came , installed the headers , and jacked the whole thing to a wicked angle to clear the headers while we stuck it back in . took the opportunity to mock up a e28 M5 radiator , and shave the rest of the brackets out of the engine bay .
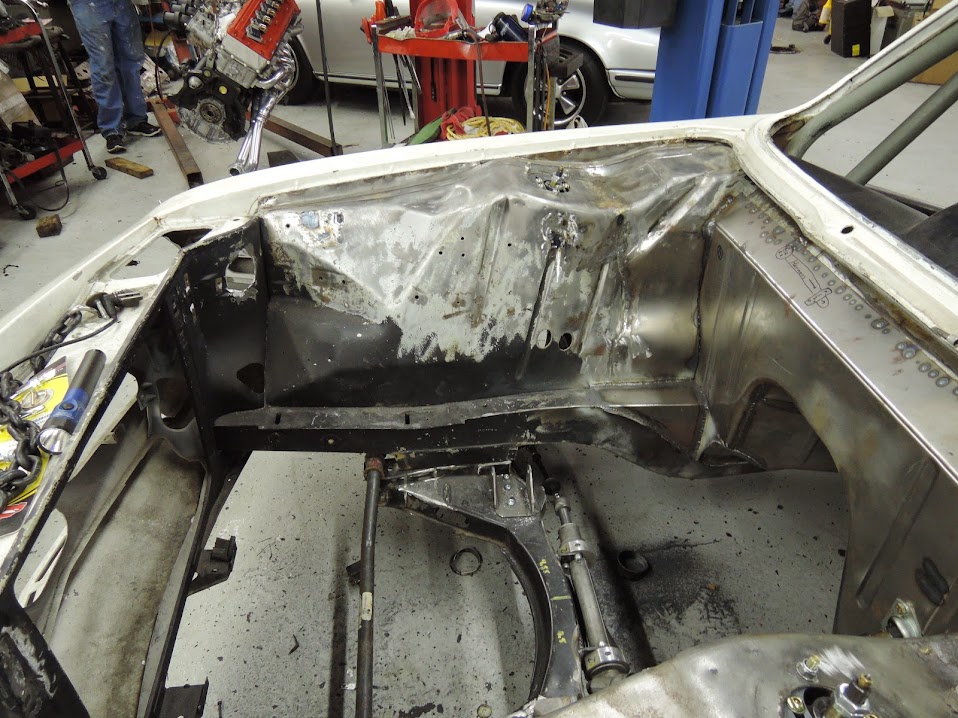
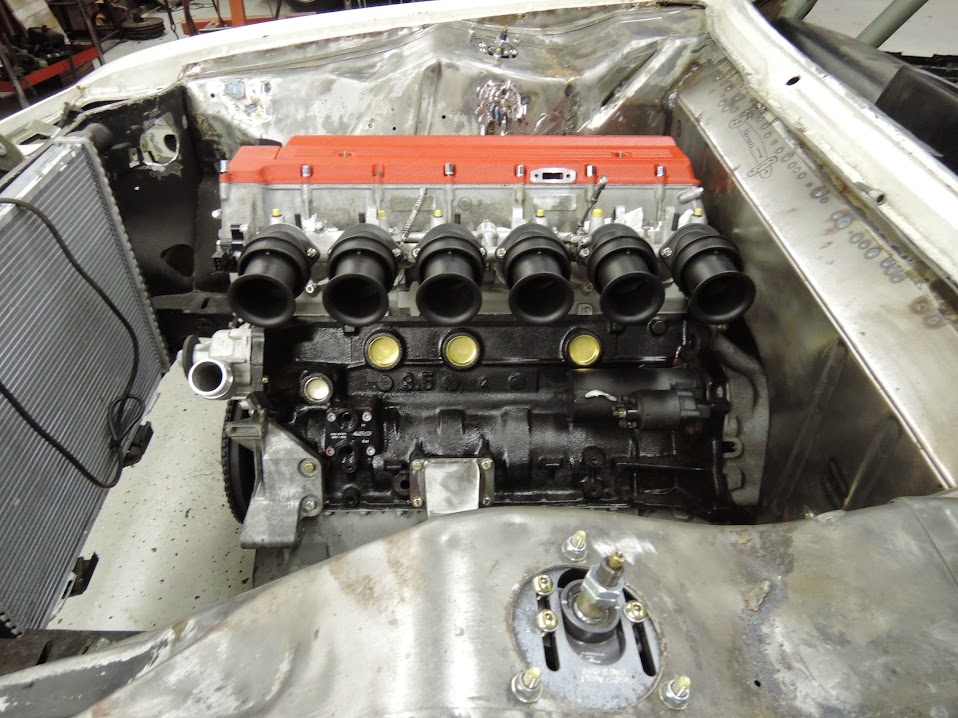
fully shaved engine bay , note missing stock e9 radiator bracket
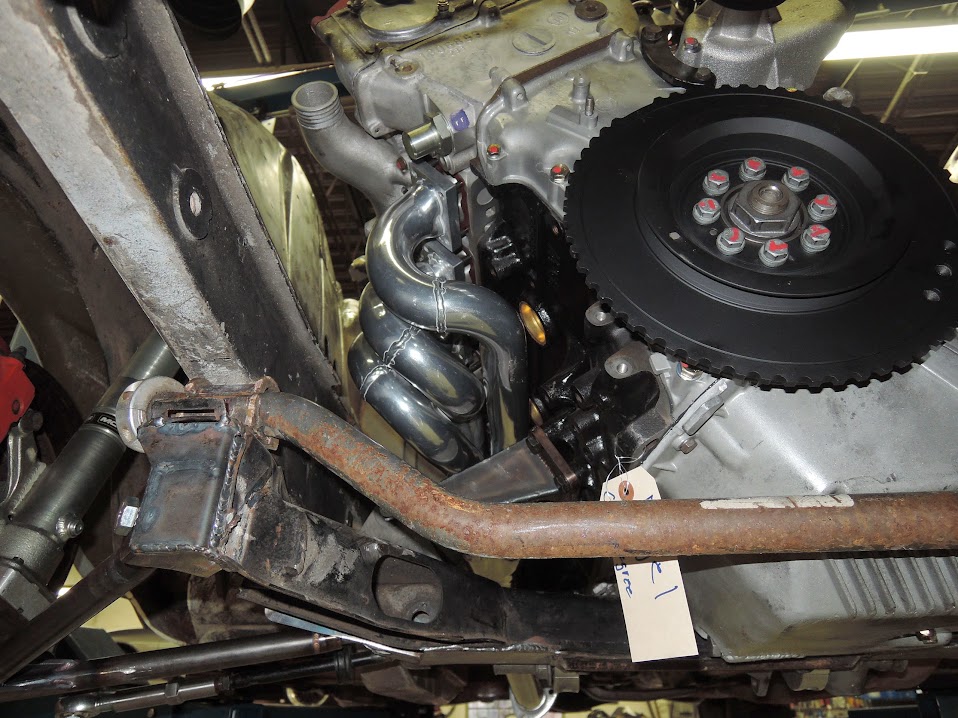
headers installed, and modified euro s38 b38 air horns installed ,, note the severe angle we had to tilt the engine to slide it in
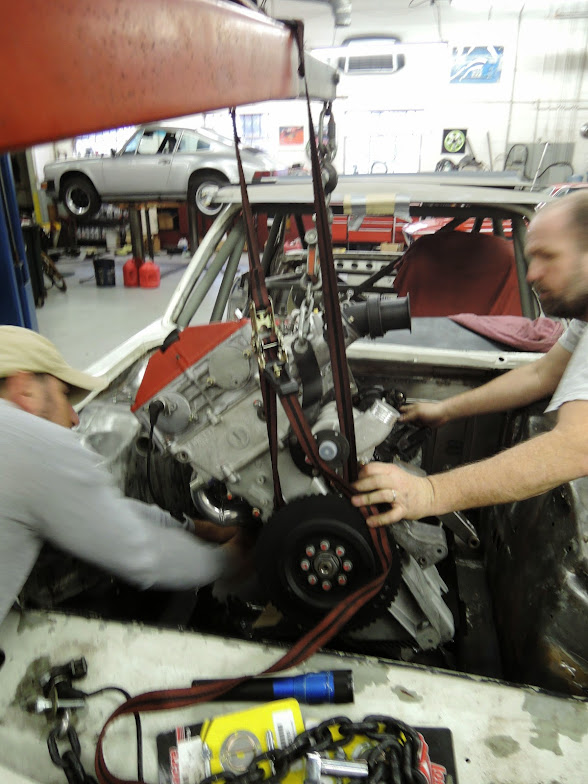
how many monkeys does it take to slide an engine in ? hahaha
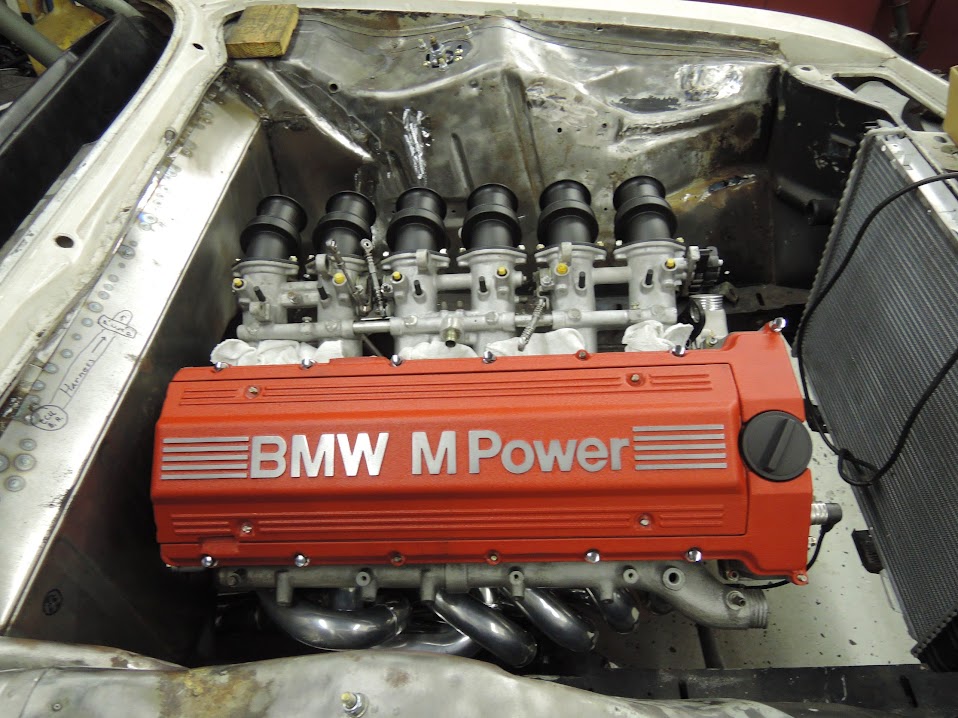
sitting back in place , nice view of modded euro air horns
view of headers tight fit
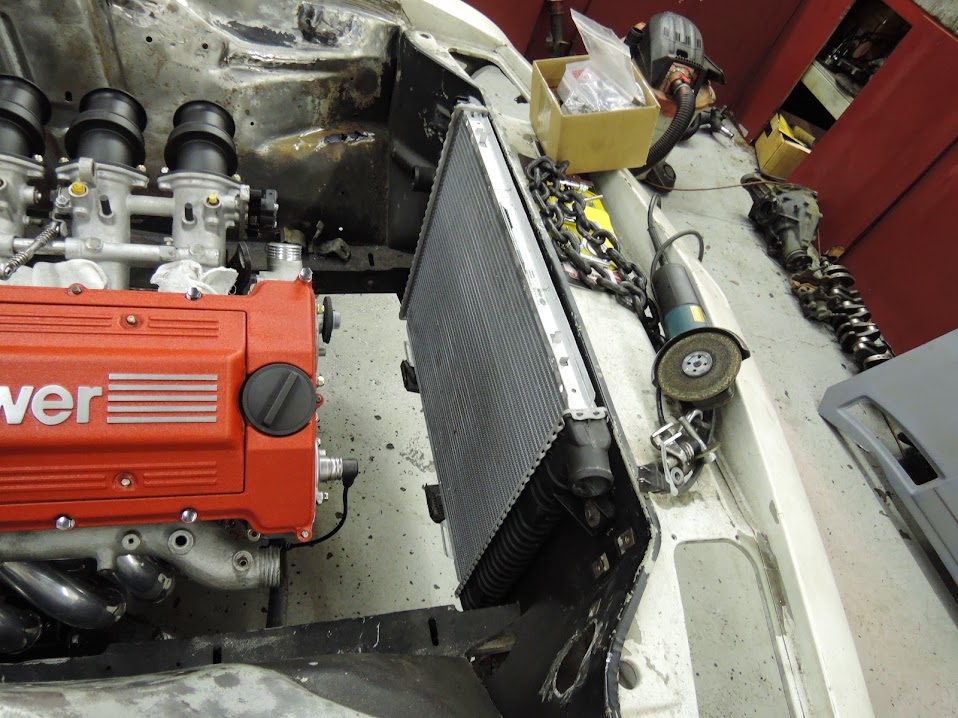
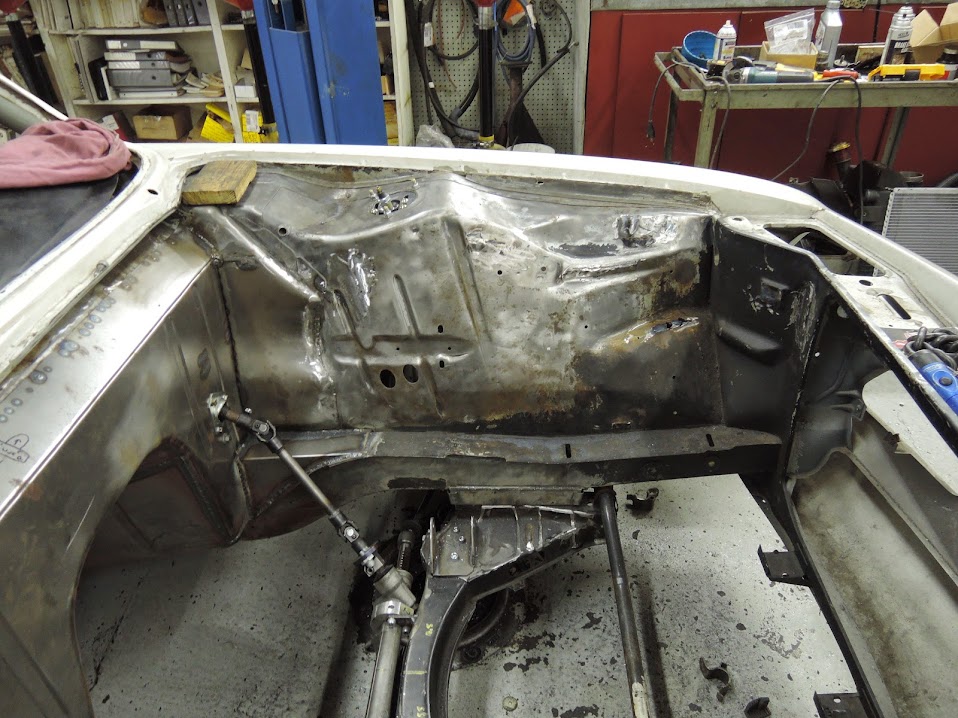
got a junk e28 M5 radiator to use for mock up, Ill be getting an aluminum version of this , had to cut out the stock mounts , and drill some holes to mount the different style Radiator , next Ill need to start routing the coolant hoses .
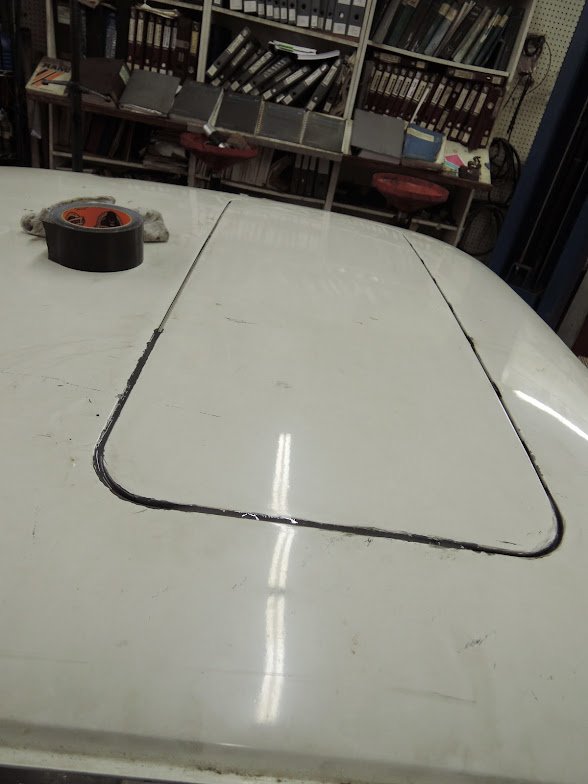
before we started on the cage we cut out the sunroof Frame , when the cage was complete Frank welded the sunroof back in place , Today We filled in the gap where the sunroof seal was with epoxy . when it goes to the body shop they will skim it with filler and no one will know it ever had a roof !
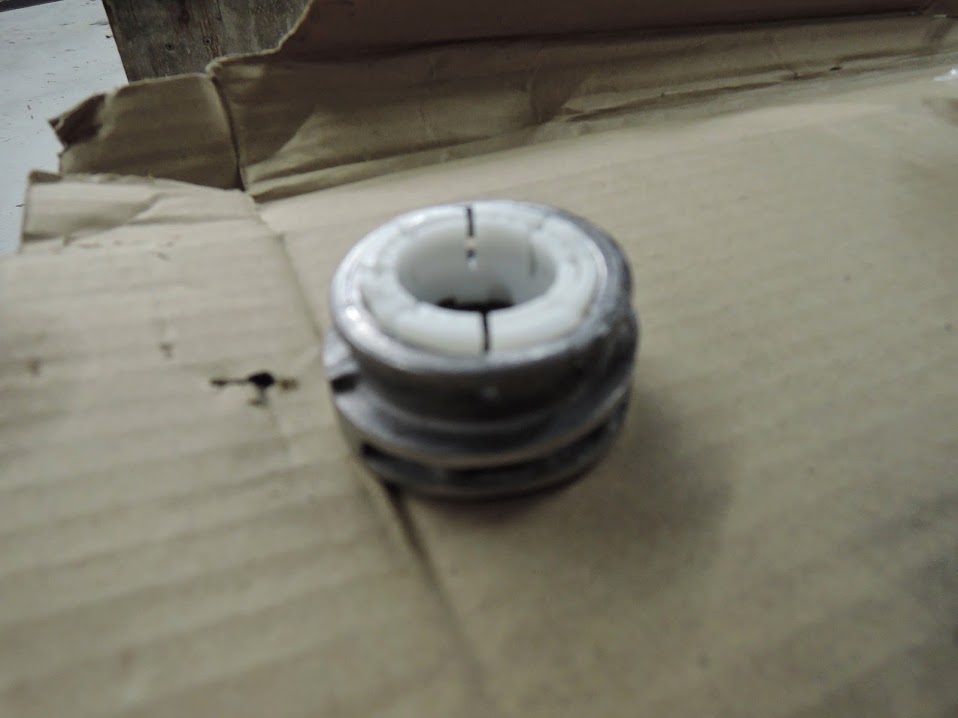
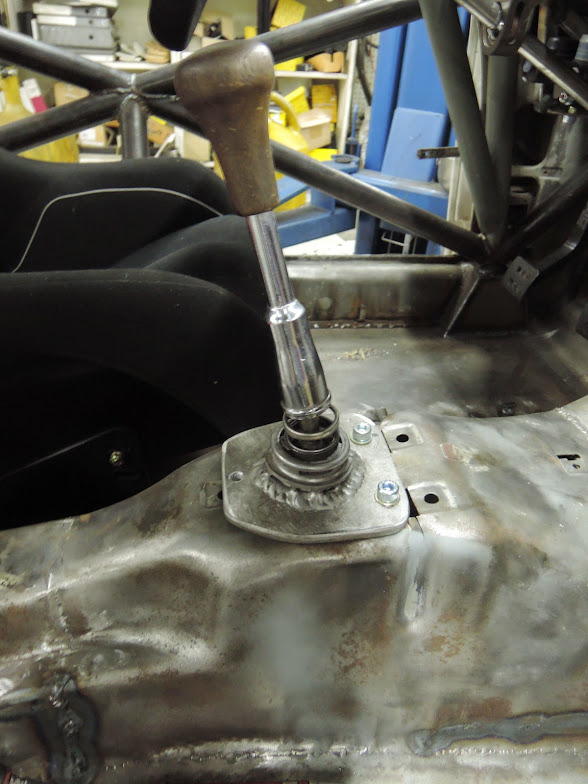
Im not a fan of the stock shifter assemblies , I like a solid mounted deal . however I find some of the sperical bearing ones are just tooo notchy . so I cut out the cup of an aluminum shifter tower ( as seen above) and had it welded to a plate that I shape and mount solidly to the body for a very nice precise shift , , the rod is been cut to size and I use a Z3 shift rod , Ill probably use a different knob .
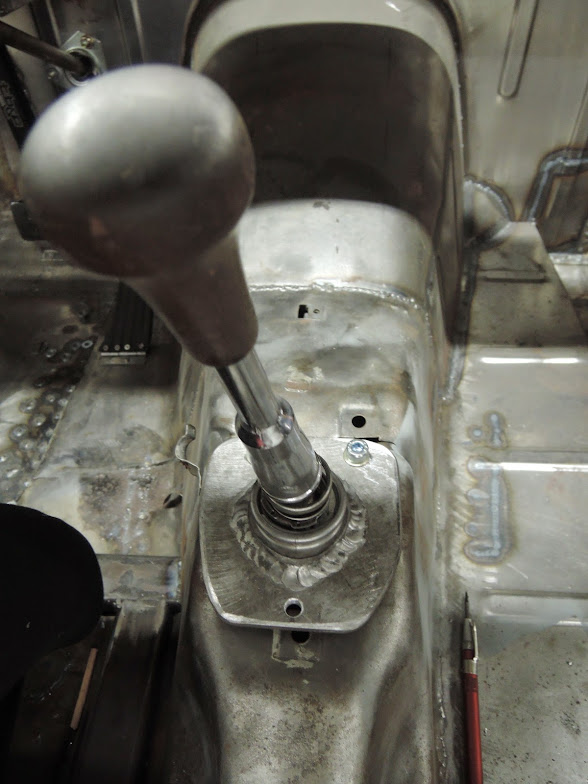
Ill have few more things to finish that project up but mocked up for now and feels great !
fully shaved engine bay , note missing stock e9 radiator bracket
headers installed, and modified euro s38 b38 air horns installed ,, note the severe angle we had to tilt the engine to slide it in
how many monkeys does it take to slide an engine in ? hahaha
sitting back in place , nice view of modded euro air horns
view of headers tight fit
got a junk e28 M5 radiator to use for mock up, Ill be getting an aluminum version of this , had to cut out the stock mounts , and drill some holes to mount the different style Radiator , next Ill need to start routing the coolant hoses .
before we started on the cage we cut out the sunroof Frame , when the cage was complete Frank welded the sunroof back in place , Today We filled in the gap where the sunroof seal was with epoxy . when it goes to the body shop they will skim it with filler and no one will know it ever had a roof !
Im not a fan of the stock shifter assemblies , I like a solid mounted deal . however I find some of the sperical bearing ones are just tooo notchy . so I cut out the cup of an aluminum shifter tower ( as seen above) and had it welded to a plate that I shape and mount solidly to the body for a very nice precise shift , , the rod is been cut to size and I use a Z3 shift rod , Ill probably use a different knob .
Ill have few more things to finish that project up but mocked up for now and feels great !
Looking great B.
I did a similar thing. I put the head back on the M5 and should have dropped the headers down next to the block and then they could be pulled up and mounted. Now I have to remove the studs and still not sure the headers will make it back in:x May require some loose engine mounts and serious tilting.
Are those the plastic air horns from the B38. Are the M88 euro horns different than S38?
My Wizard radiator is out right now. Is that what you're getting?
You can borrow mine if you want to check a fit?
Gary
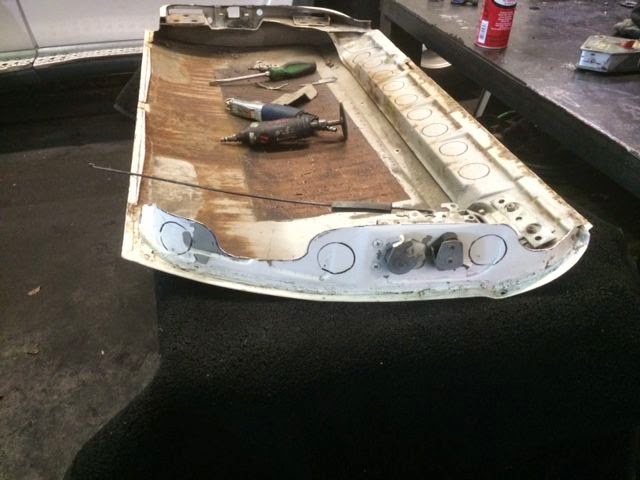
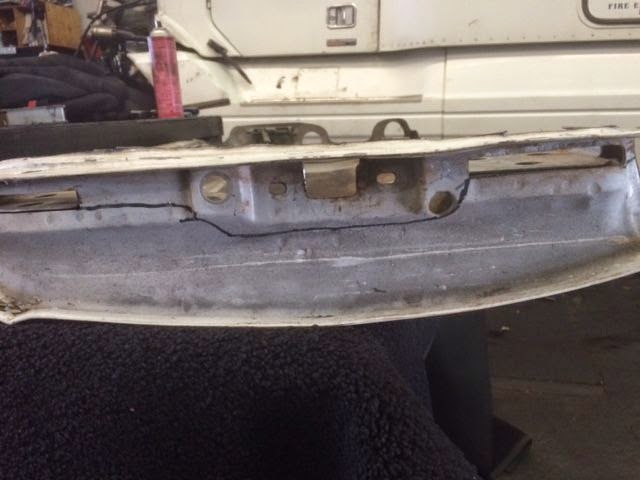
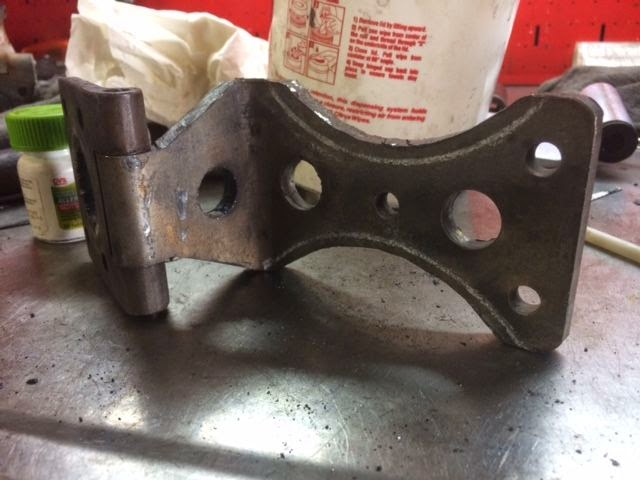
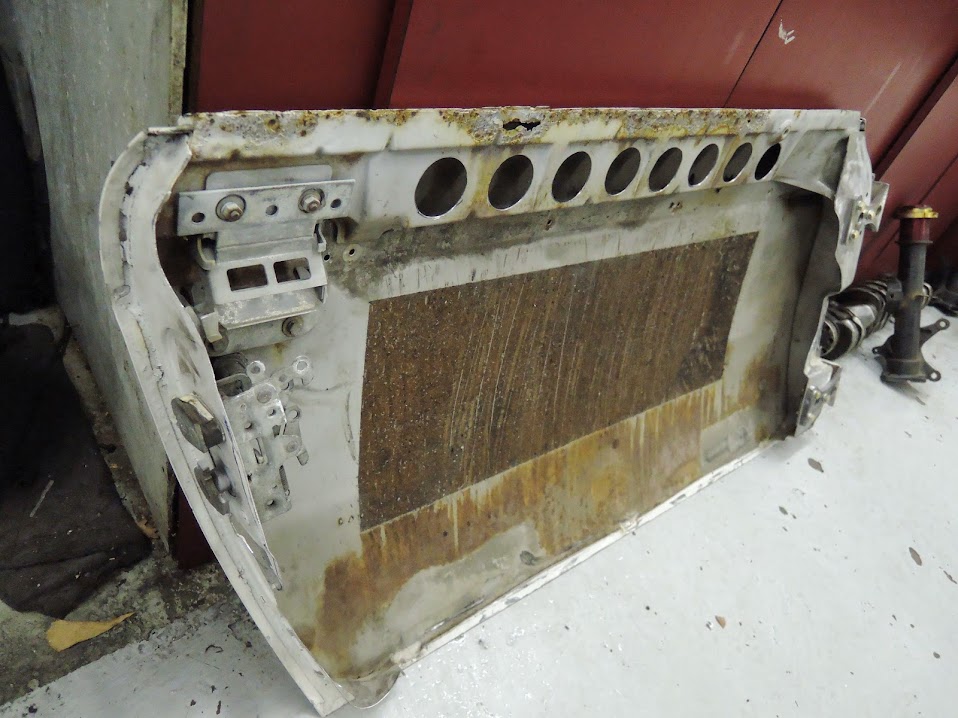
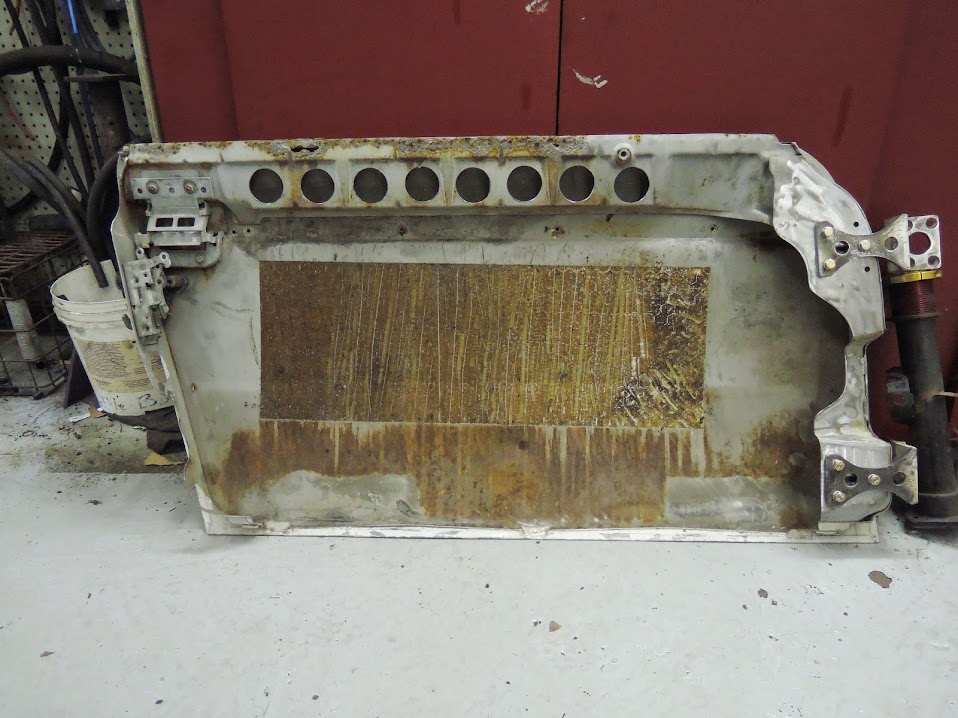
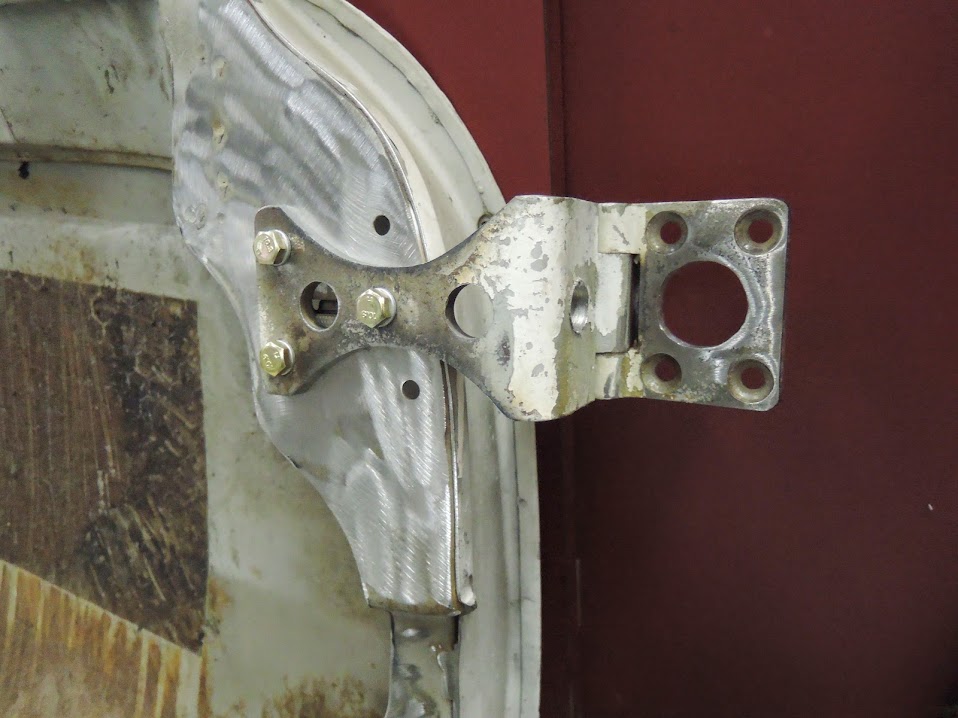
This next entry will make some of you collectors upset , and faint of heart ! We hacked up a perfectly good set of doors . One to make room for the roll cage bars , and two to get rid of the weight . Don't know how many of you have had the doors off , let me tell you, the Damn things are heavy . with out glass l and window motor/ regulator assembly they weigh about 48 pounds ! My friend Ken took the scapel and liposuctioned them down to about 20 pounds , thus saving 56 pounds ! He cut the frames down to basicly the door skins, cut out the safety bar, used a hole saw to cut some holes in structurally needed pieces , then did a beautiful jog gutting the hinges .
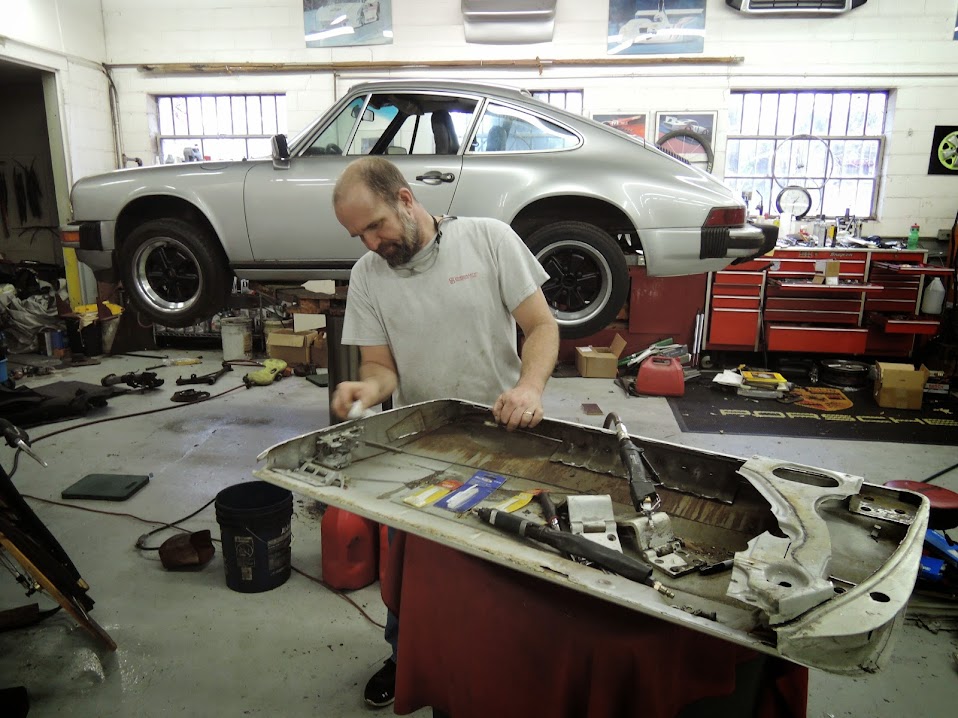
Ken starting the doors diet
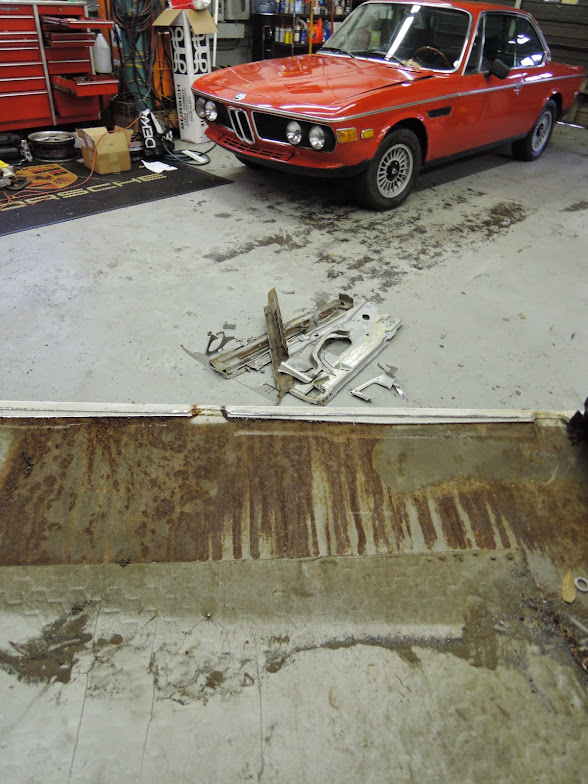
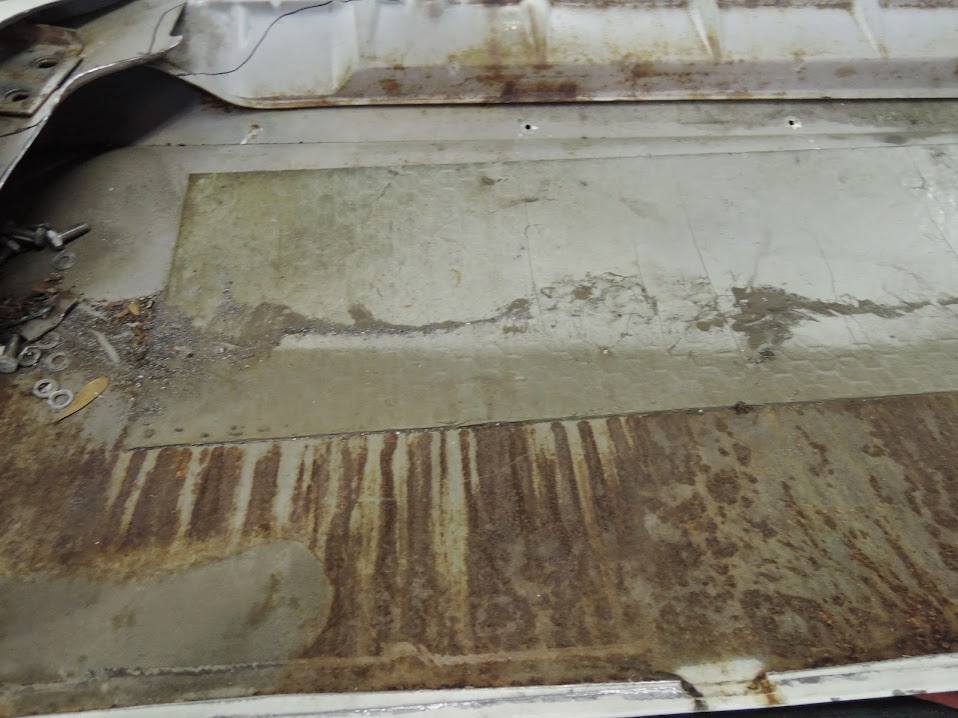
removing the sound deadening and a view of the cut out metal on the floor
at the surgery table
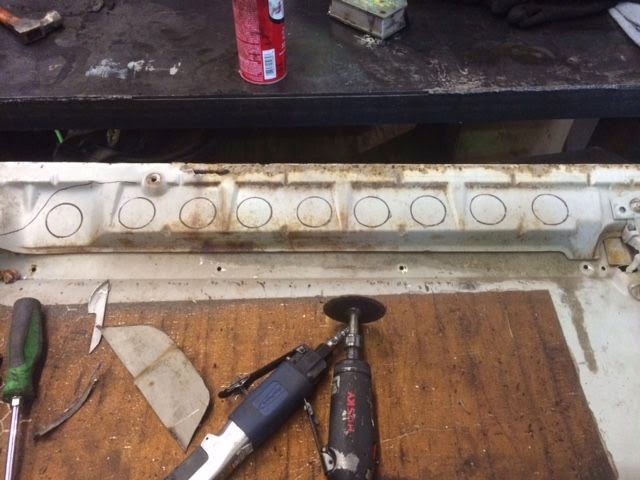
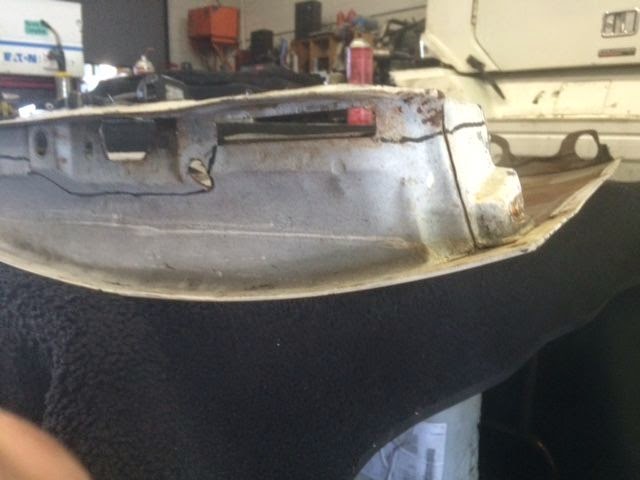
above marking out more of the door to cut out , and below Ken making his plans to cut the fat out of the hinges

and starting to cut it out
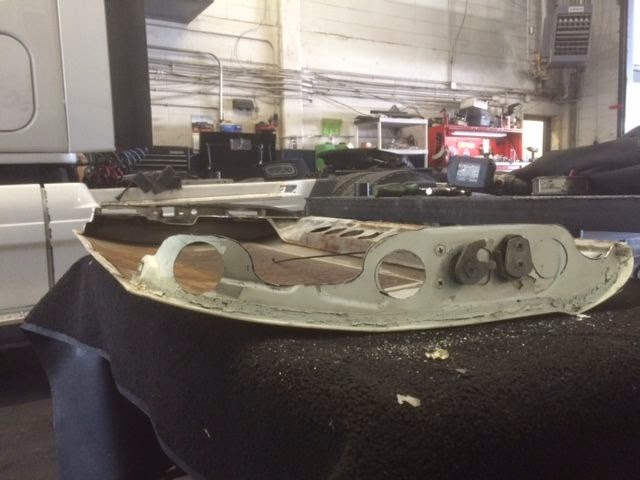
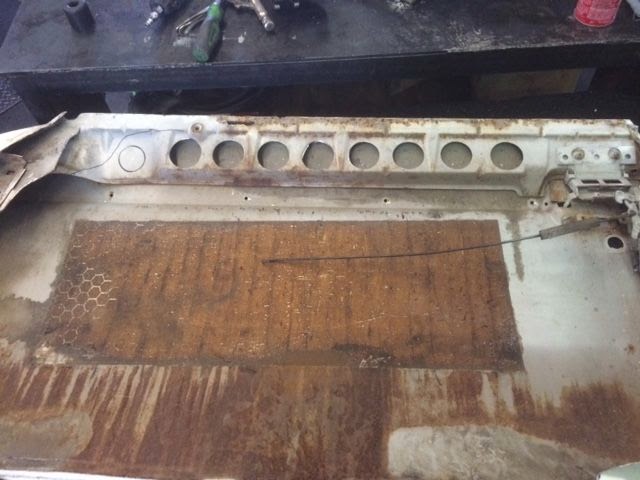
and the finished product
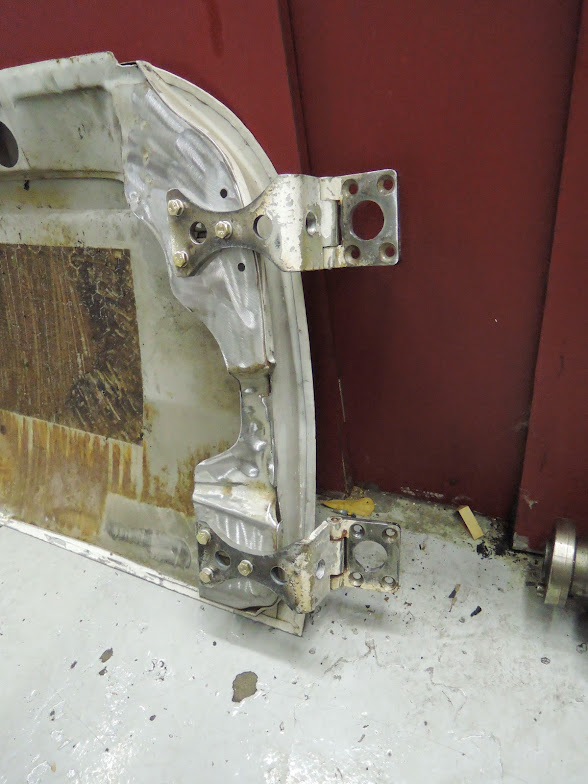
and finally a close up of the hinge , which now is an added bonus bling
Ken starting the doors diet
removing the sound deadening and a view of the cut out metal on the floor
at the surgery table
above marking out more of the door to cut out , and below Ken making his plans to cut the fat out of the hinges
and starting to cut it out
and the finished product
and finally a close up of the hinge , which now is an added bonus bling
frogisland
Well-Known Member
Just for interest, approx. weights:
A frame + glass - 3.75kg
Door internals (elec windows) - 8kg
Door main window glass - 4.5kg
Carcass minus outer skin - 8.25kg (not CSL with aluminium inner panel)
Steel outer skin - 5.75kg
approx. total 31kg - excludes sound deadening on inside and hinges
aluminium door skin approx. 2kg
4x steel door hinges approx. 5kg
4x aluminium door hinges approx. 1.75kg
Admire the effort. Aluminium skins?
I found that you could place a £/$ per kg value on weight...the aluminium bonnet and bootlid in particular did not fair well. Aluminium hinges and door skins were coming in at about £60-70 per kg saved.
I have an aluminium bootlid but also stripped the steel bootlid to the frame and will cover with an aluminium
Bootlid outer skin - approx. 8.25kg, frame 6.75kg. You could save maybe 3kg out of the bootlid with aluminium skin and a few additional holes - unless you are going GRP?
JP
Amazing degree of detail (and work)! I like the "Polaris Coupe" in the background too! Glad this is all on one thread, will make it much easier to follow and use for a reference. Thanks!
MyFemurHurts
Well-Known Member
Thanks for the updates! Love seeing this come together.
decoupe
(deceased)
To lose the weight and keep the original metal for some other day, have a look at http://mrglasscars.com - BMW - Section 6.
I've always wondered what his components are like 'cause if you went the full replacement route at race weight it would add up to 319lbs saved for $3000. Then you could sell the real metal parts for.... I don't really know but it probably wouldn't cover what it would cost to make it look "right"
Still.....
To lose the weight and keep the original metal for some other day, have a look at http://mrglasscars.com - BMW - Section 6.
I've always wondered what his components are like 'cause if you went the full replacement route at race weight it would add up to 319lbs saved for $3000. Then you could sell the real metal parts for.... I don't really know but it probably wouldn't cover what it would cost to make it look "right"
Still.....
Funny you mention that < I actually have Mr. Glasscars hood and deck lid . There not bad , they will require a bit of tweeking to get right , But I will say he was very easy to deal with , very quick , etc, etc . The doors wouldn't have worked , the driver side bars pretude preety far out into the door so I cut away .
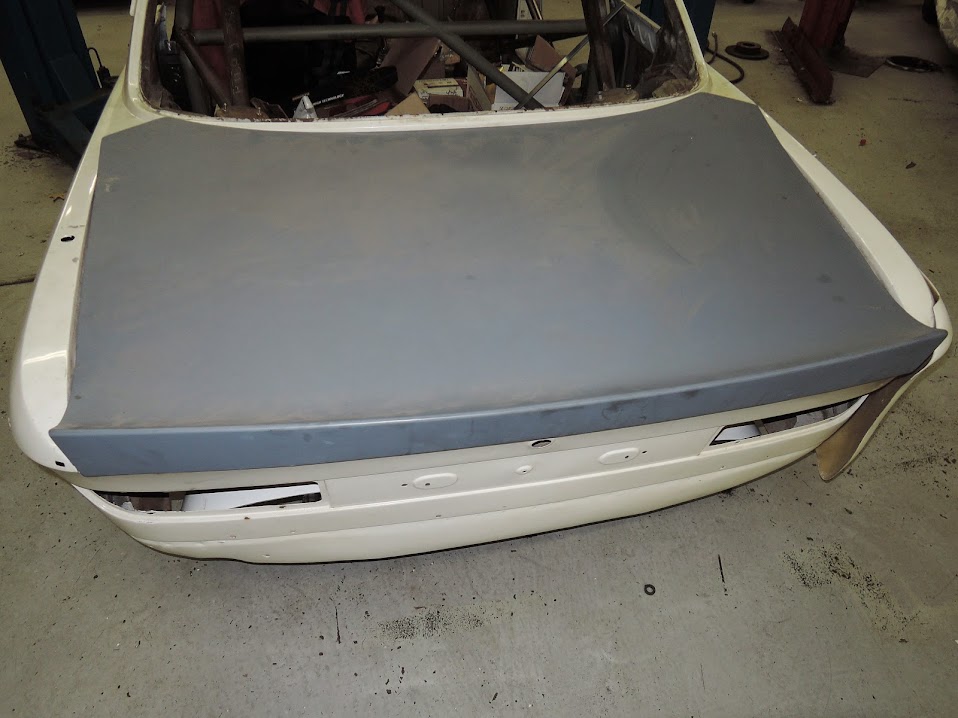
custom decklid with intergrated " lip spoiler"
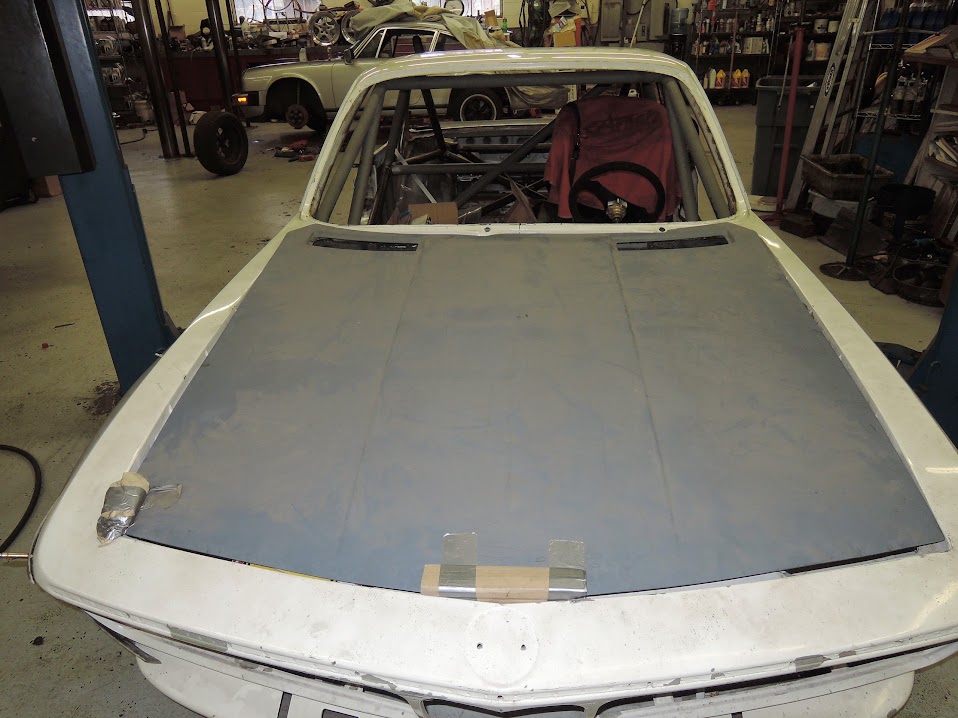
race weight hood
note the two year layer of dirt , I dragged them out of the attic to photo for you guys today .
we also got some more stuff done before she goes to the body shop, the window net got installed , we used rodends on the rods like the pro cars do, so that the net goes up and down easier . the fuel cell frame got put in, a huge deal ! we got the dash mounted , and I made the oil lines mounted the cooler and remote oil filter , it was big day
you may remember a few weeks ago I cut out the trunk , and now it has a frame for the fuel cell
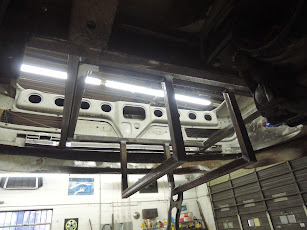
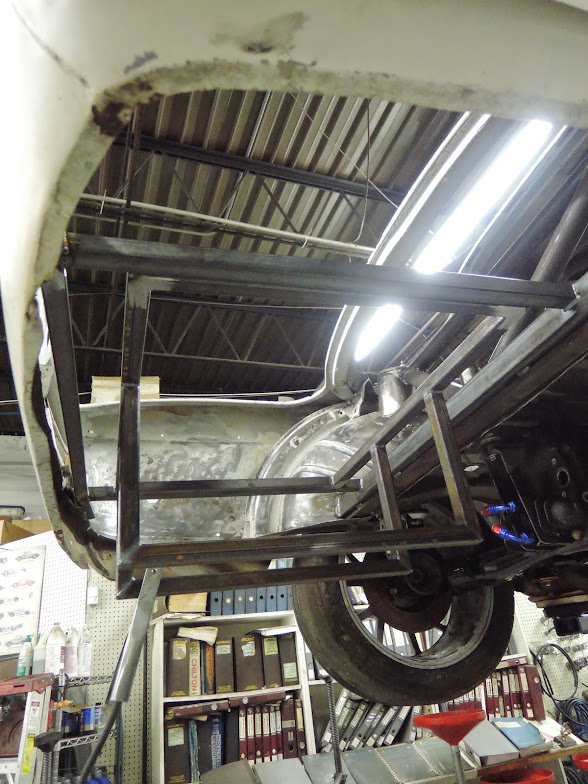
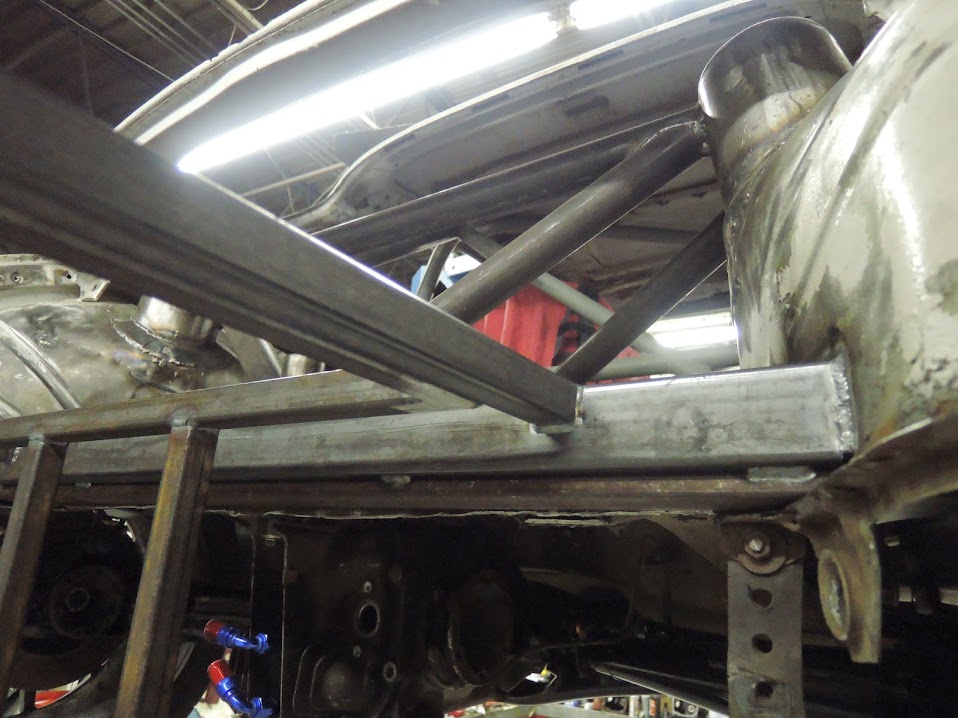
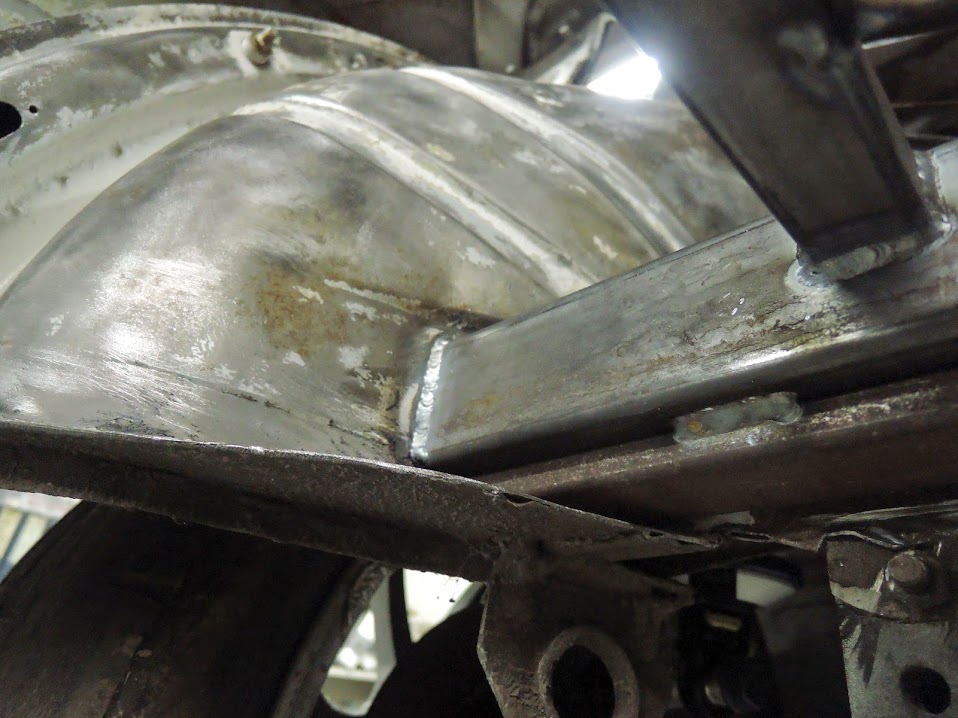

views of the frame from underneath
Time to plumb the oiling system
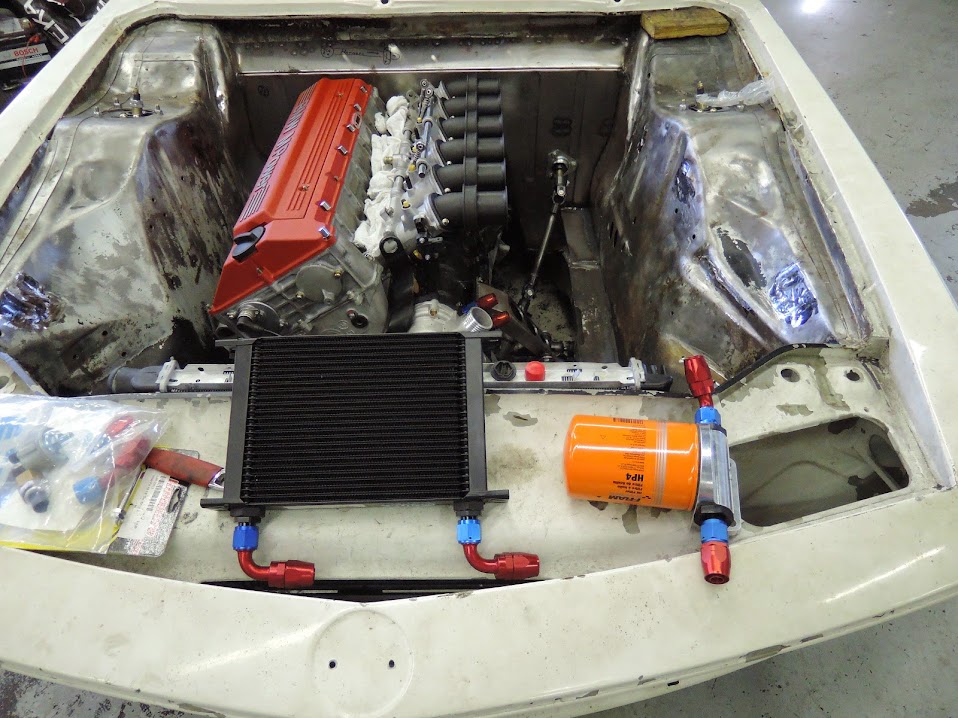
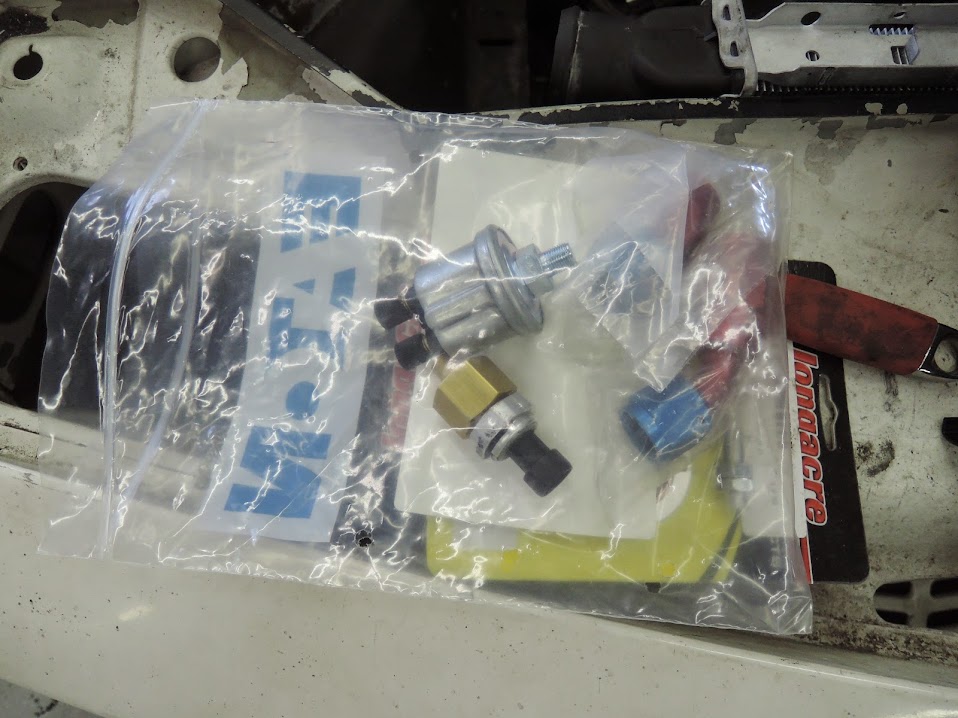
the parts layed out, remote oil filter, oil cooler, dash 10 AN aeroquip fittings, and oilpressure switch's , one for the VDO gauge and the other for the data into the ECU
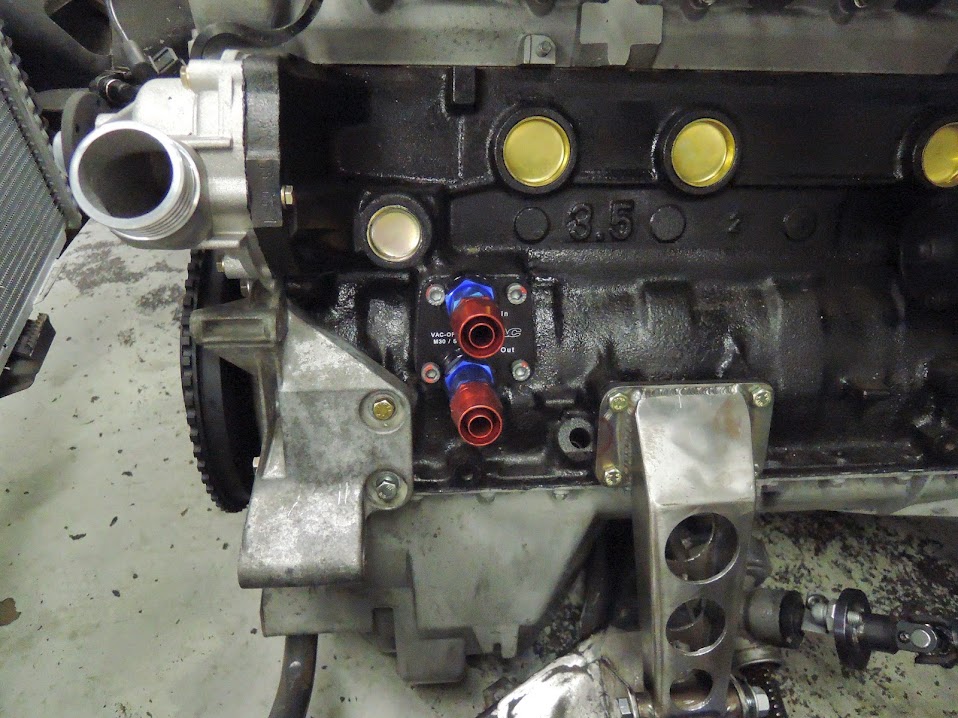
stock oil filter housing was removed and replaced with this unit
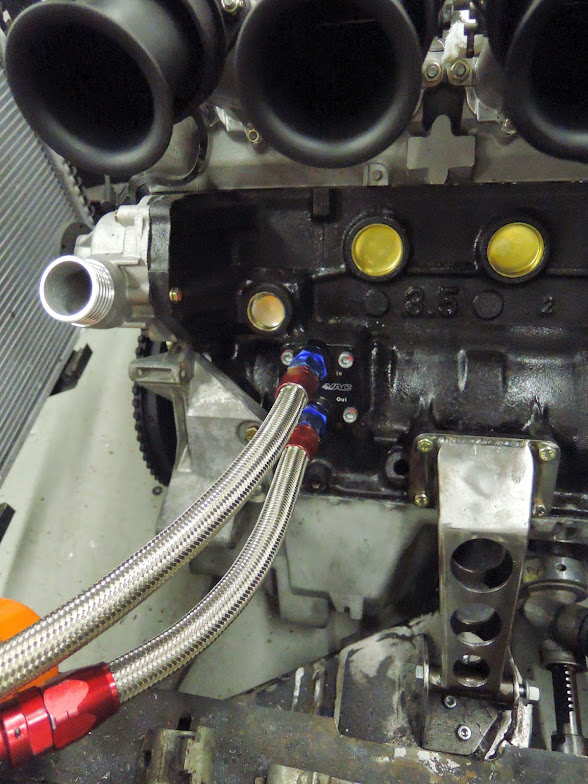
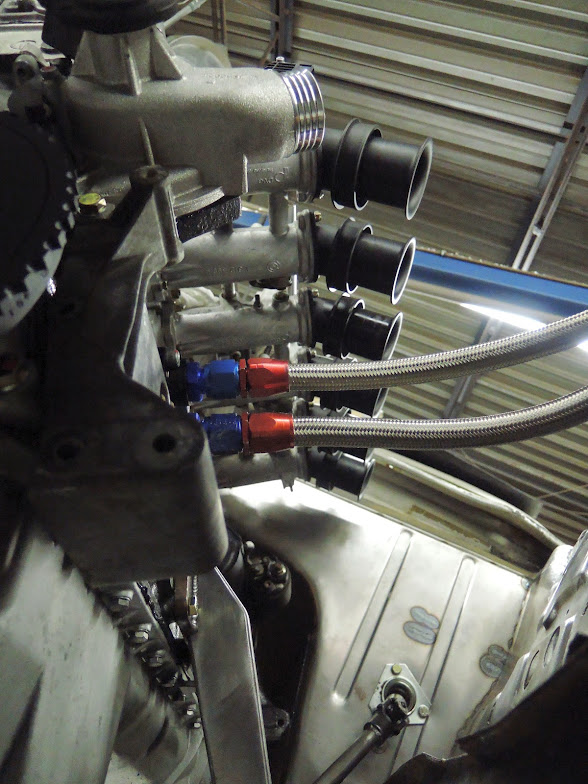
layed out the stainless line in and out of the engine
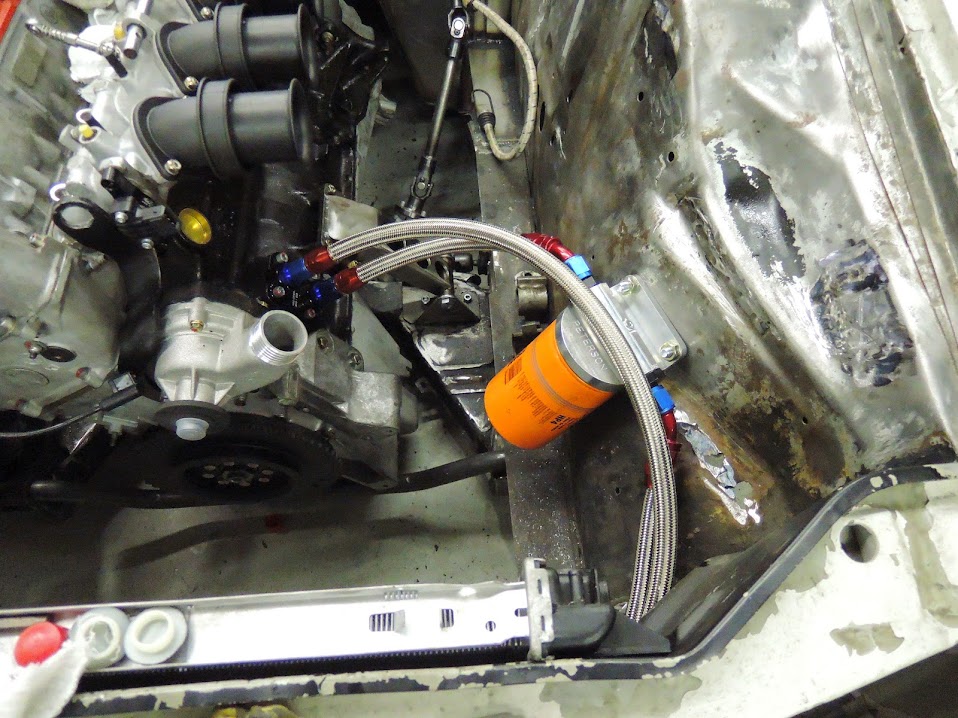
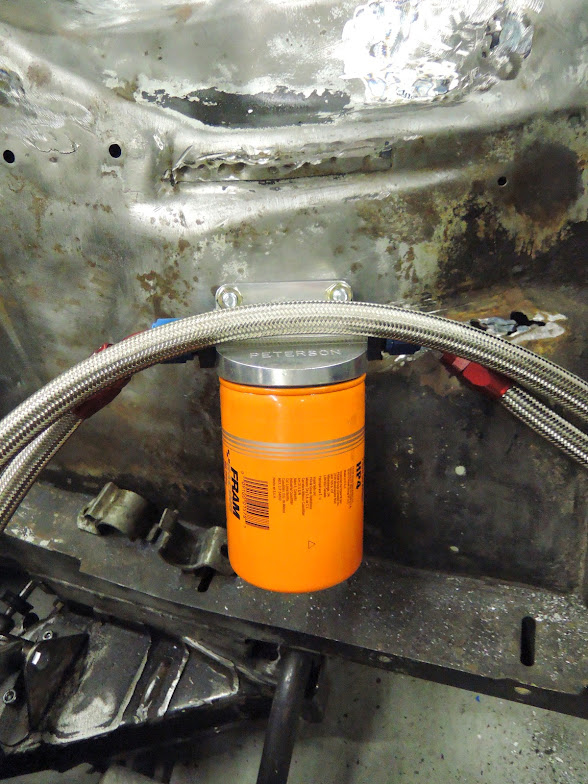
mounted remote filter
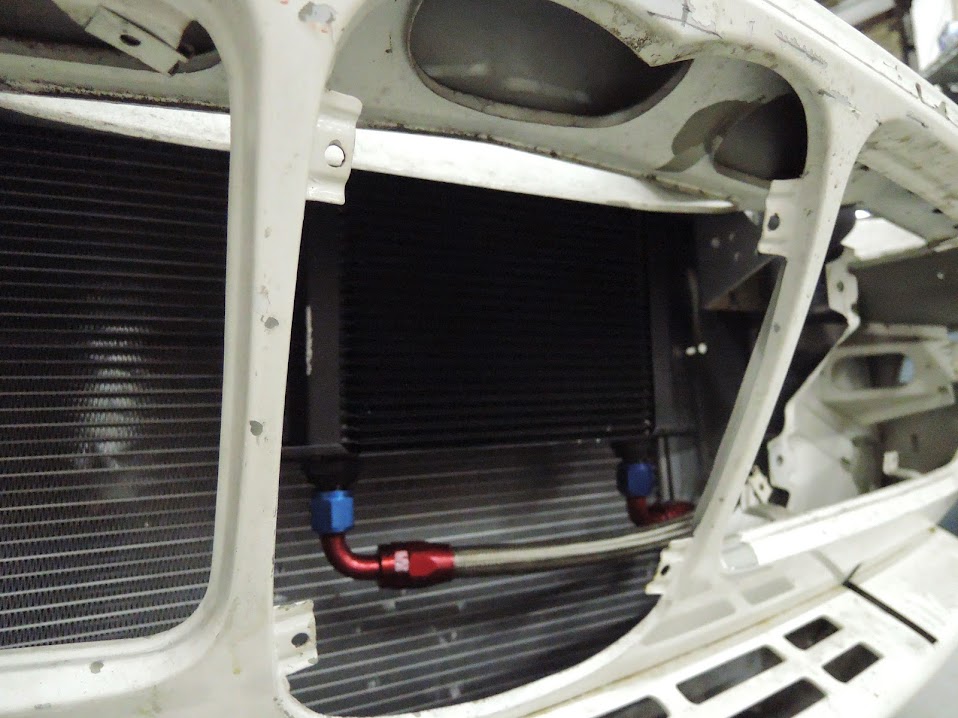
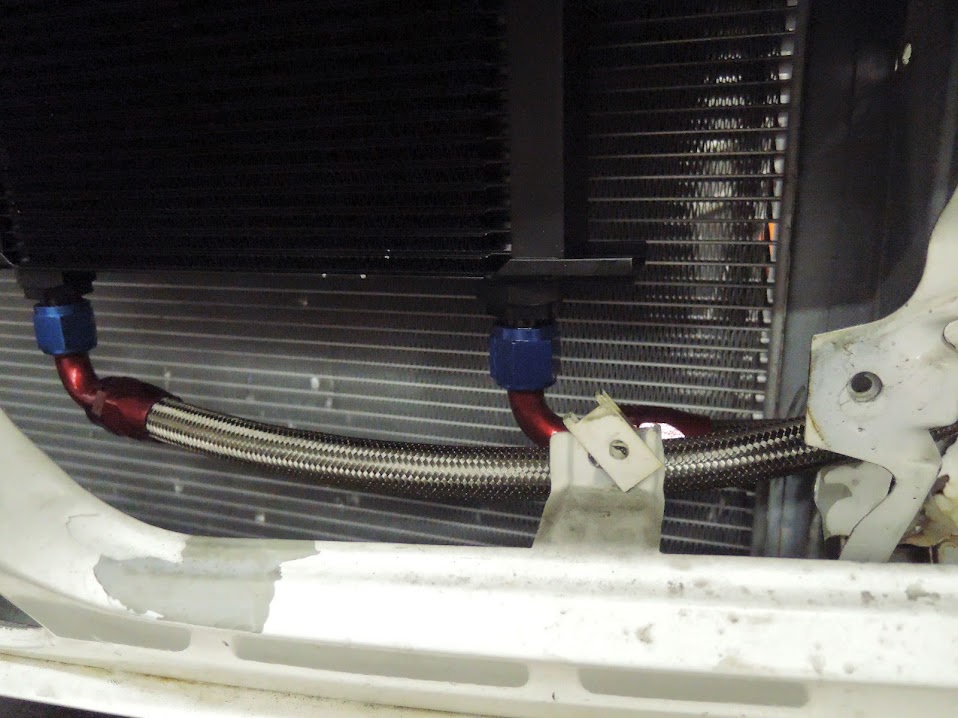
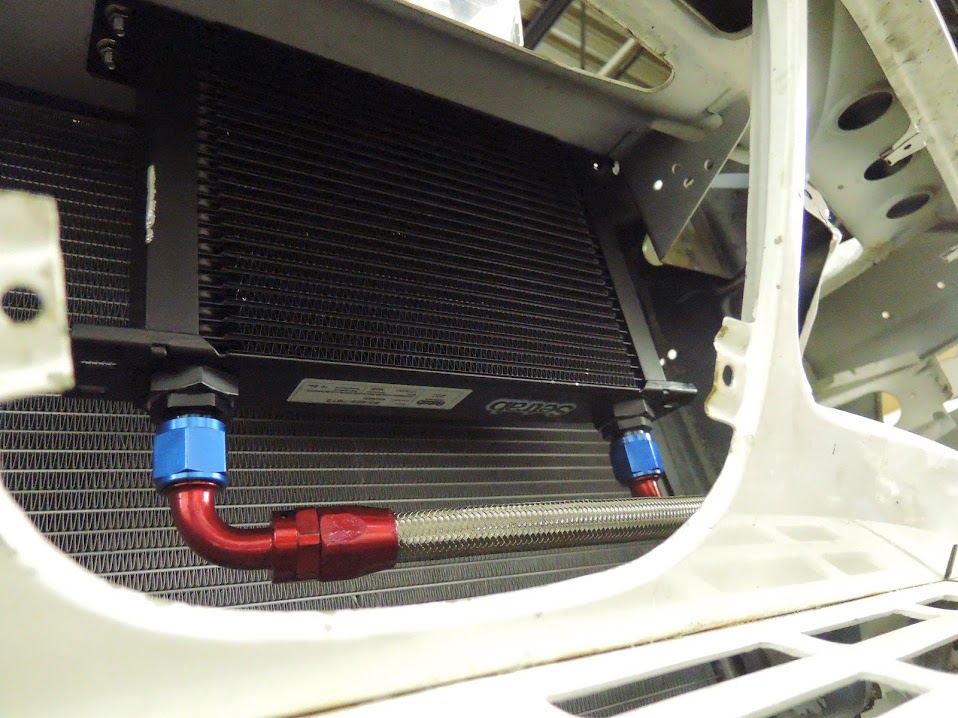
mounted the oil cooler in the cowl
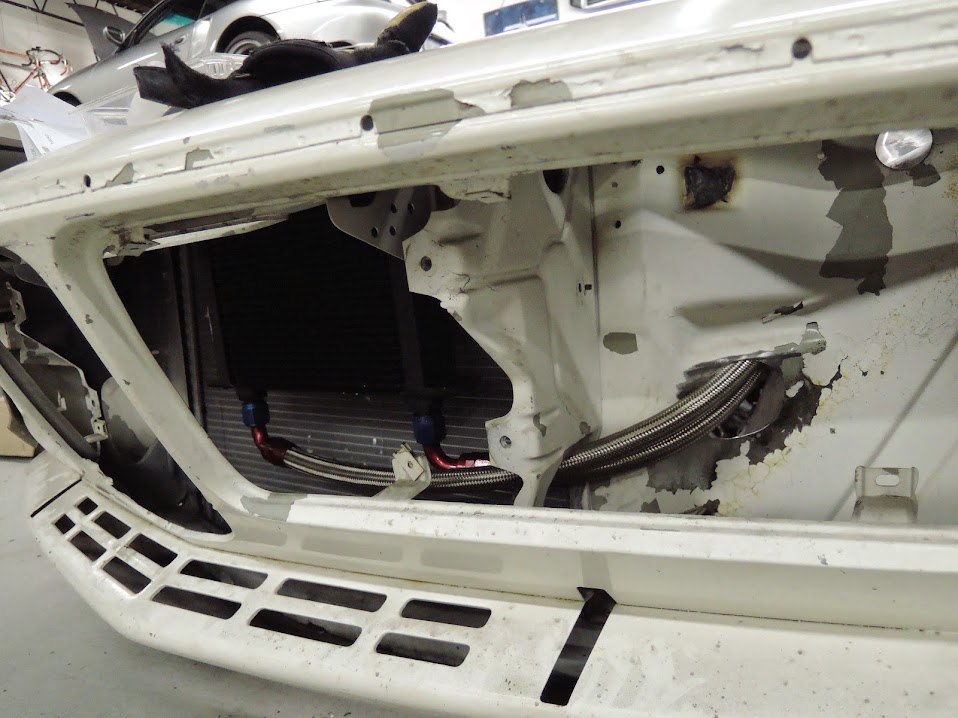
where the line go though the body to get to the cooler
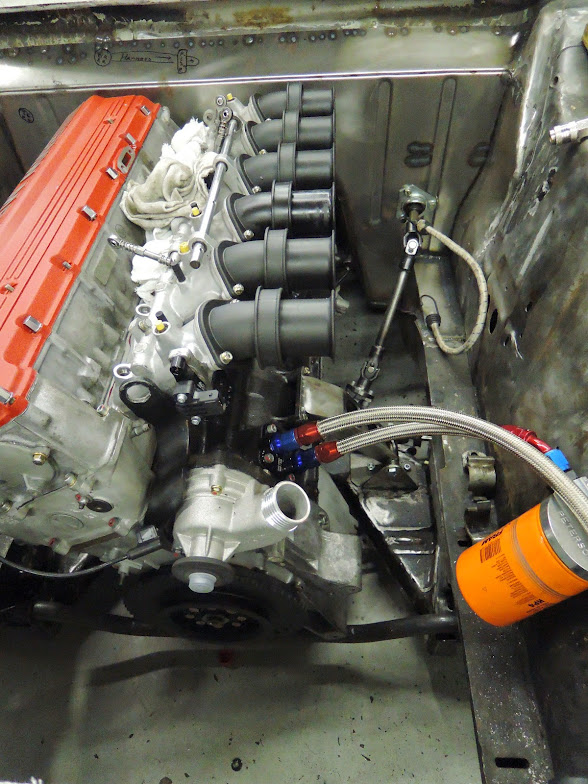
the parts layed out, remote oil filter, oil cooler, dash 10 AN aeroquip fittings, and oilpressure switch's , one for the VDO gauge and the other for the data into the ECU
stock oil filter housing was removed and replaced with this unit
layed out the stainless line in and out of the engine
mounted remote filter
mounted the oil cooler in the cowl
where the line go though the body to get to the cooler
Any of you guys who have raced cars know what a pain latching the window net is , fumbling around with the damn thing trying to make grid can be stressful . So this is one thing I wanted to make work better, so I stole an idea from the "pro's" .Ken and I put rod ends on the end of the rods going though the net and attached them to the b pilar tube . then welded a safety belt latch in the a pilar corner and in conjunction with the bearings allows super easy movement of the whole thing !
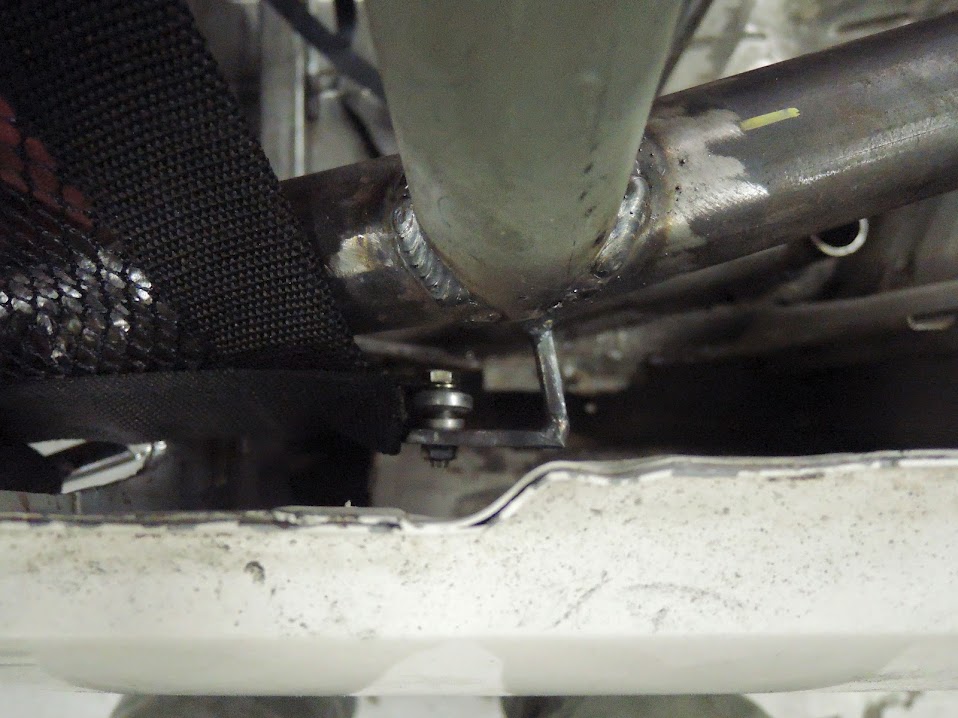
bottom rod end mounted to the b pilar tube
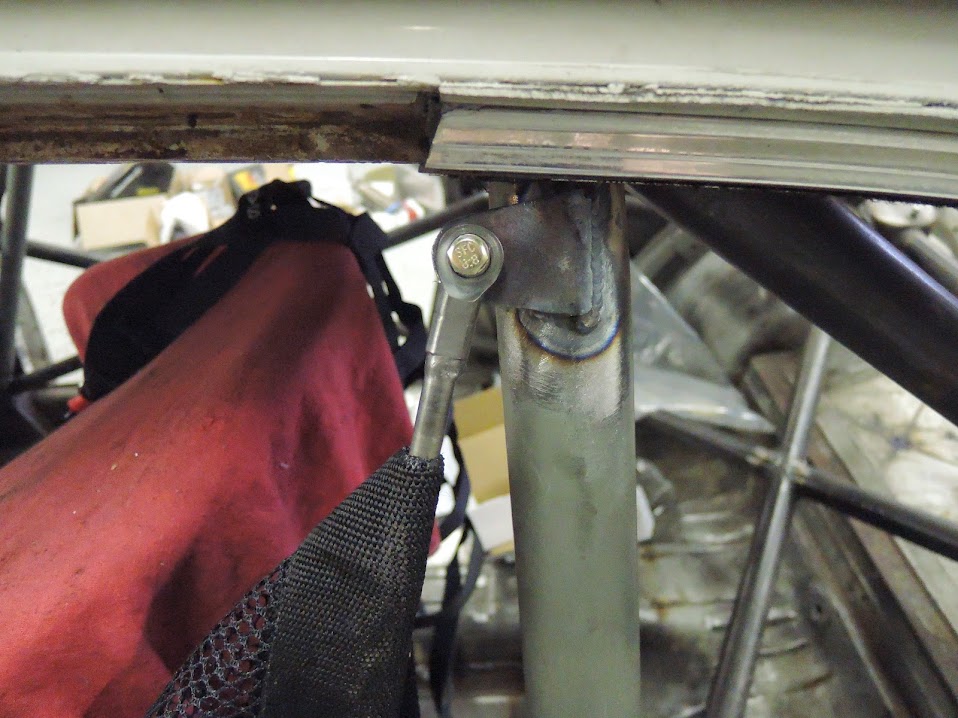
top rodend attached to the b pilar tube
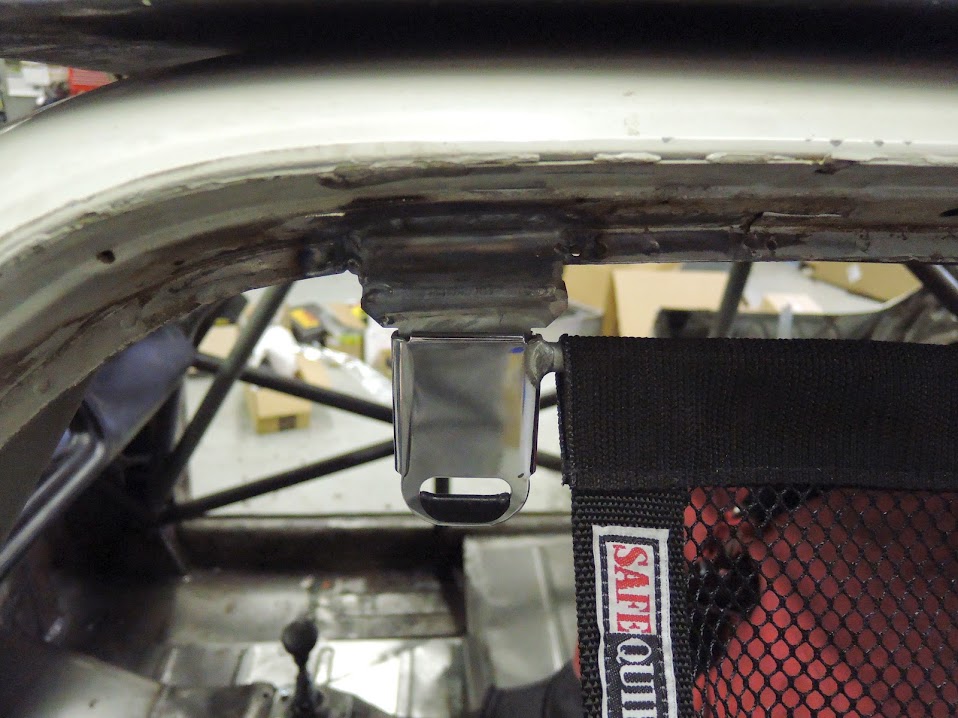
safety belt latch welded in
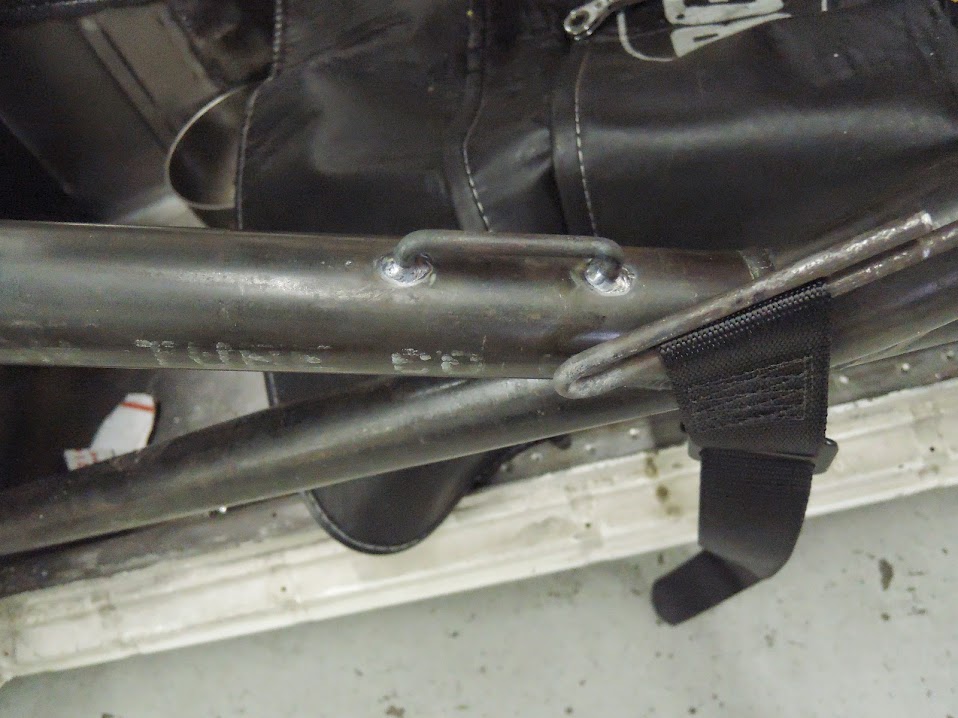
a nice touch to keep the strap in place
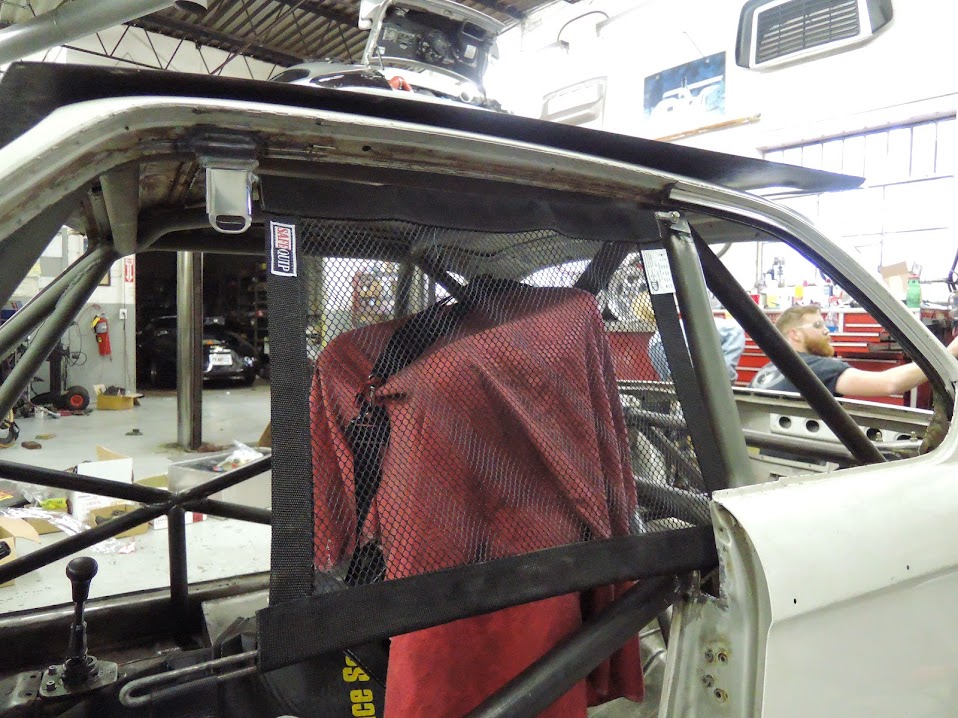
the whole thing latched in place
bottom rod end mounted to the b pilar tube
top rodend attached to the b pilar tube
safety belt latch welded in
a nice touch to keep the strap in place
the whole thing latched in place