Most impressed with the welding! I need more practice!
You are using an out of date browser. It may not display this or other websites correctly.
You should upgrade or use an alternative browser.
You should upgrade or use an alternative browser.
72 Restomod clubracer build
- Thread starter bdigel
- Start date
-
- Tags
- restoration list
Most impressed with the welding! I need more practice!
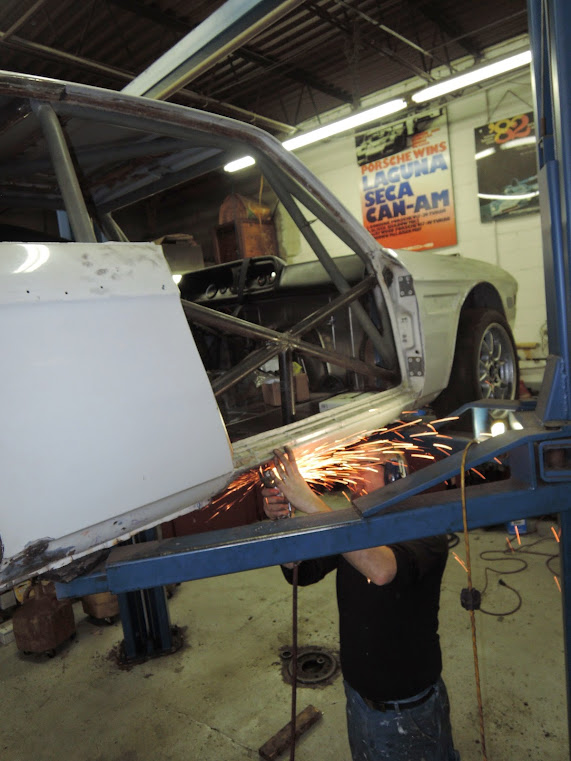
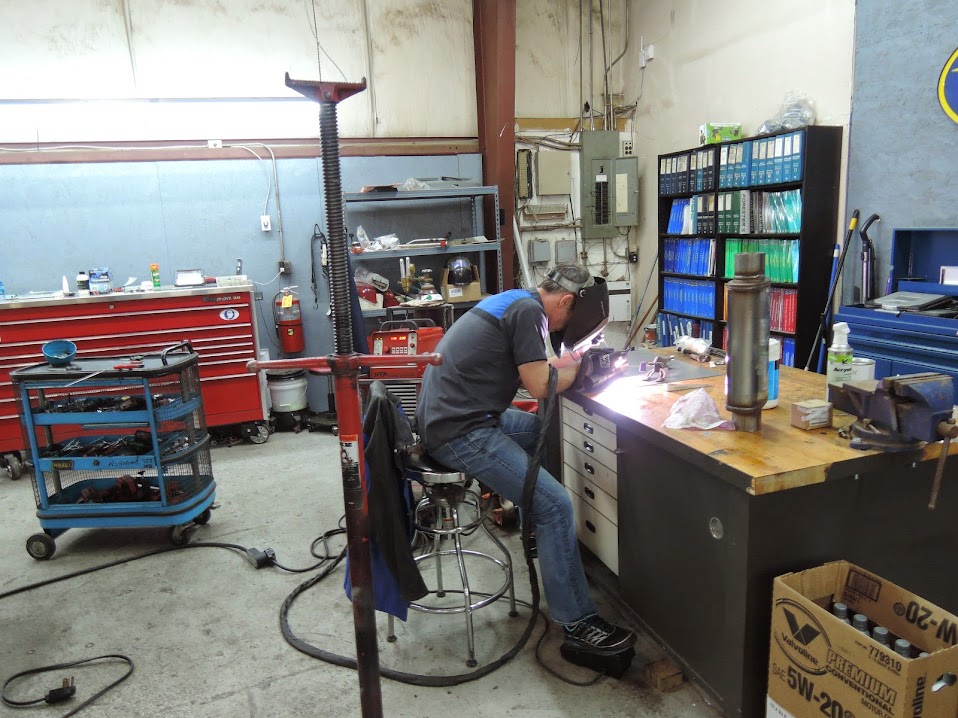
I am not responsible for the welding, The latest batch of credit goes to the young fella in the back of the picture here, Steven Landis aka " turtle "
a very very talented welder and General fab guy , very lucky to have his service as well as the help of many others .
on this batch of work he used he really cool "suitcase" tig welder. It lays down a nice clean beed. just listening to it lay down you can tell it going to come out soooooo much nicer than a mig. crazy stuff
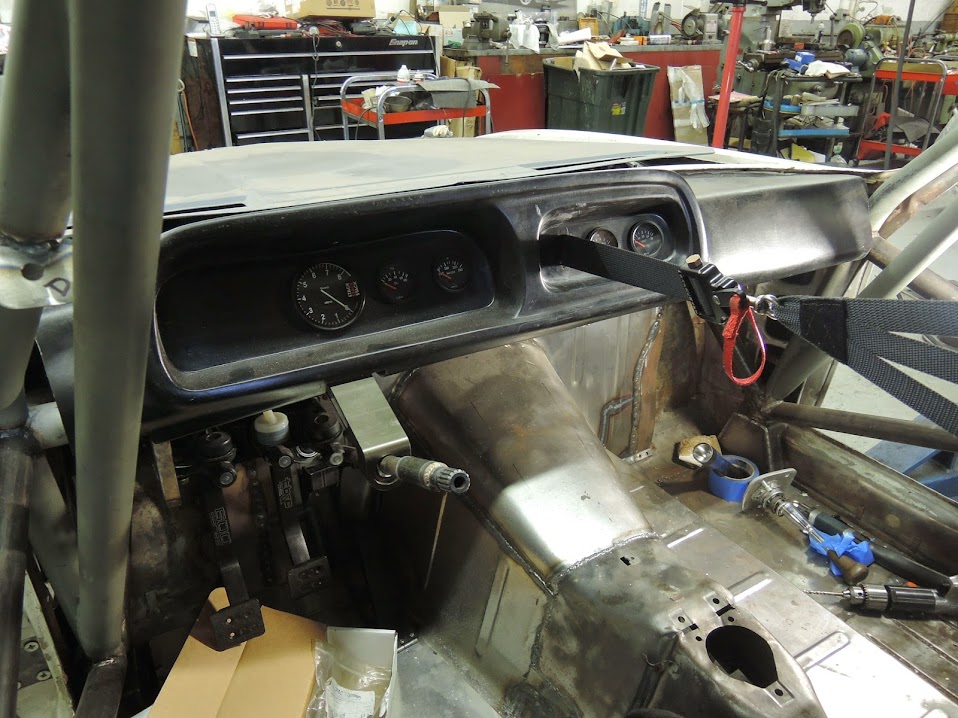
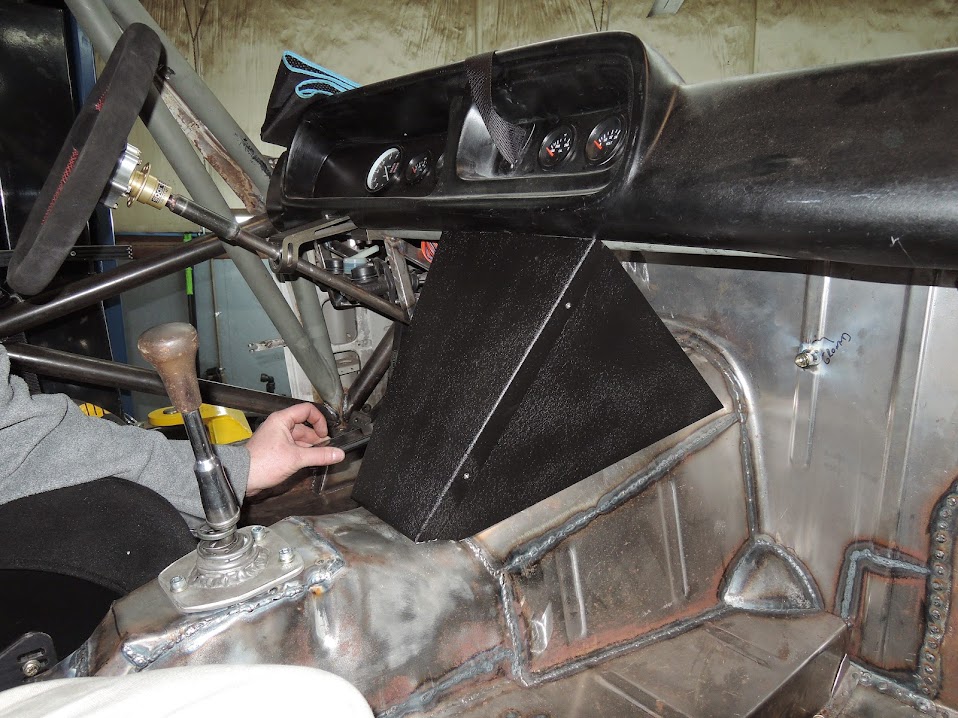
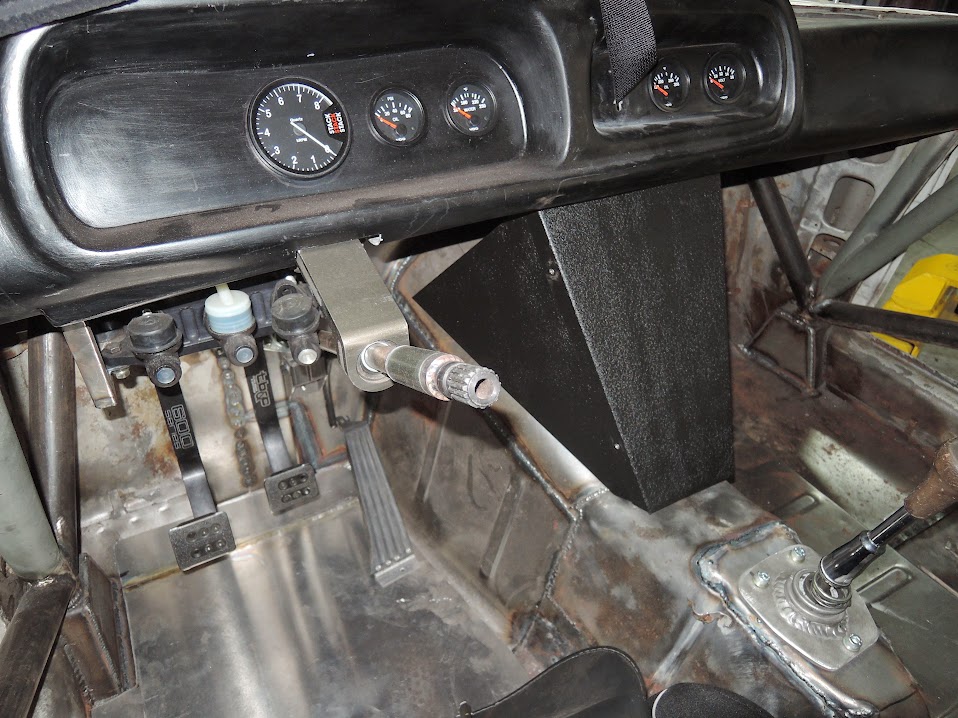
now for the dashboard install. I got a repo fiberglass deal , which didn't fit real well. it took a lot of massaging to get it to fit well and some creative solutions to mount the thing in the car , we welded some nuts in the corners and two on the top , and finally it looks like it belongs in the car
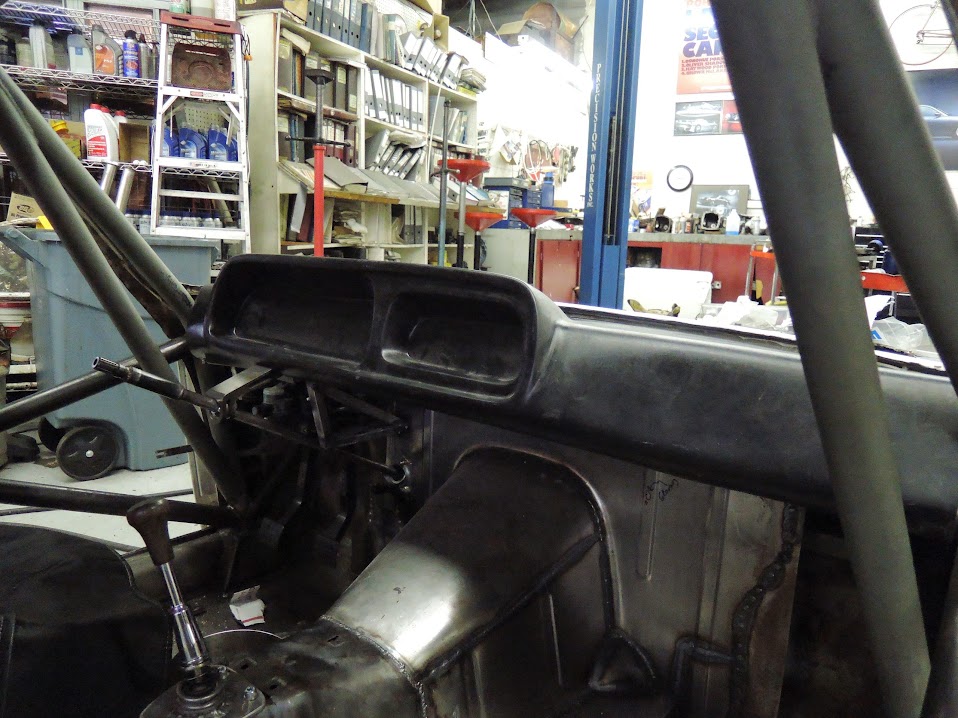
Notched out where the steering column goes and recessed where the a pillar bars come down
notice how tight it actually fits now
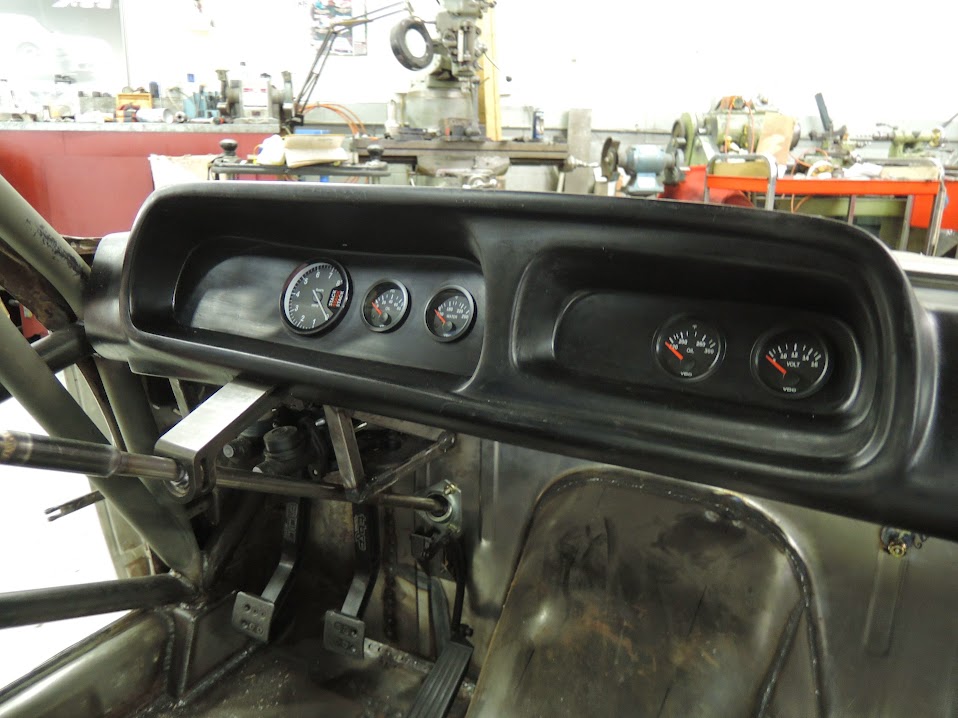
after the gauges are installed
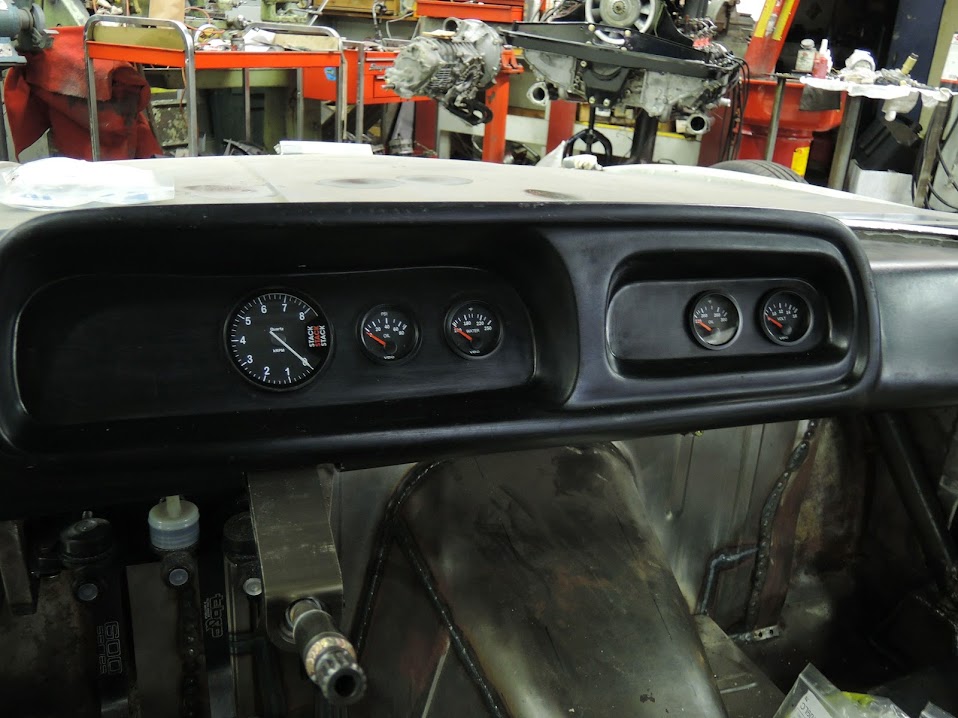
a nice stack 8k tach prominent front and center
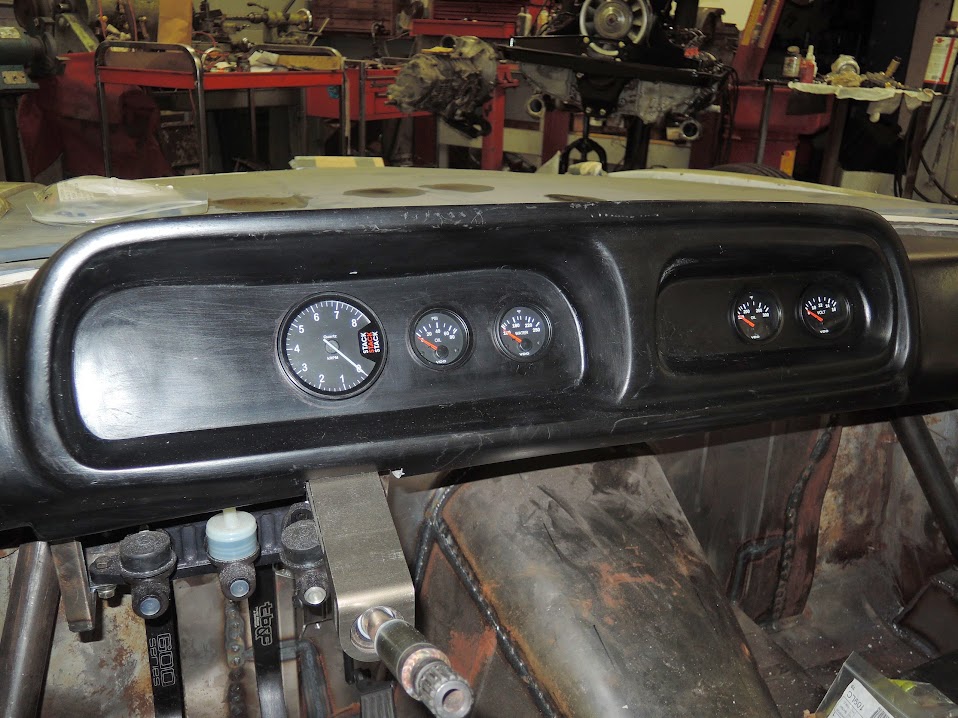
still have to wire up and install idiot lts but some nice progress
Notched out where the steering column goes and recessed where the a pillar bars come down
notice how tight it actually fits now
after the gauges are installed
a nice stack 8k tach prominent front and center
still have to wire up and install idiot lts but some nice progress
stphers
Well-Known Member
Gauges
Hi,
I have to commend you and the fellows that are doing your car, this is one well put together car. Never mind how the pro's do it, this is a very professional job. Kudo's to all.
One thing about your small gauge cluster, have a look at some chrome bezels that Series 2 (70-75 ) Alfa Spiders use. They offset the guages a little so the actually face you better. I used them on a 2002 that I did up years ago with extra gauges in my center console. Much easier to check especially when you are in the middle of a race. Just a thought. They might a cool touch
Thanks, Rick
Thanks Rick 1 Ill look in to the alfa gauges but I think the VDO's and stack are here to stay thanks for the tip though
another day another update
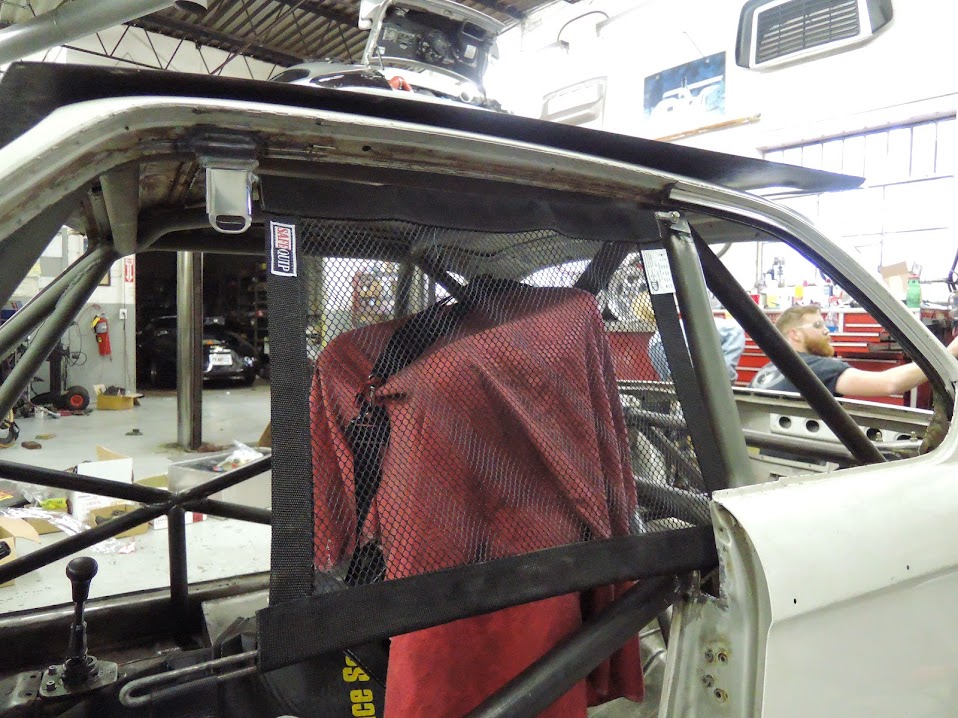
today we installed the center net, probably the 1st time a center has been installed in a CS ! Its required with some of the clubs I run with so yes I cut up the dash a bit to install this net . it is obtrusive , but you get use to it , This net is widely used by pro team's , because of its well working quick release, and the ratchet devise used to tighten the net up ,
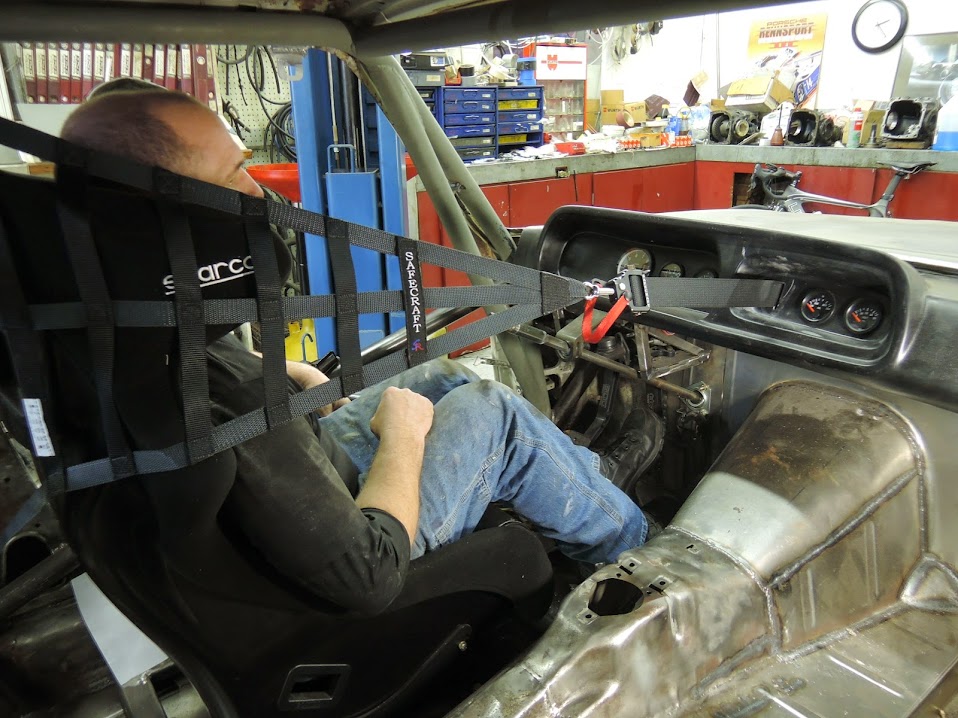
Ken test's out the new net
view from the drivers side

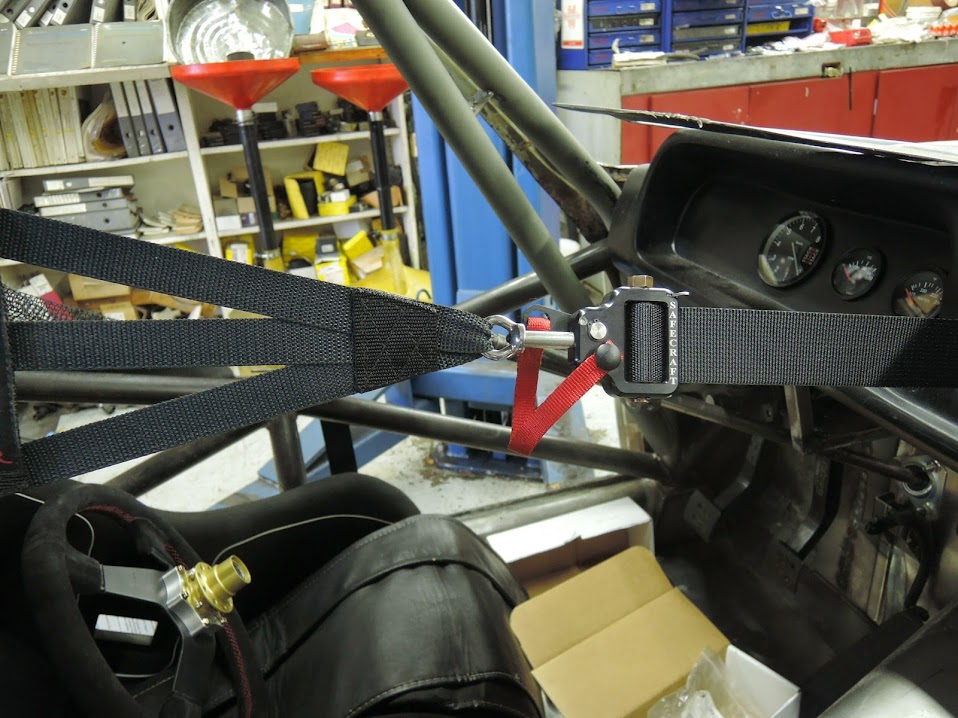
close up of quick release and ratchet devise
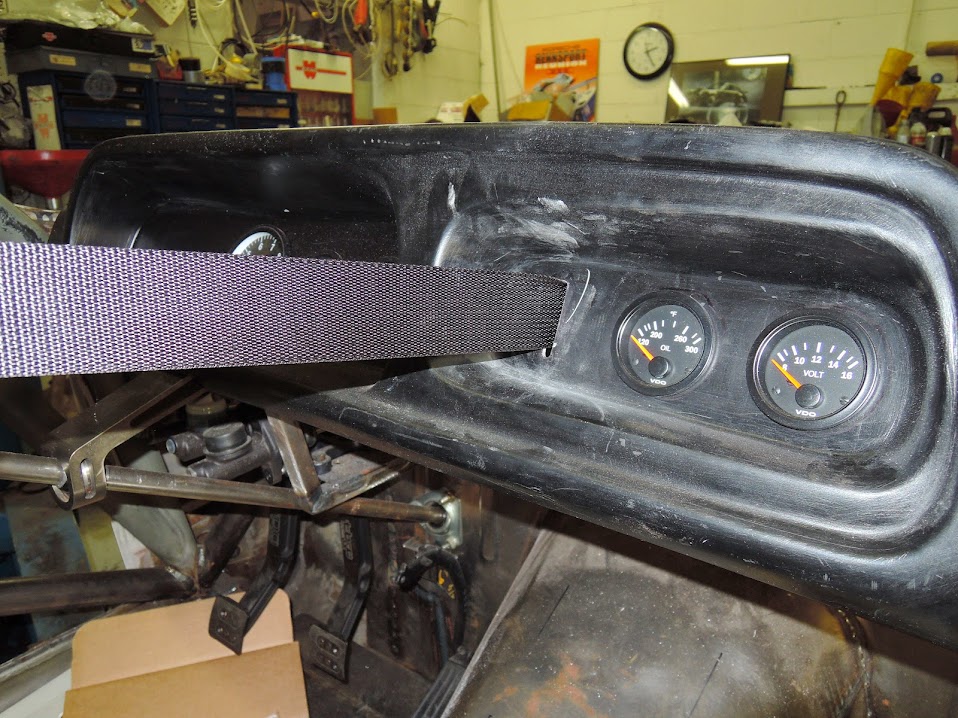
close up of how ken slotted the dash , and where the center net strap goes though it. The dash covers up where the net attaches to the body, there is a eyebolt welded where a clip connecter clips into the eyebolt
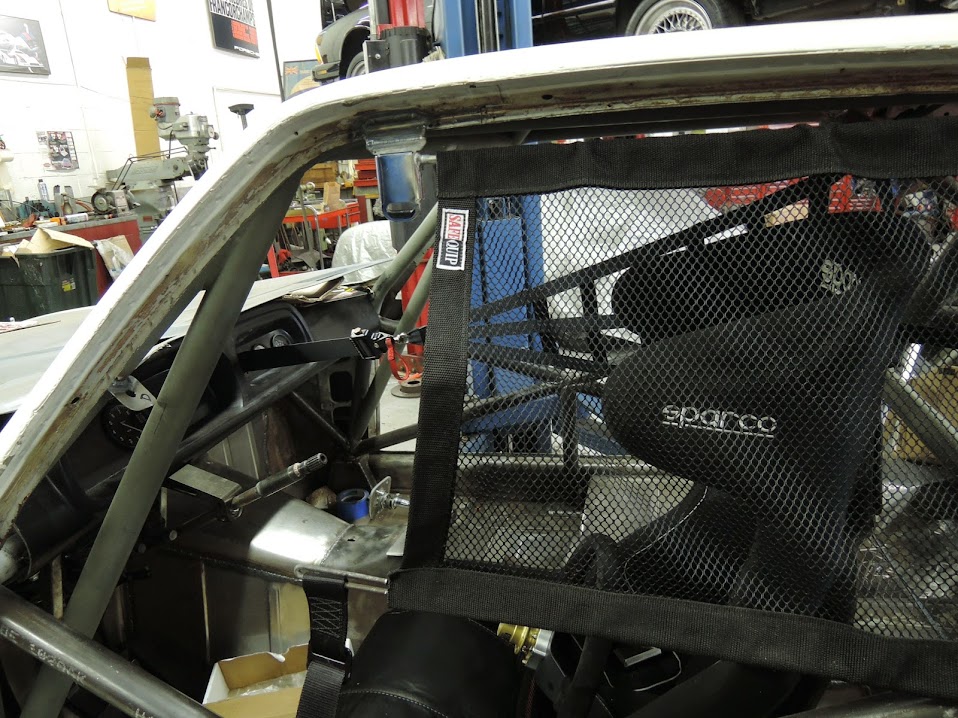
view with both nets up
as you guys may have noticed I have spent some serious cash on go fast parts , but take note I did not skimp on safety !
another day another update
today we installed the center net, probably the 1st time a center has been installed in a CS ! Its required with some of the clubs I run with so yes I cut up the dash a bit to install this net . it is obtrusive , but you get use to it , This net is widely used by pro team's , because of its well working quick release, and the ratchet devise used to tighten the net up ,
Ken test's out the new net
view from the drivers side
close up of quick release and ratchet devise
close up of how ken slotted the dash , and where the center net strap goes though it. The dash covers up where the net attaches to the body, there is a eyebolt welded where a clip connecter clips into the eyebolt
view with both nets up
as you guys may have noticed I have spent some serious cash on go fast parts , but take note I did not skimp on safety !
decoupe
(deceased)
New contest? Name that Car!
Can I suggest a name for the car? Max. It just has that "Mad Max" look and you wouldn't have to paint it.
Thanks for sharing all the creative engineering.
Can I suggest a name for the car? Max. It just has that "Mad Max" look and you wouldn't have to paint it.
Thanks for sharing all the creative engineering.
Yes, Max, but then he would have to mount a 60 gallon boobie-trapped fuel tank in the rear window, but on the bright side I have a couple of "ferrel Kids" that can ride along, one is pretty good with a boomerang ")
Yes, Max, but then he would have to mount a 60 gallon boobie-trapped fuel tank in the rear window, but on the bright side I have a couple of "ferrel Kids" that can ride along, one is pretty good with a boomerang
ahh that's great fella's ! love it
well heres my theme song well my opening credits anyways ! hahaha
https://www.youtube.com/watch?v=Gb1uDc_qa-4
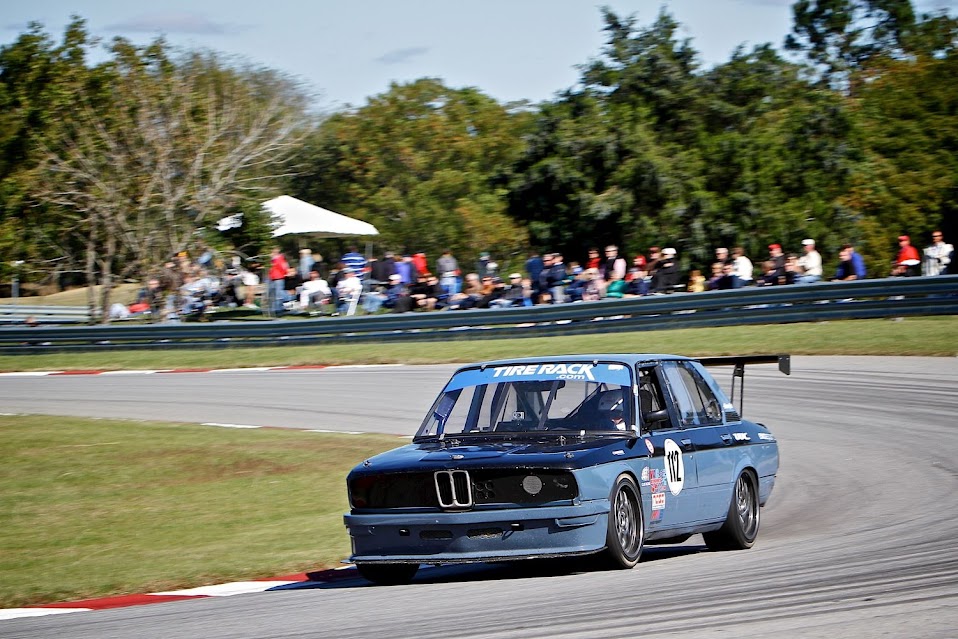
Hopefully once the body work is done she will be too nice to be a " mad max " car we can use that on the old e12 race car !
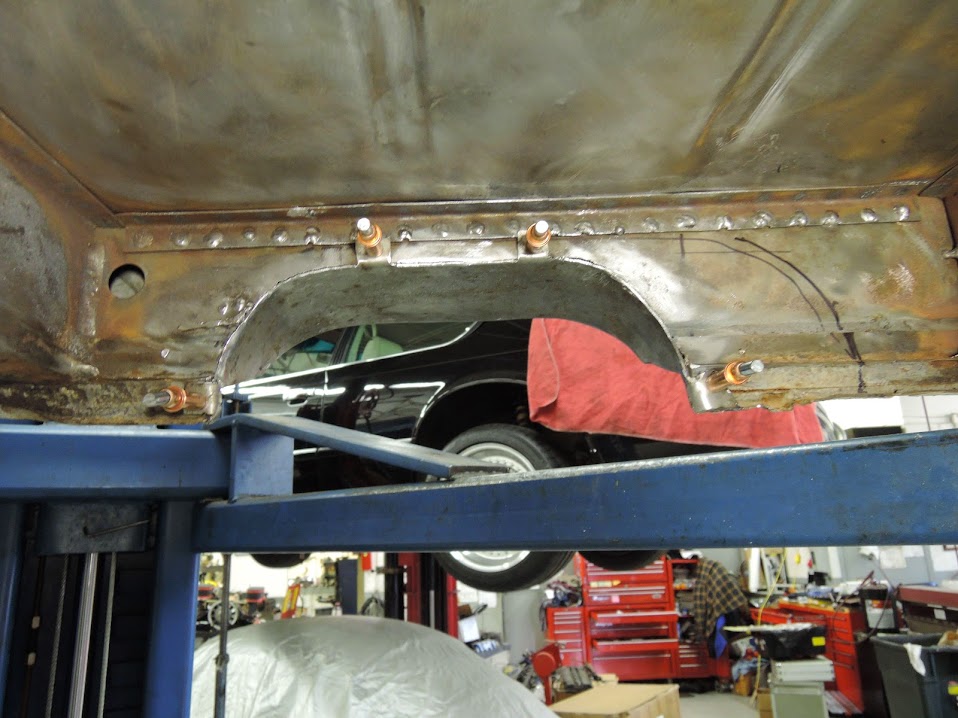
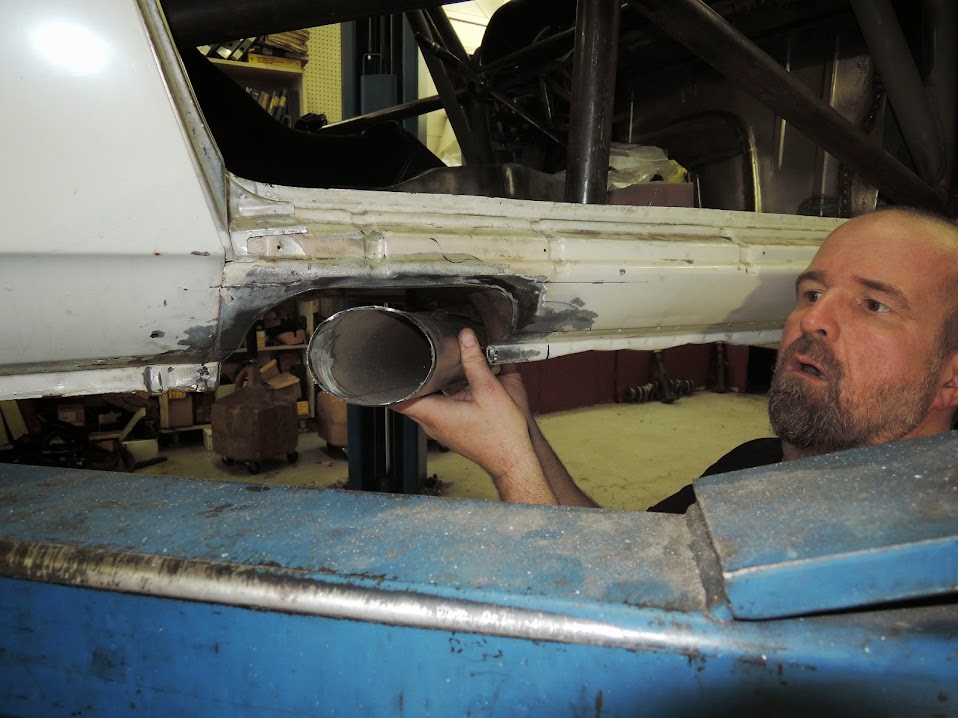
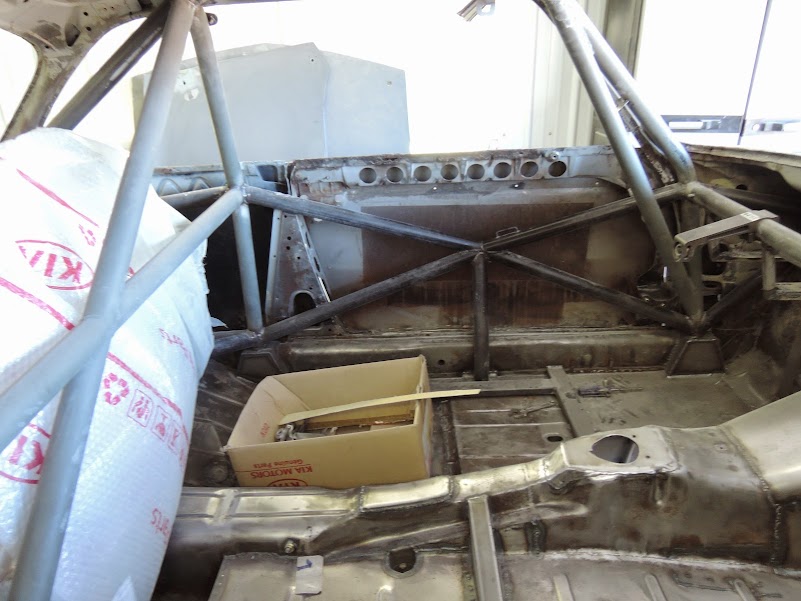
The pace is picking up , the car will go to get the exhaust done , but before that could happen we had to finish the mods for the side exit. You may remember I had the pass. side floor raised to make a tunnel /pathway for the exhaust to get it off the ground . the last piece of that puzzle was the pass. side rocker panel. Ken cut it out and made a beautiful piece to fill in the gap in the rocker and Steven welded it in to place , Im real happy with the way it turned out , I think it adds a nice finished touch esp compared to how other CSL 's do their side exhaust under the rocker. it was lot of extra work but I think its worth it
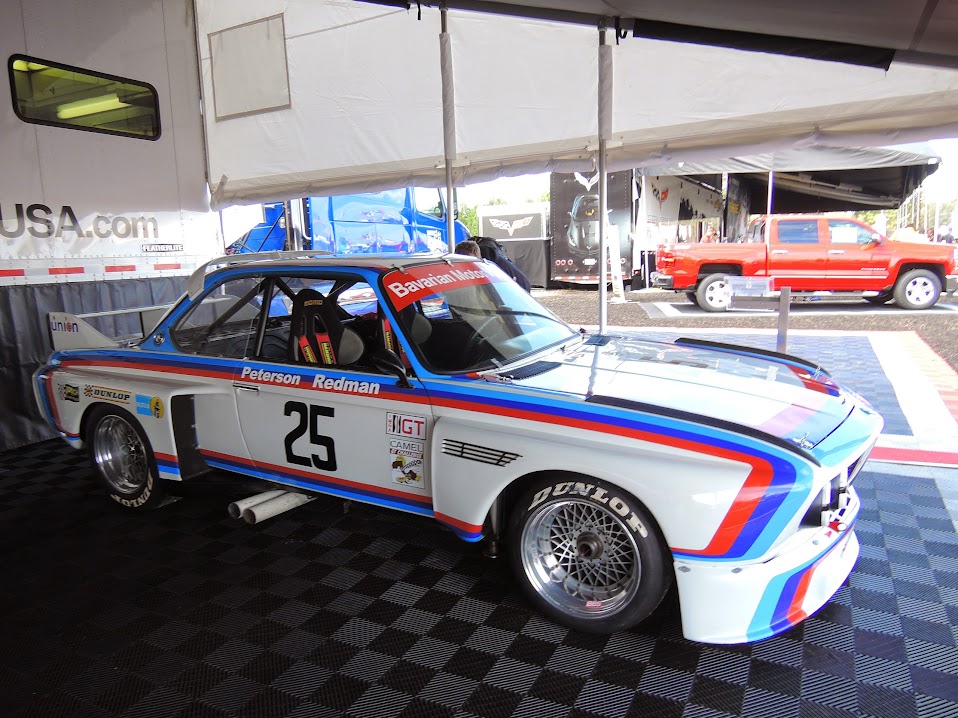
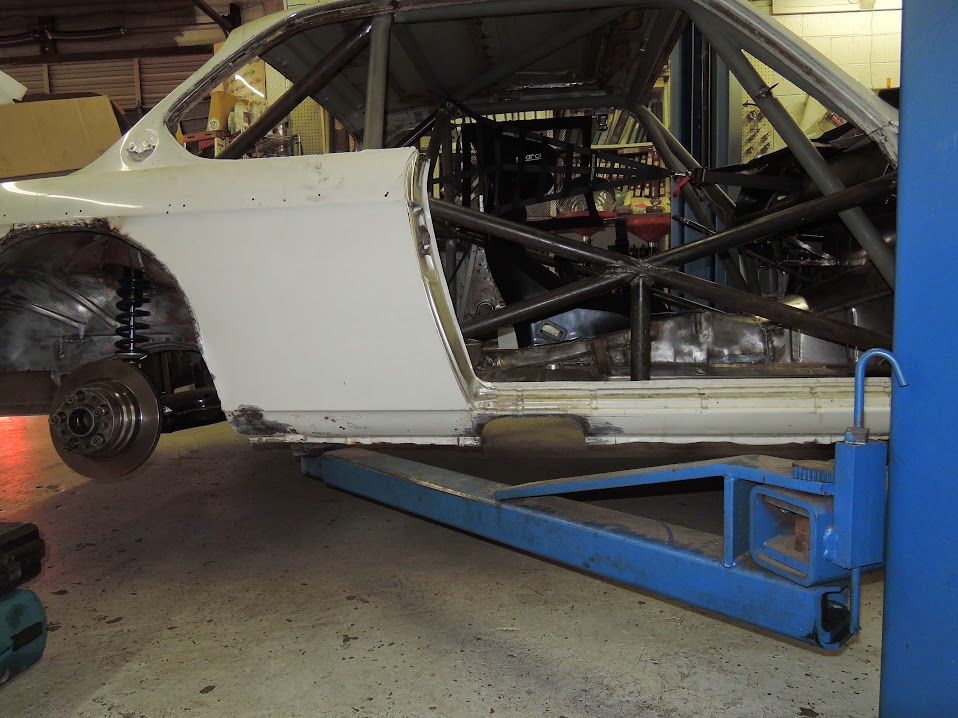
how they did it in the 70's , notice the car has to sit up higher to get ground clearance for the exhaust. , I think this is one reason my car will ride a bit lower .
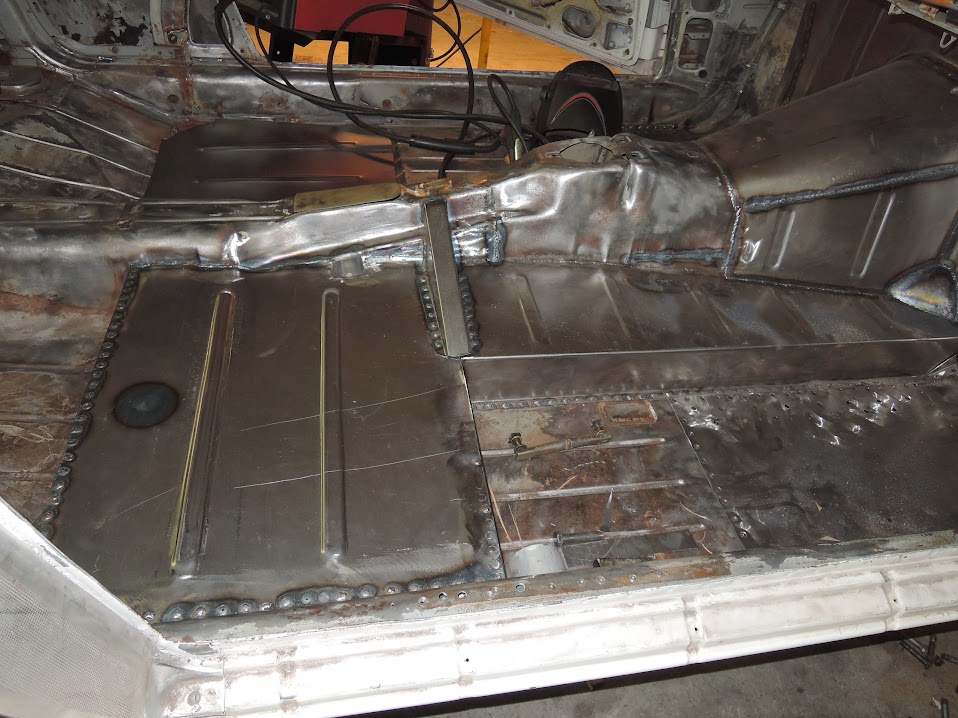
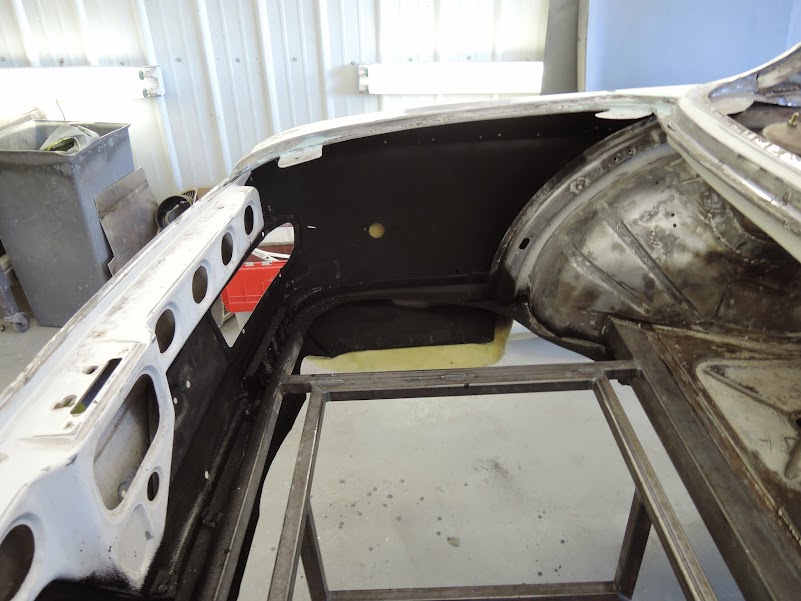
as previously posted the raised floor
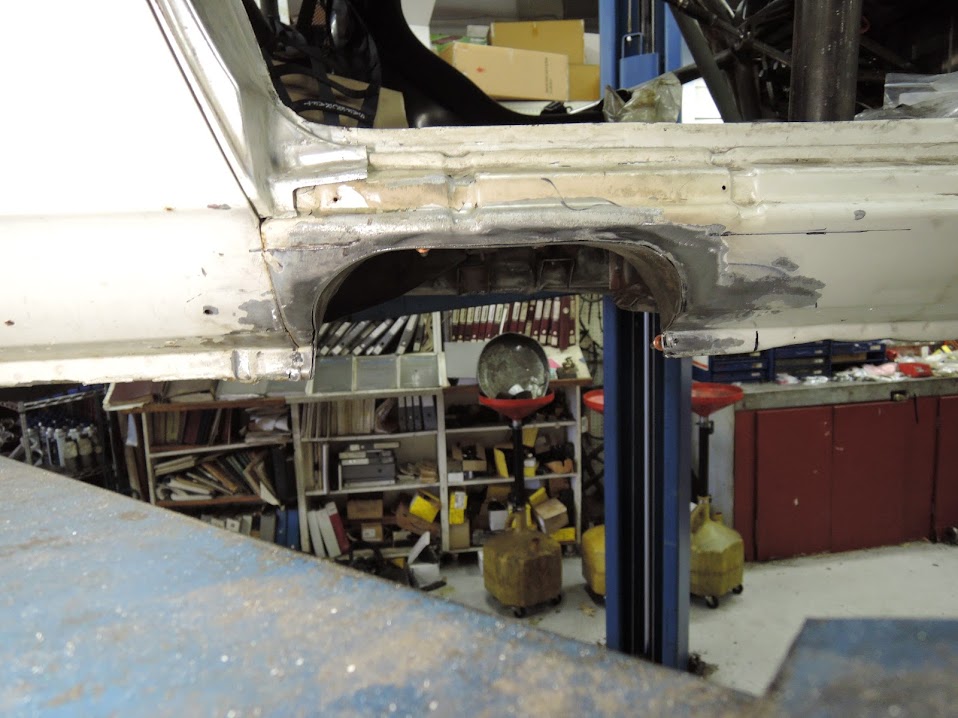
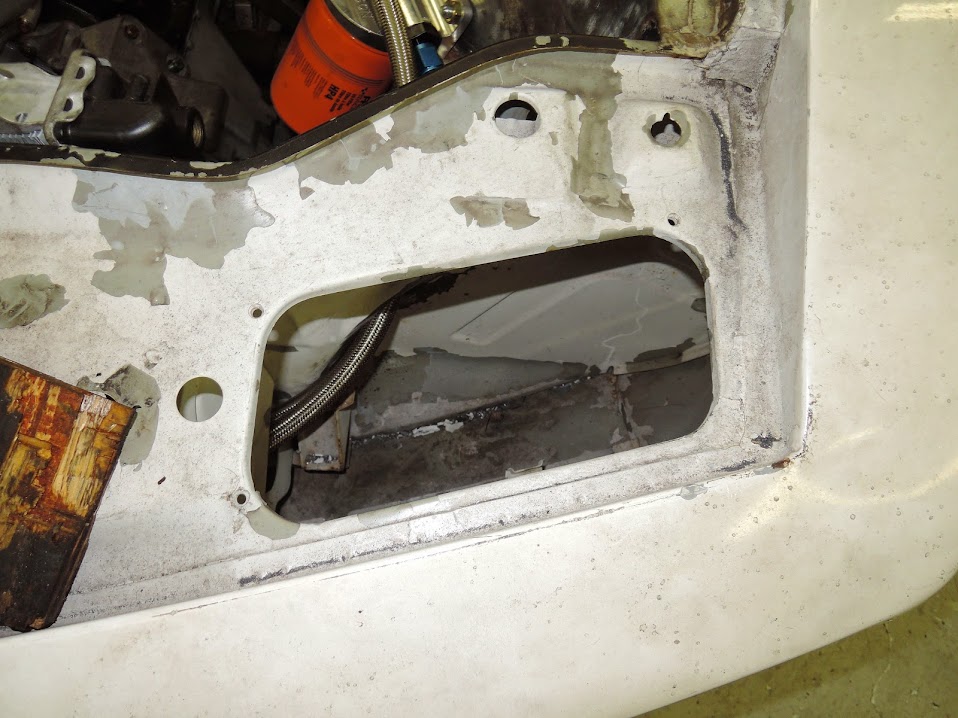
where the raised floor dead ends in to the rocker

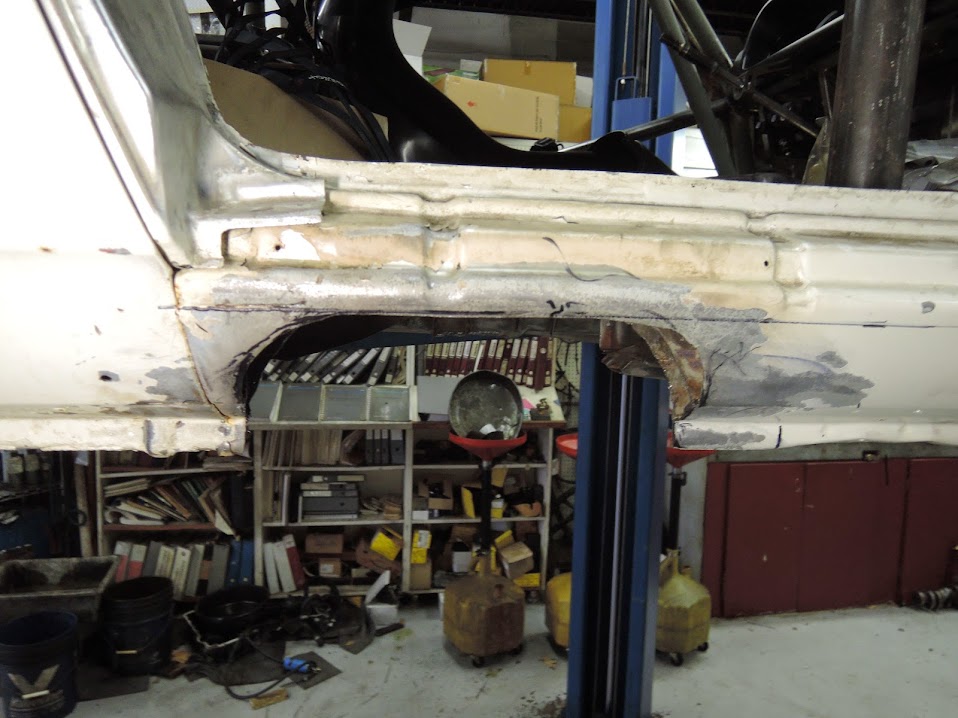
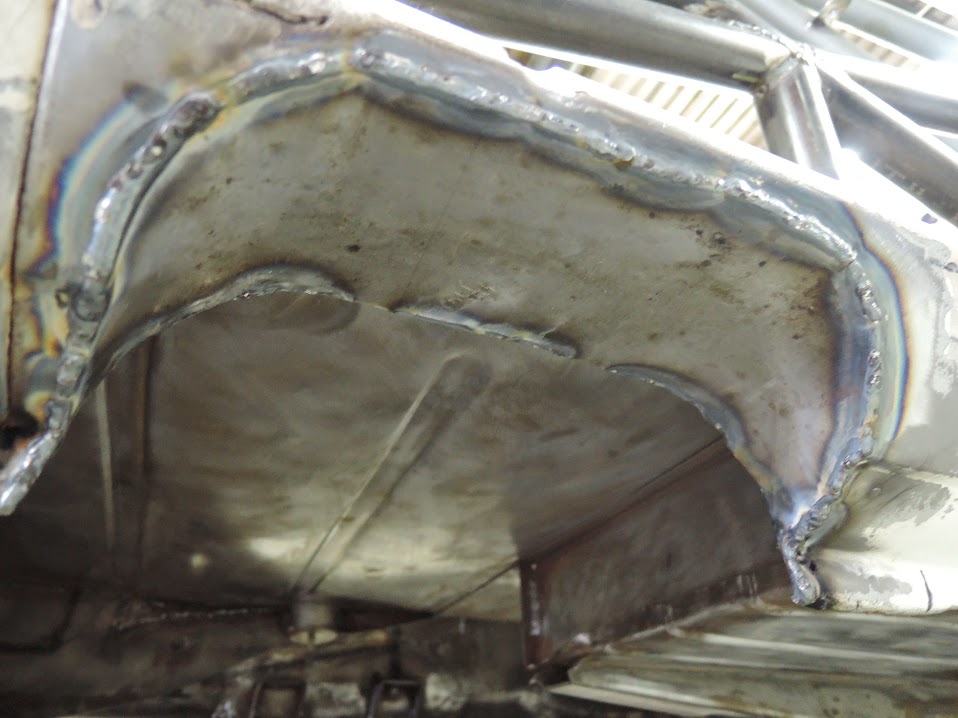
Ken makes progress in removing the many layers of the rocker panel . Note , I really thought it would just be a matter of cutting two panels and filling the hole , it actually was a lot more work, damn thing was like an onion , peeling more and more layers !
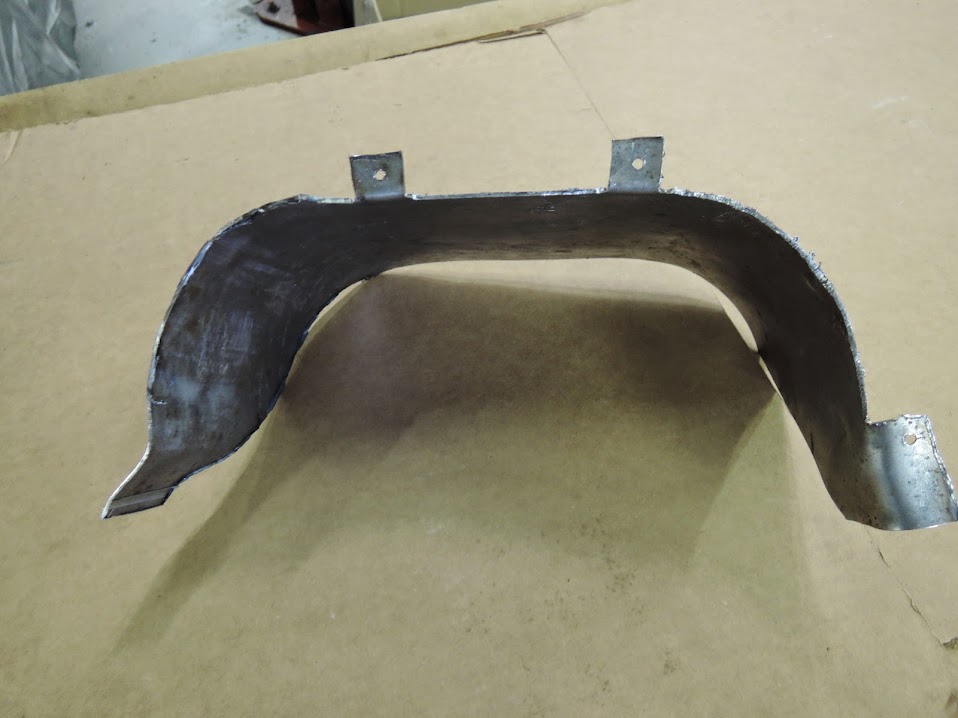
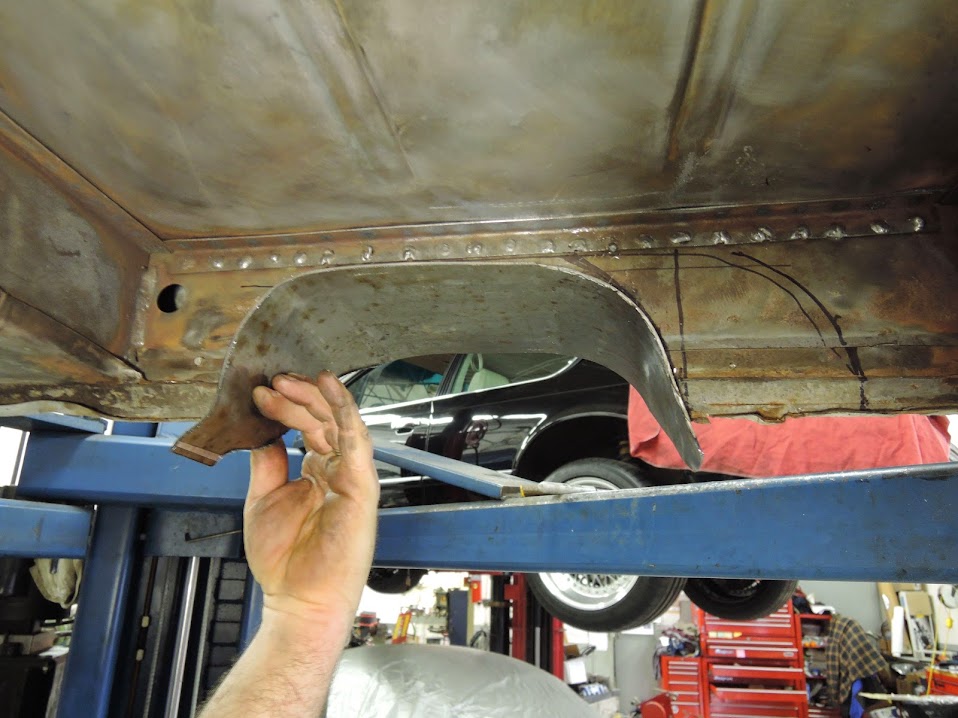
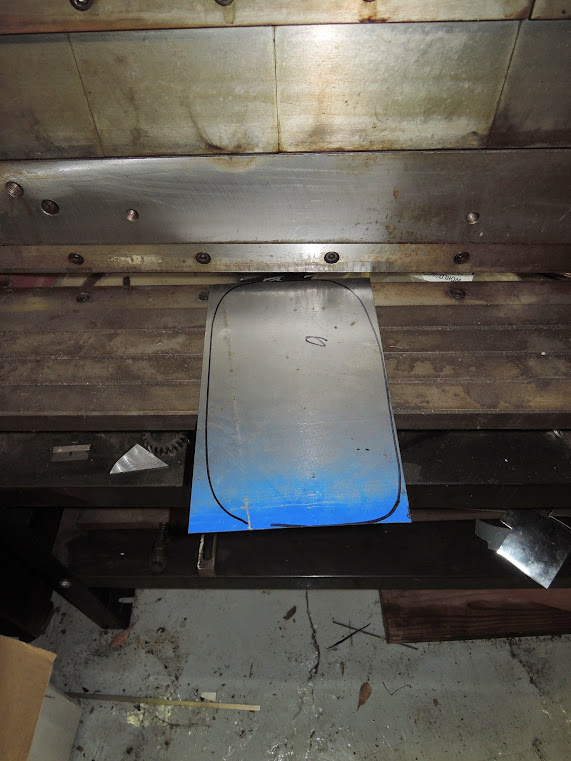
panel the Ken crafted to cover the cutout rocker
cutting and shaping the piece to fit
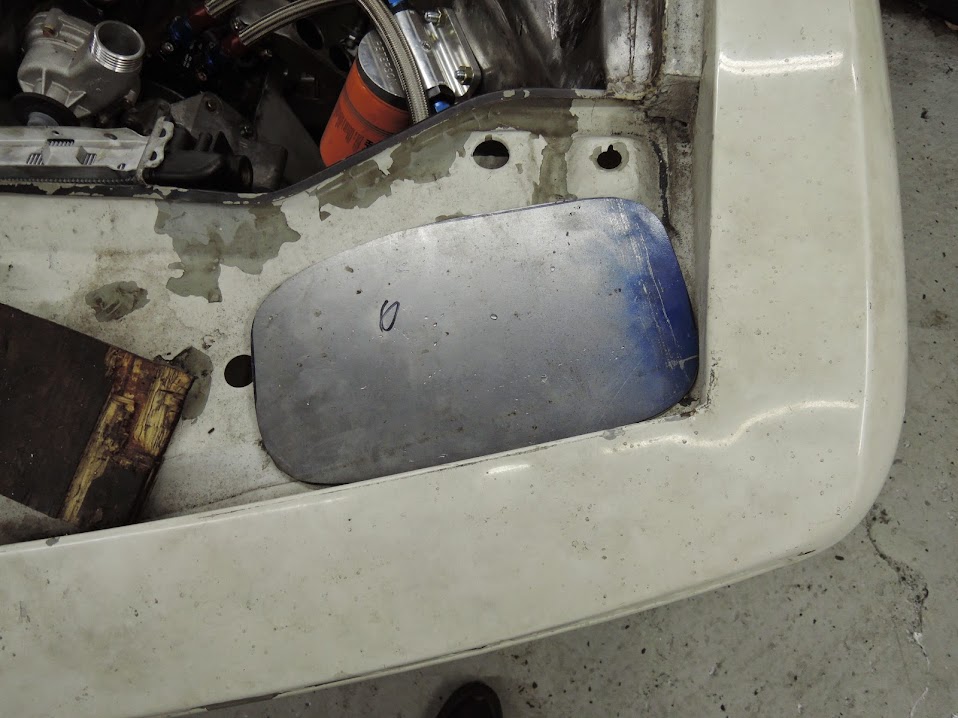
new piece held in place by celicos
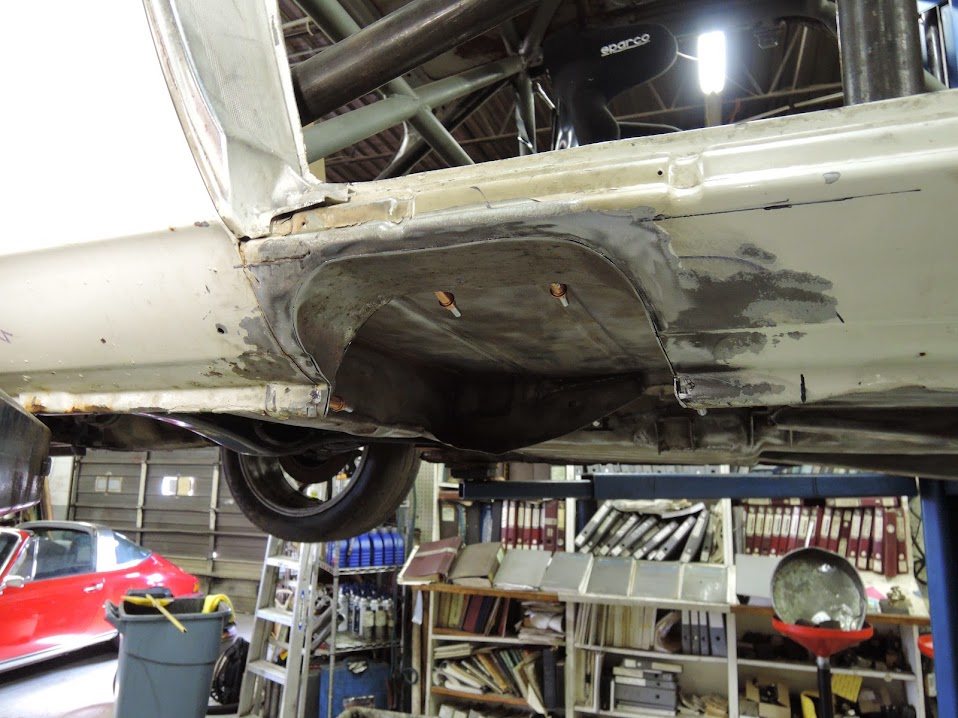
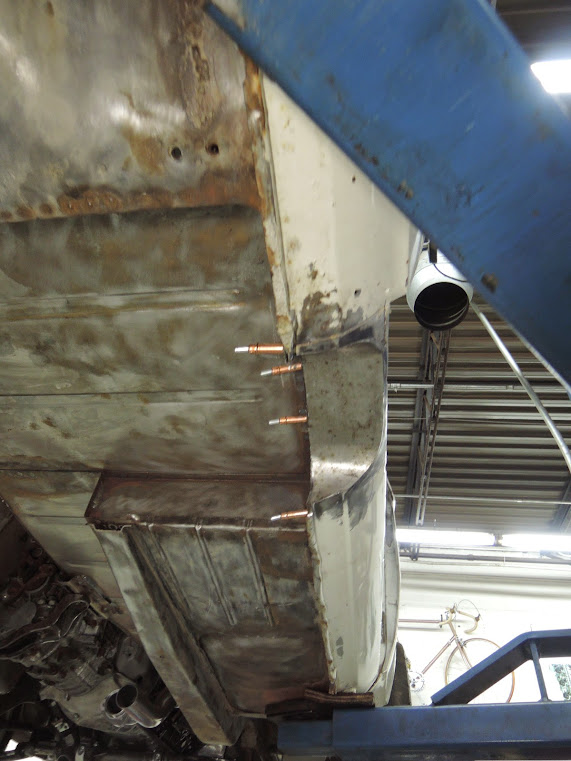
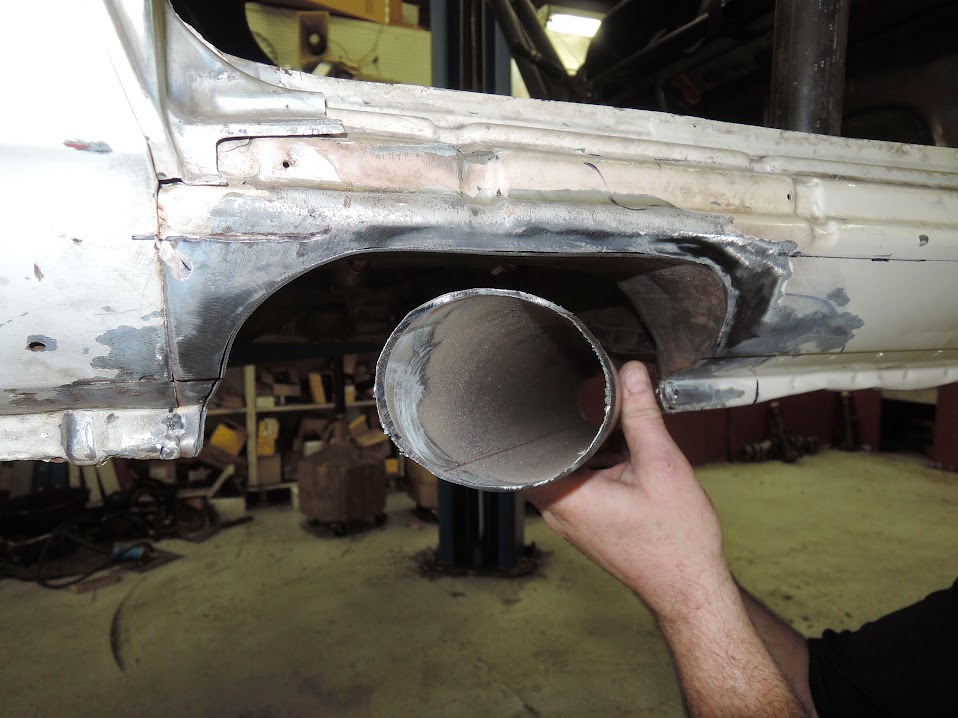
lastly an idea of what a 3 inch pipe would /will look like in the new exhaust exit
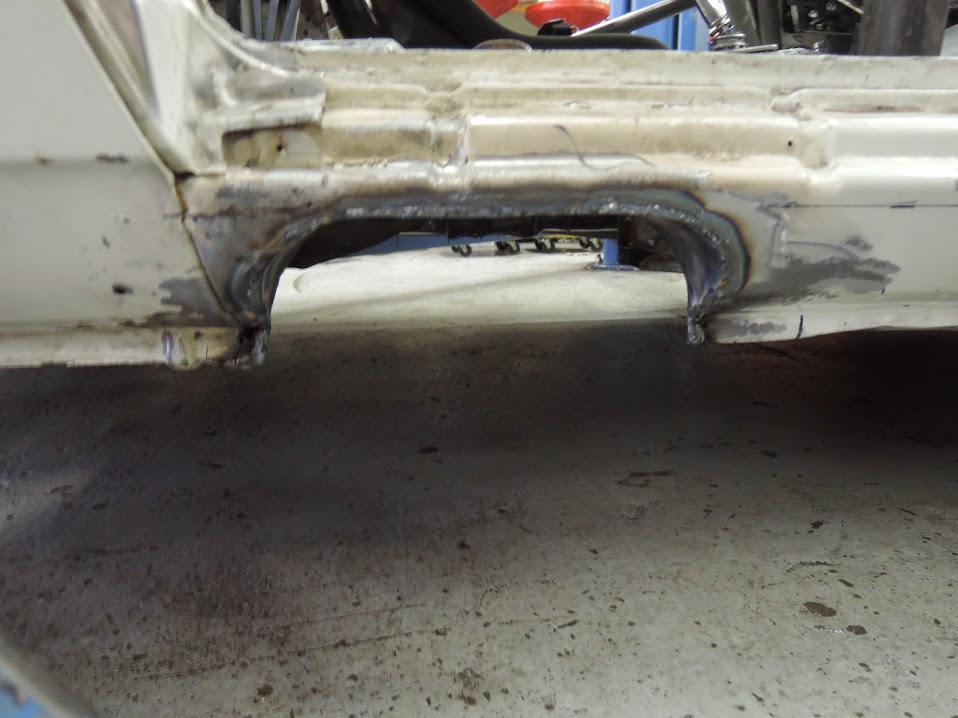
and finally welded into place , ready to be shipped off to get the exhaust done .
lastly a huge shout out to Ken , who really did a nice job there
how they did it in the 70's , notice the car has to sit up higher to get ground clearance for the exhaust. , I think this is one reason my car will ride a bit lower .
as previously posted the raised floor
where the raised floor dead ends in to the rocker
Ken makes progress in removing the many layers of the rocker panel . Note , I really thought it would just be a matter of cutting two panels and filling the hole , it actually was a lot more work, damn thing was like an onion , peeling more and more layers !
panel the Ken crafted to cover the cutout rocker
cutting and shaping the piece to fit
new piece held in place by celicos
lastly an idea of what a 3 inch pipe would /will look like in the new exhaust exit
and finally welded into place , ready to be shipped off to get the exhaust done .
lastly a huge shout out to Ken , who really did a nice job there
You are my hero. That is all.
Stefan Doring
Member
clubracer gauges
Hi there
first of all want to gratiulate all of the involved in that Project for their great work you/they did
just want to ask can you see the two gauges on the right side of the center net from your driver position ?
they are very important when you drive(race) the car
Hi there
first of all want to gratiulate all of the involved in that Project for their great work you/they did
just want to ask can you see the two gauges on the right side of the center net from your driver position ?
they are very important when you drive(race) the car
Hi there
first of all want to gratiulate all of the involved in that Project for their great work you/they did
just want to ask can you see the two gauges on the right side of the center net from your driver position ?
they are very important when you drive(race) the car
Hi Stefan,
the center net does slightly obstruct the view of the two gauges on the other side, and that's why I put the gauges that aren't "mission critical " there, the oil temp and volt meter . Personally , I only pay attention to 3 gauges during a race, , the tach, oil pressure, and water temp .
and now for more updates.
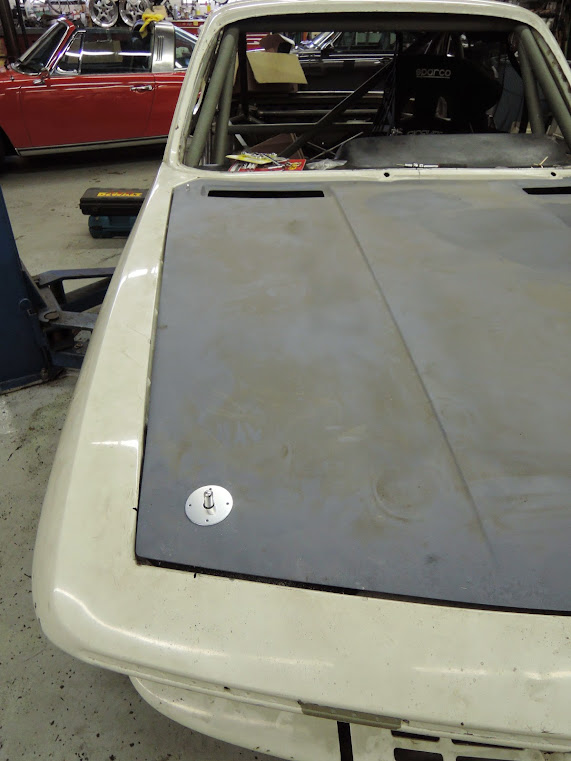
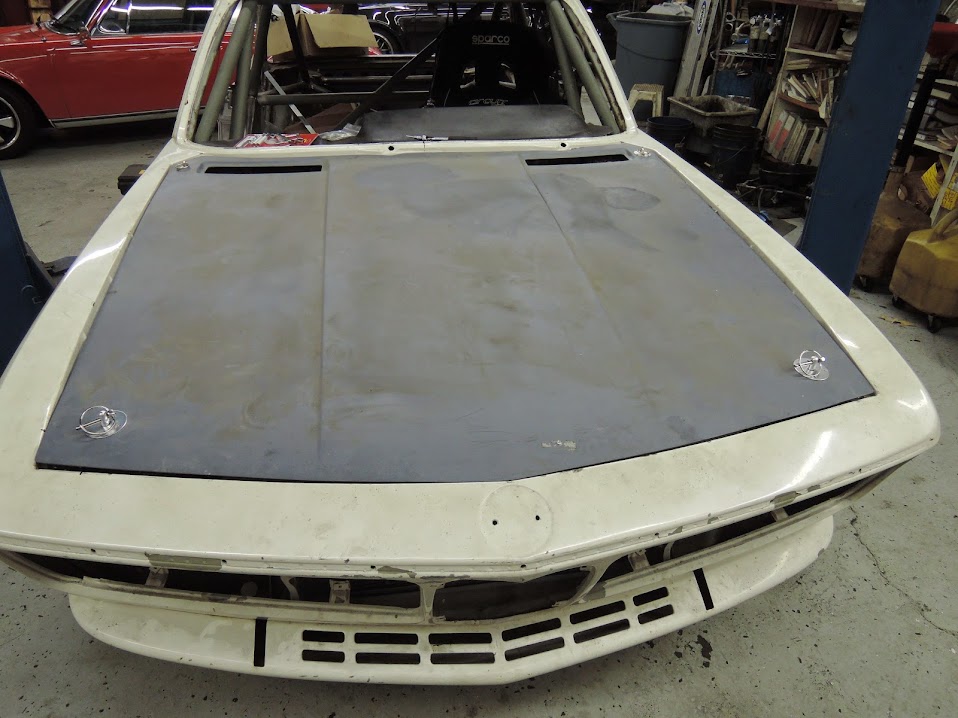
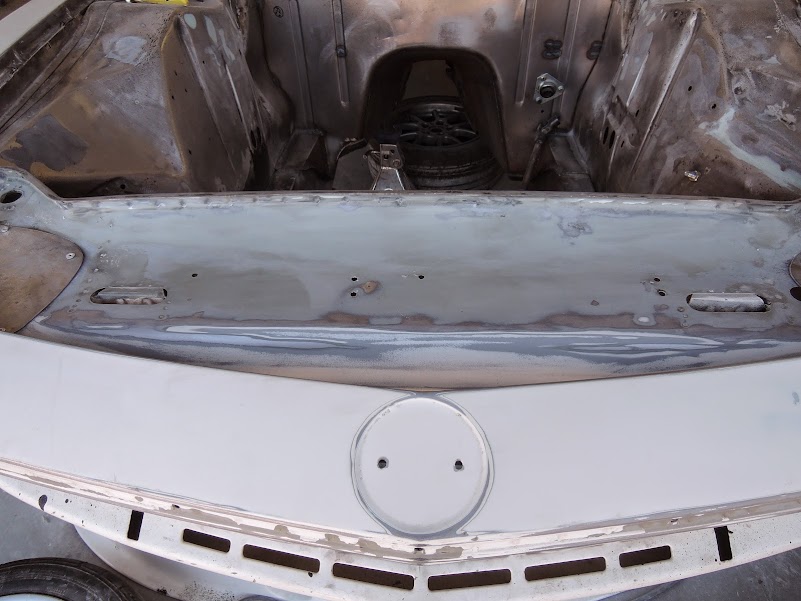
I started on mounting the fiberglass hood, and installing the hoodpins that will hold it in place , the hood will need some tweeking but Ill get to that later
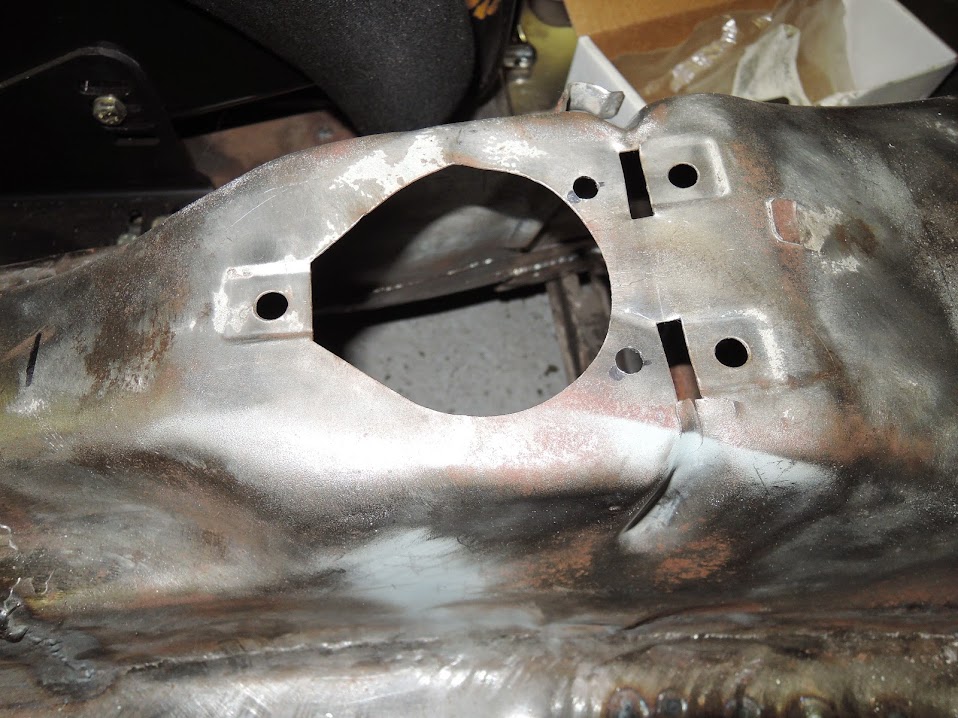
The rear pins we just drilled some holes and mounted them , the front ones I needed to fab up some plates to cover the headlight access ports ,and then mounted the pins in those
using the shear to cut out some panels

panel taking some shape
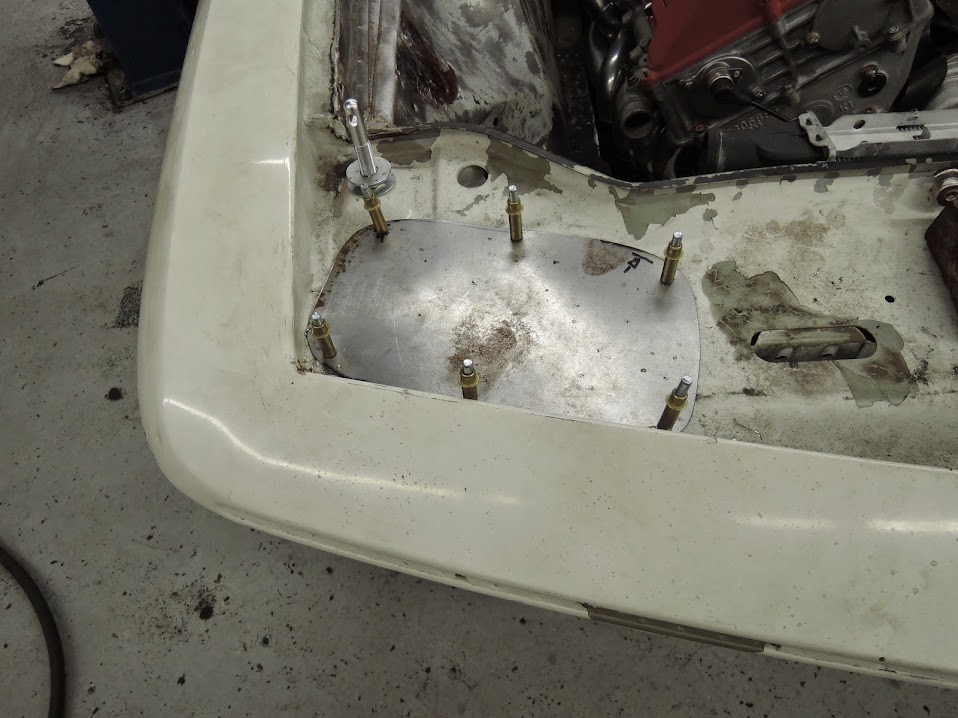
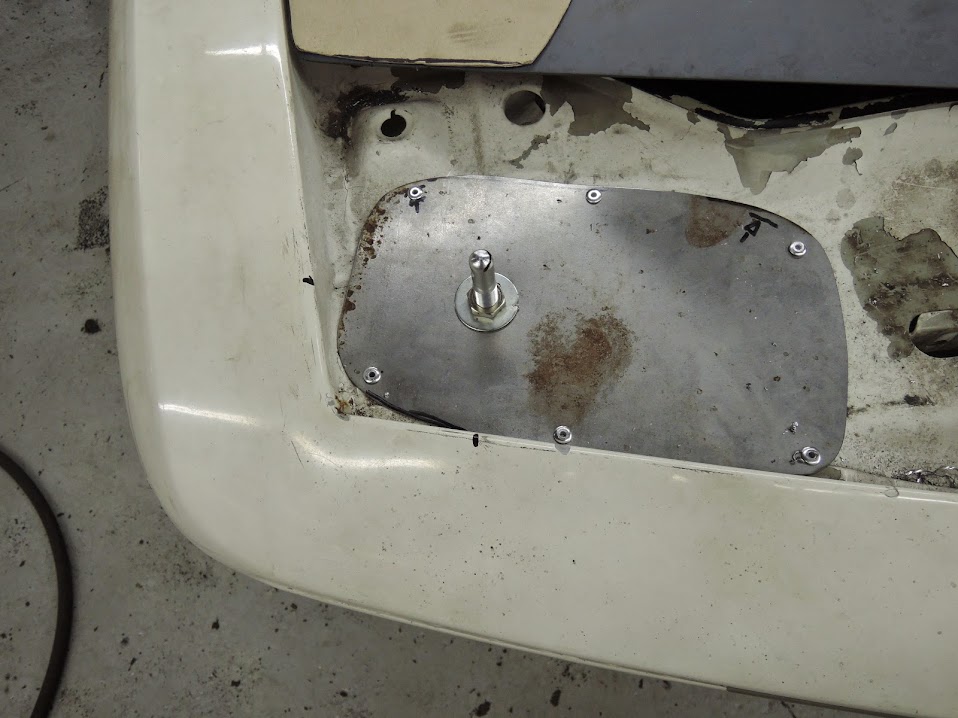
panel installed with hoodpin
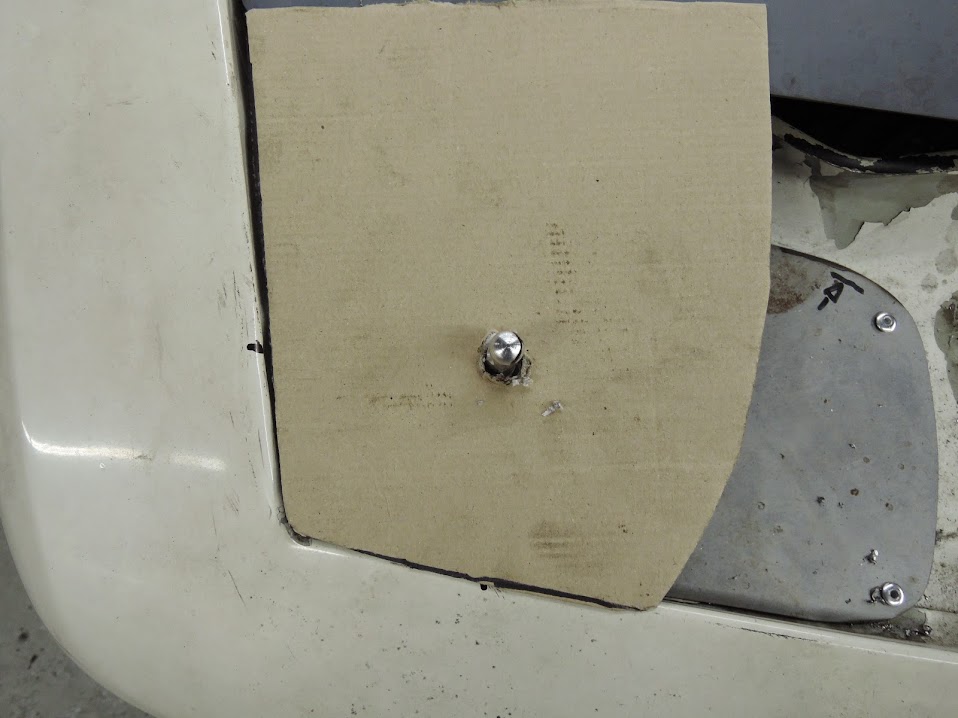
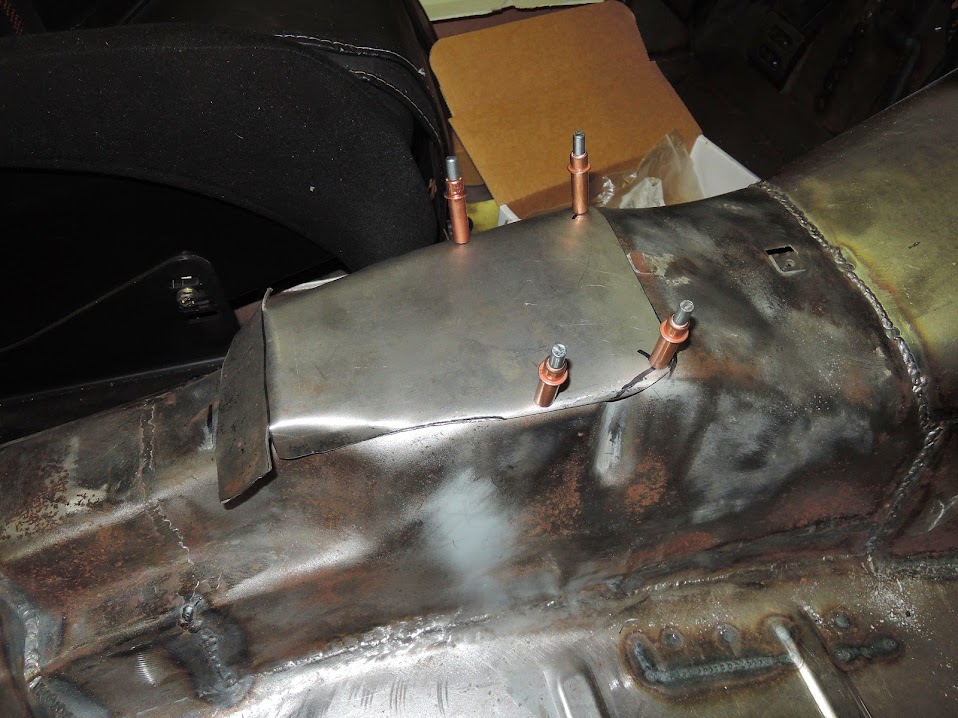
making a template so I can match placement on the other side
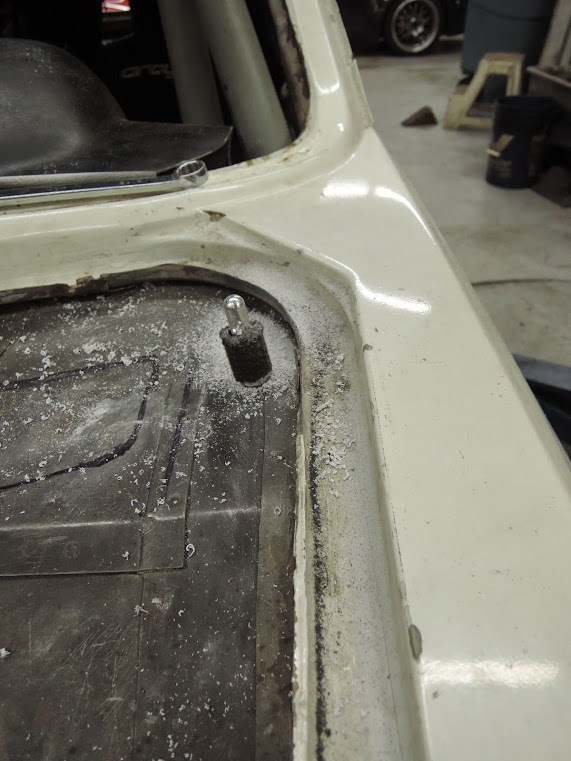
rear pin installed
last bit of interior work before the car gets dropped off at the body shop
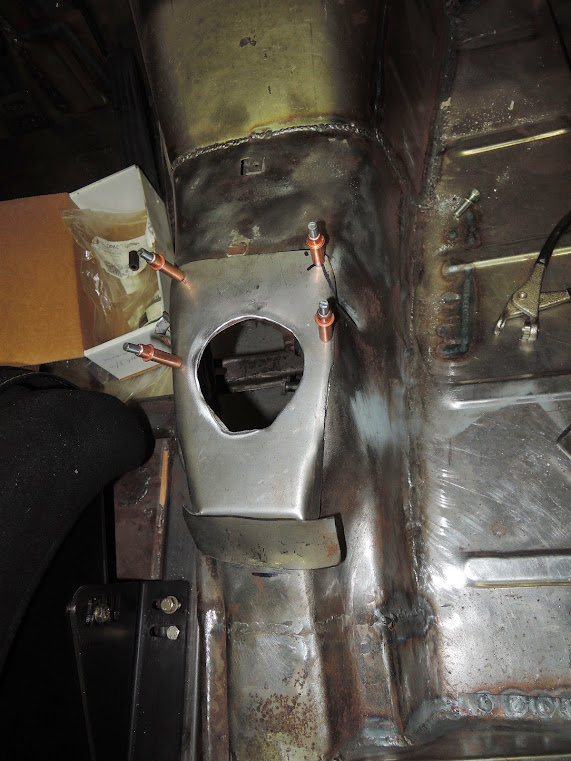
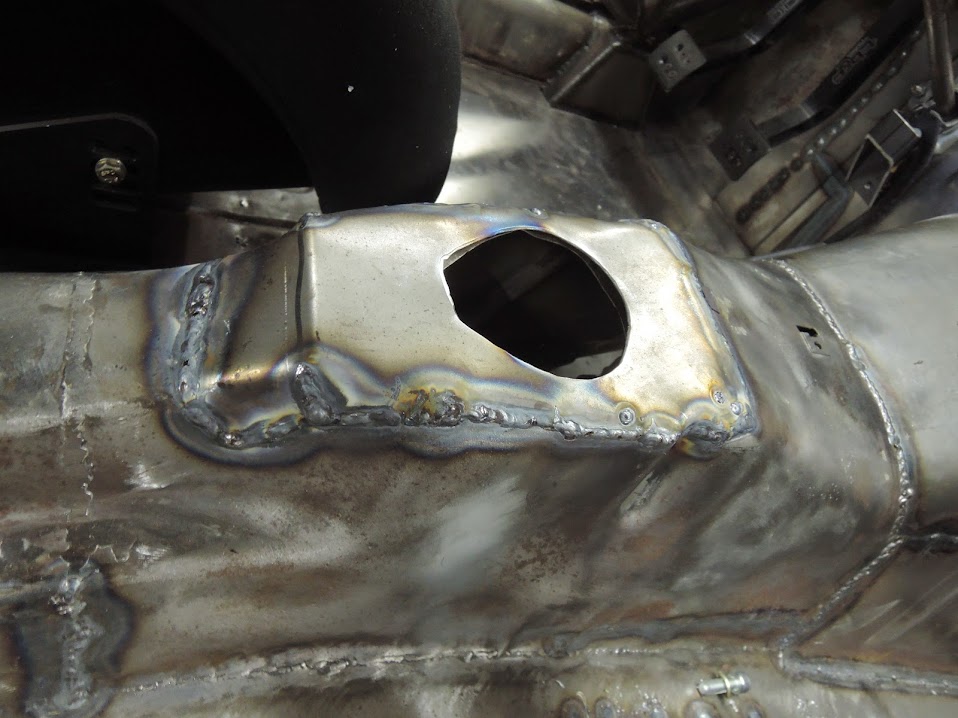
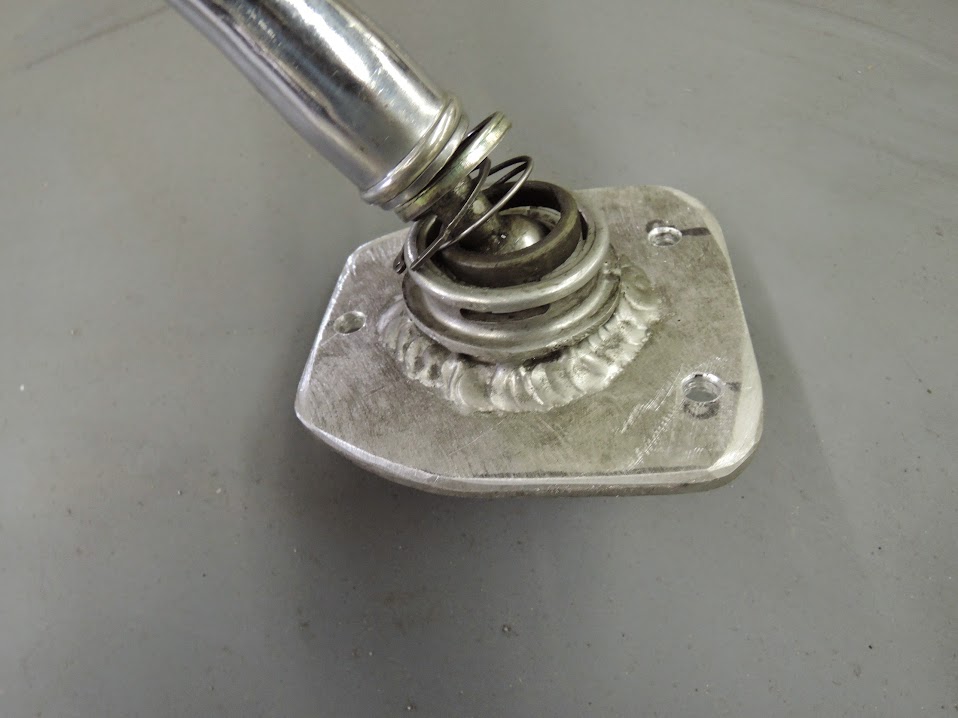
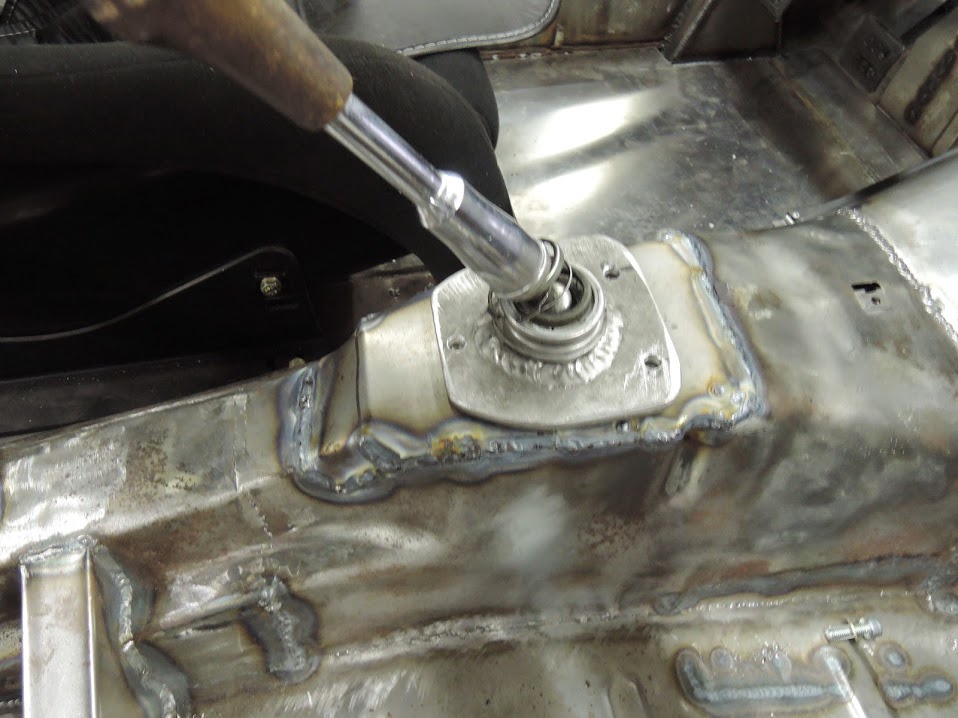
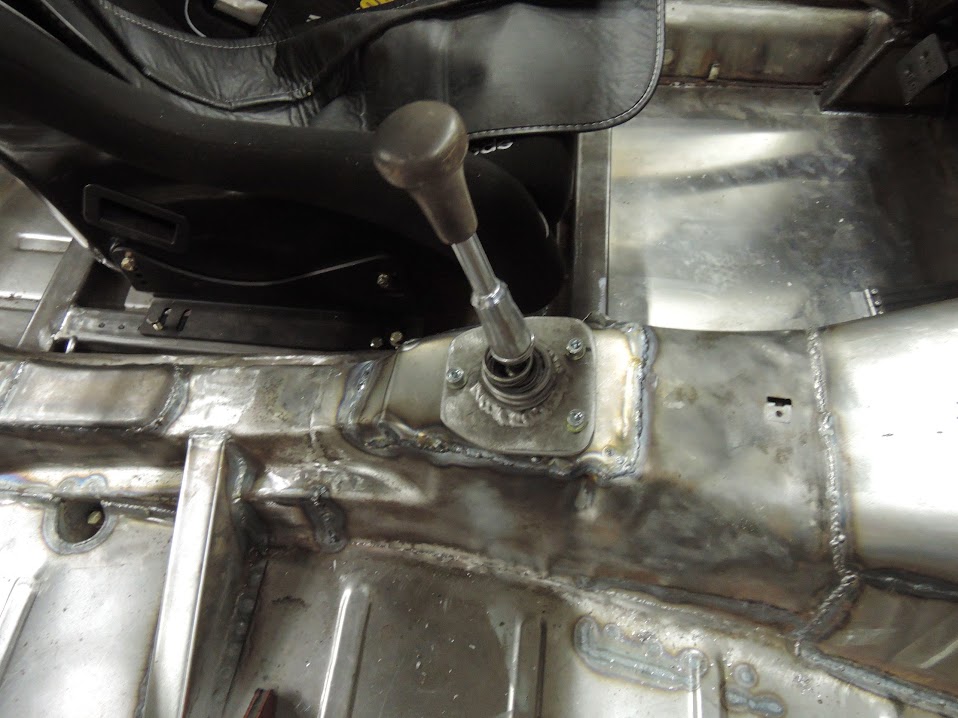
first project was to finish the shifter , I needed to tweek the tunnel where the shifter sits
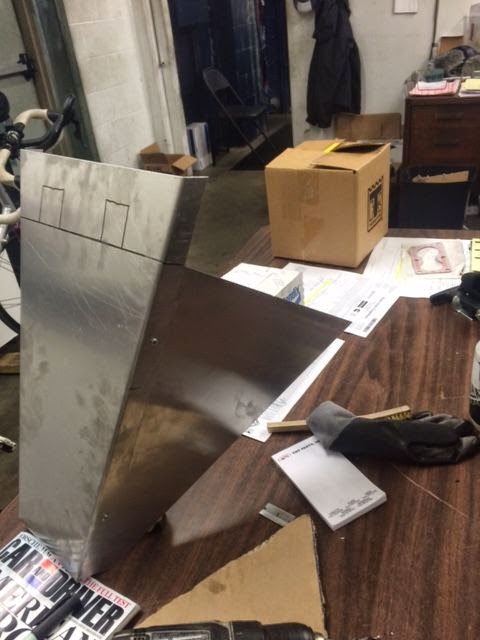
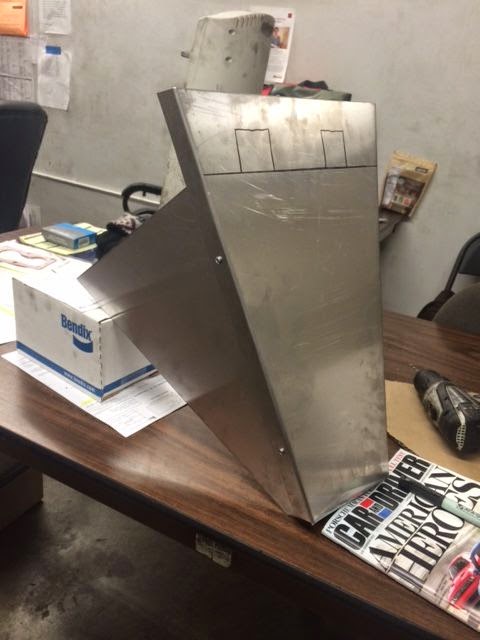
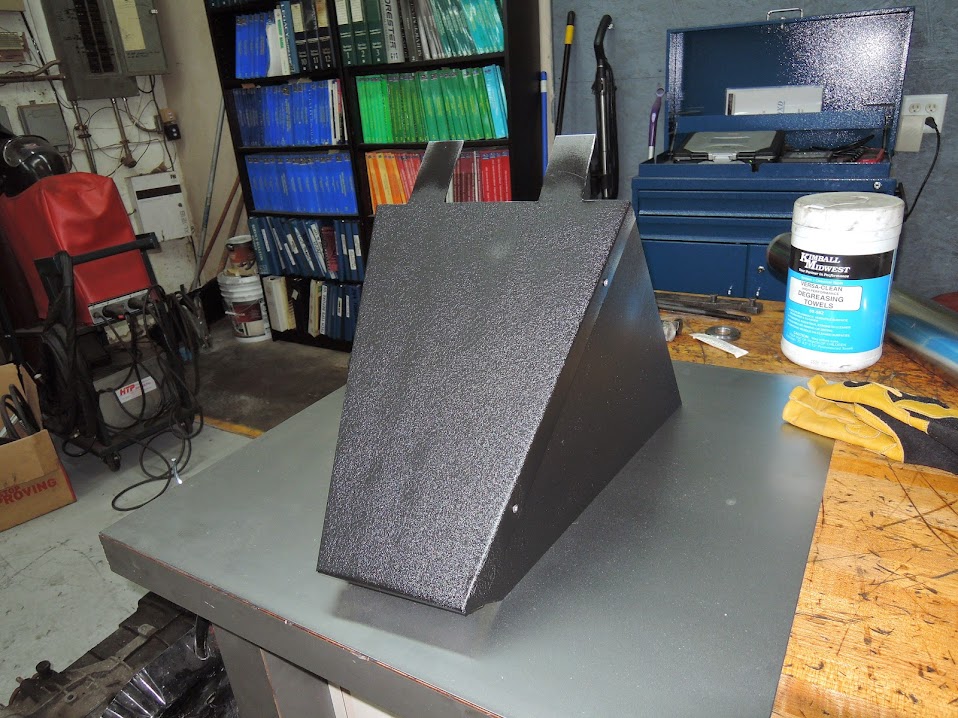
the second interior project that needed to be completed is a switch panel needed to be made
first project was to finish the shifter , I needed to tweek the tunnel where the shifter sits
the second interior project that needed to be completed is a switch panel needed to be made
Once again
Beautiful work, or should I say art, can't wait to see it on it's way to body and when she gets back- those pictures seem to be very dramatic
Do you have any idea when/where your first race will be- I think we all need to show up!
Beautiful work, or should I say art, can't wait to see it on it's way to body and when she gets back- those pictures seem to be very dramatic
Do you have any idea when/where your first race will be- I think we all need to show up!
Really appreciate you taking the time to photographically chronicle all your hard work Brendan. Most interested to see how the steering works, which I guess you won't really know until it is track tested.
Gary
Gary
Beautiful work, or should I say art, can't wait to see it on it's way to body and when she gets back- those pictures seem to be very dramatic
Do you have any idea when/where your first race will be- I think we all need to show up!
Thanks Guys, I am trying to have the car ready for this years Walter Mitty HSR race at road Atl in late April . BMW will be the featured mark and I really want to be there ! Not sure Im going to make it ,its a a lot of work but Im going to try . I would love to debut it there and meet all of you . Regardless all of you should come to this event , I think the CSL turnout should be high , and it will be a fun time.
to keep things moving I actually Dropped the car off at the Body shop yesterday, exciting stuff . and that was after picking it up from getting the exhaust done . A friend of mine I worked with at another shop ions ago ( Justin Poole) opened a Subaru shop, did the exhaust, , he is another extremely talented guy that I am lucky to know !
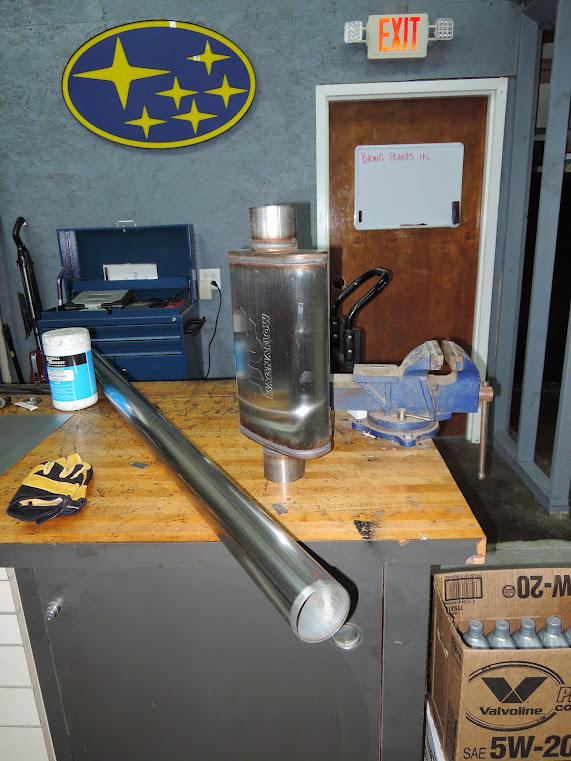
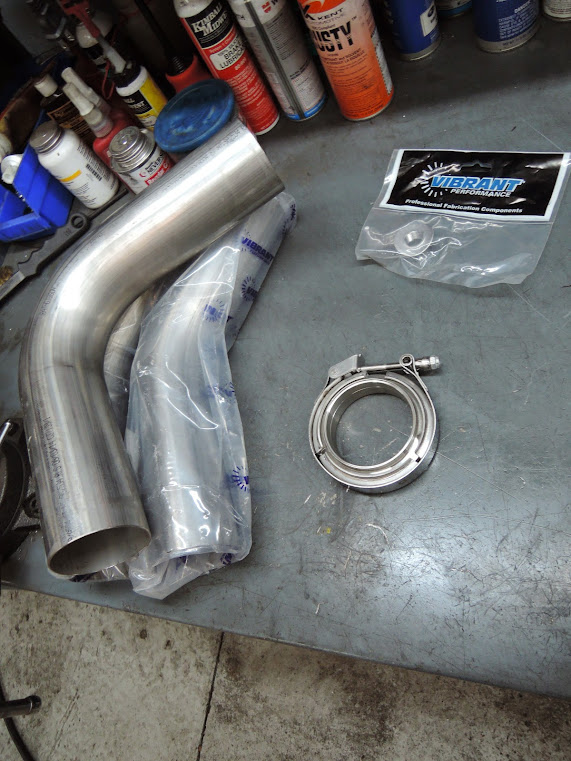
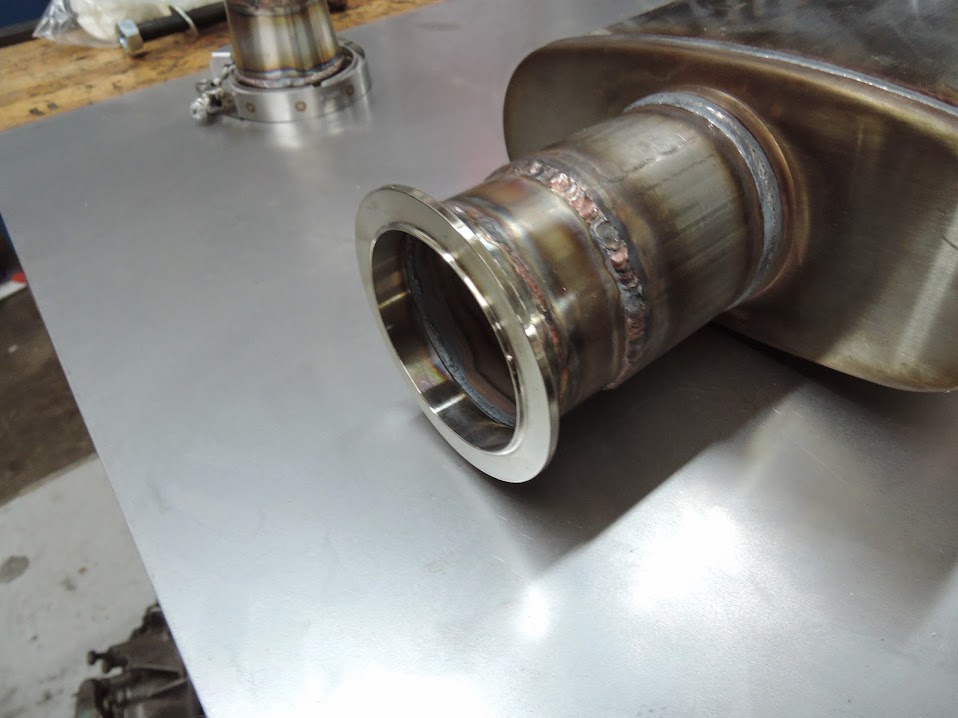
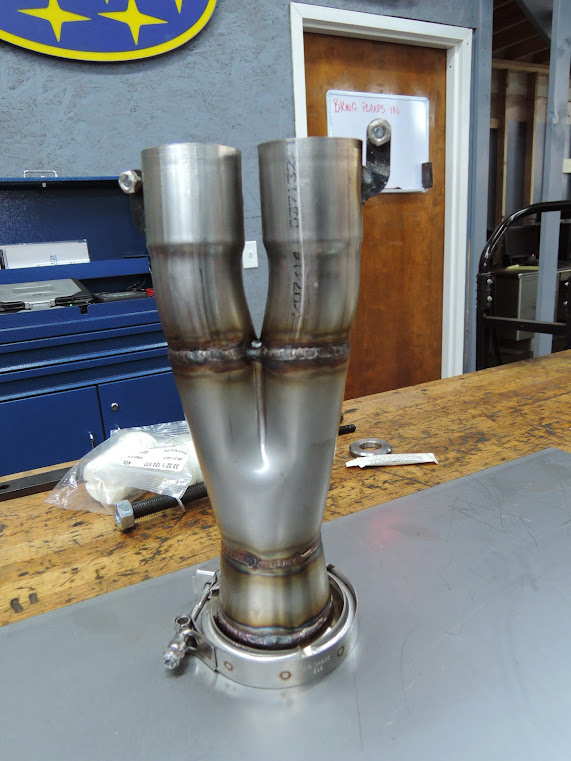
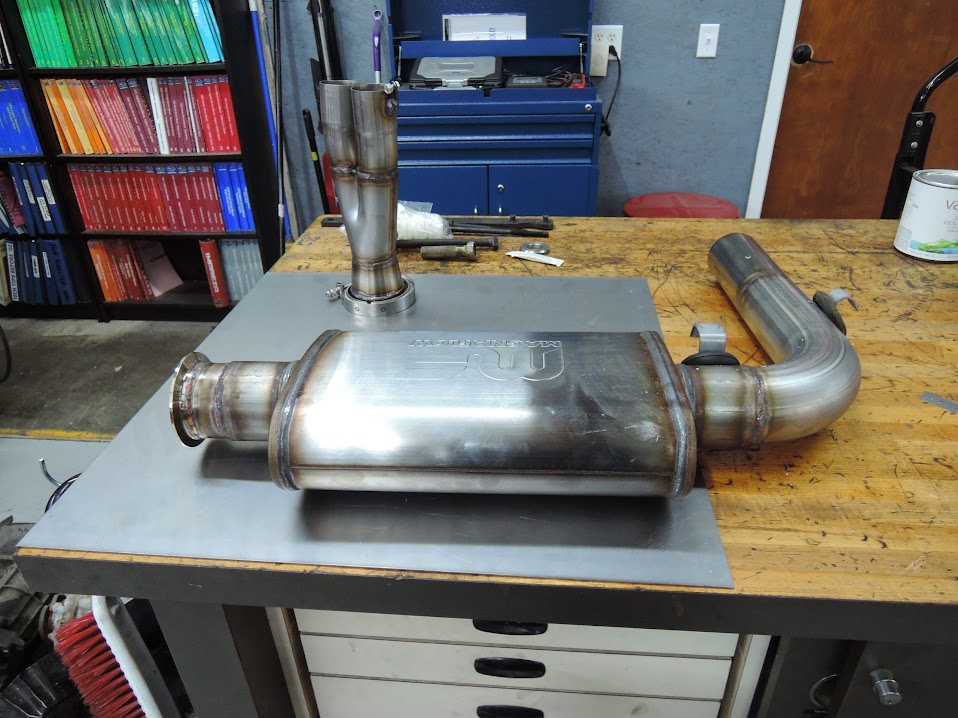
the exhaust pieces before assembly
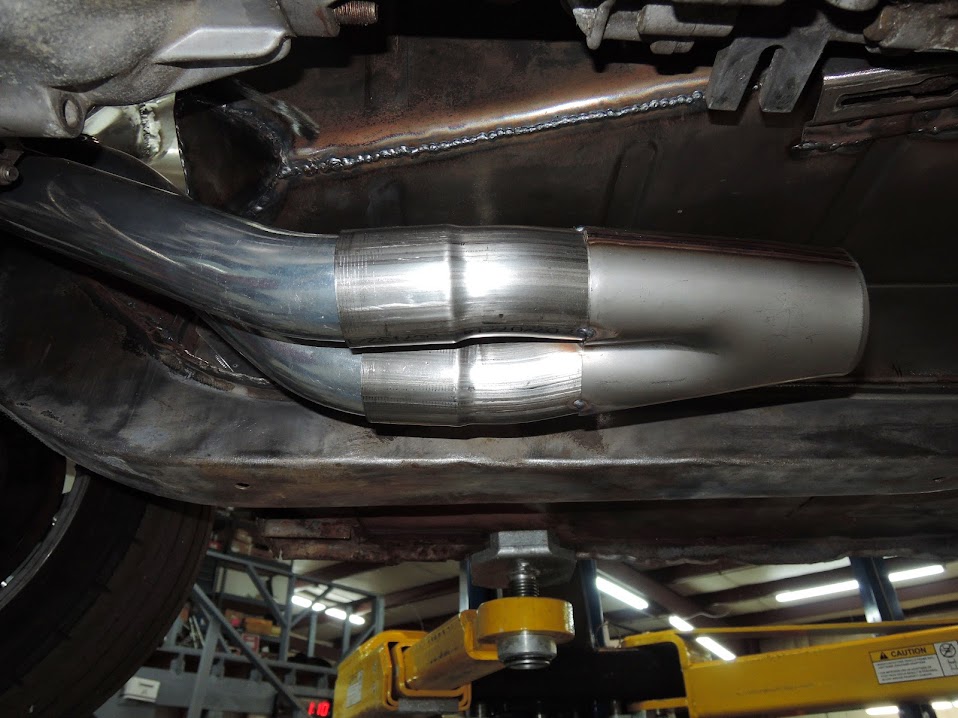
putting together the merge collector
taps welded on the headers to bolt the merge collector on
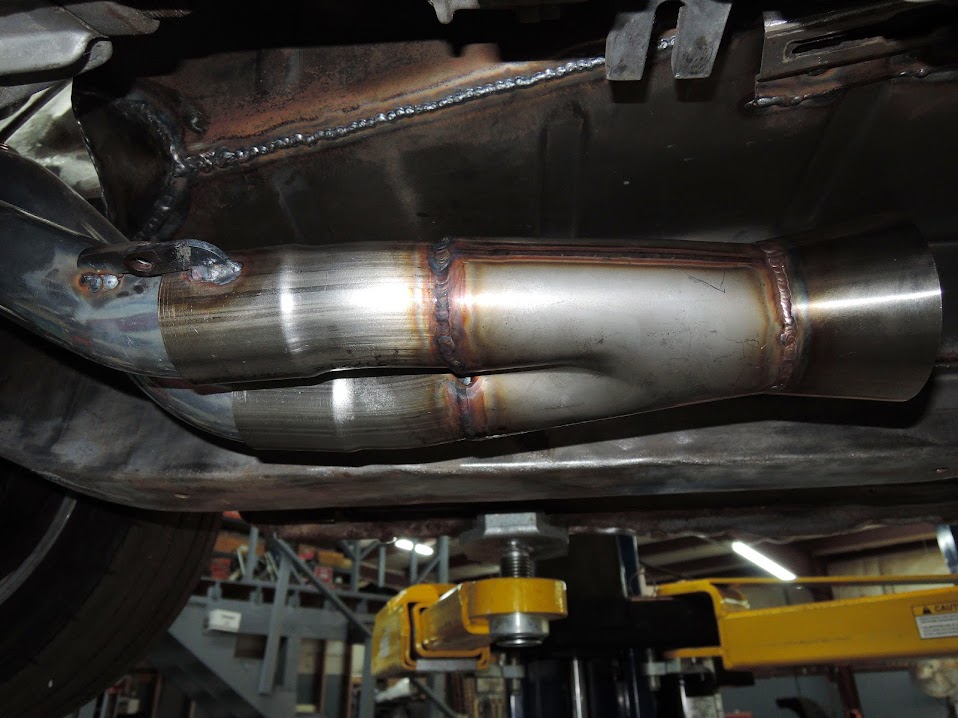
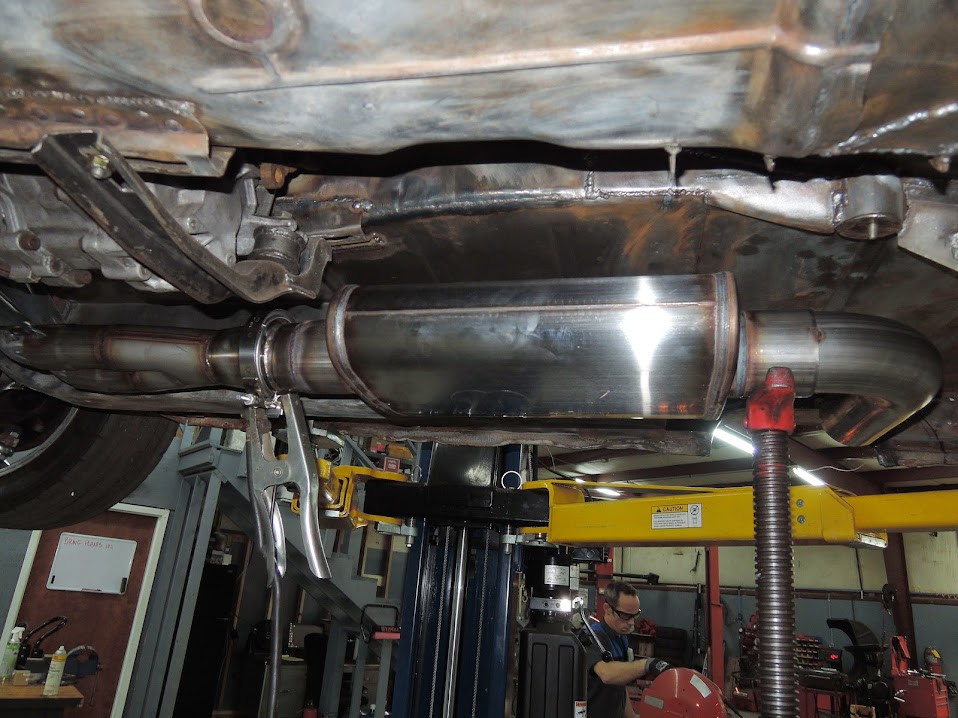
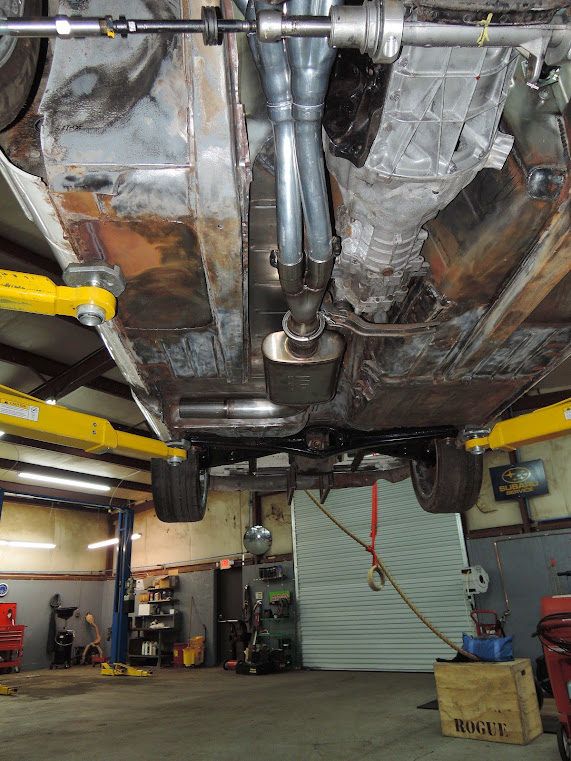
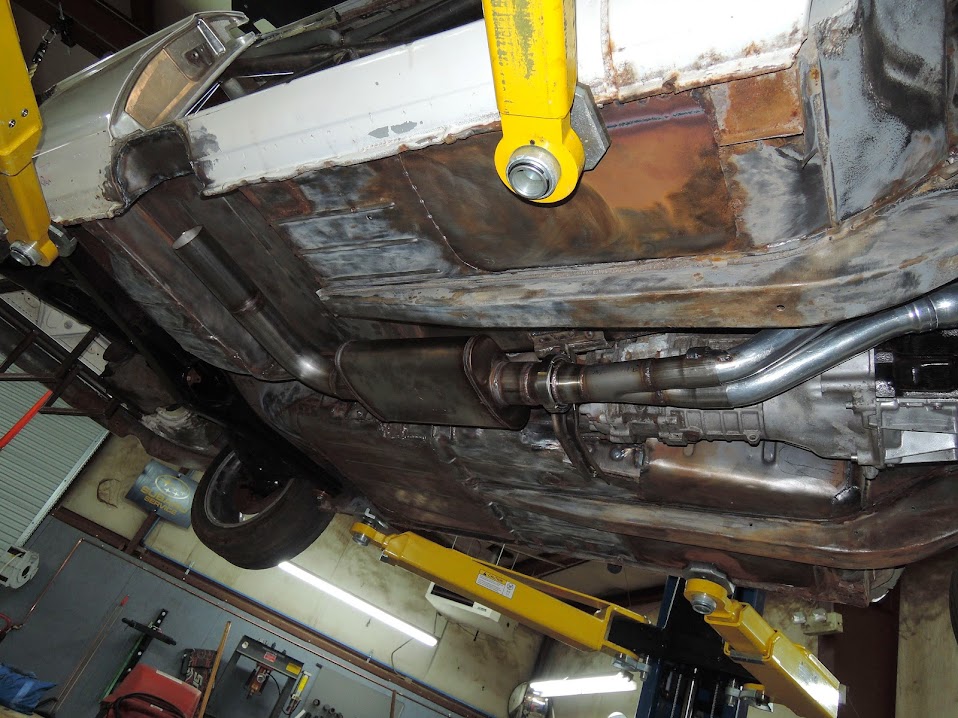
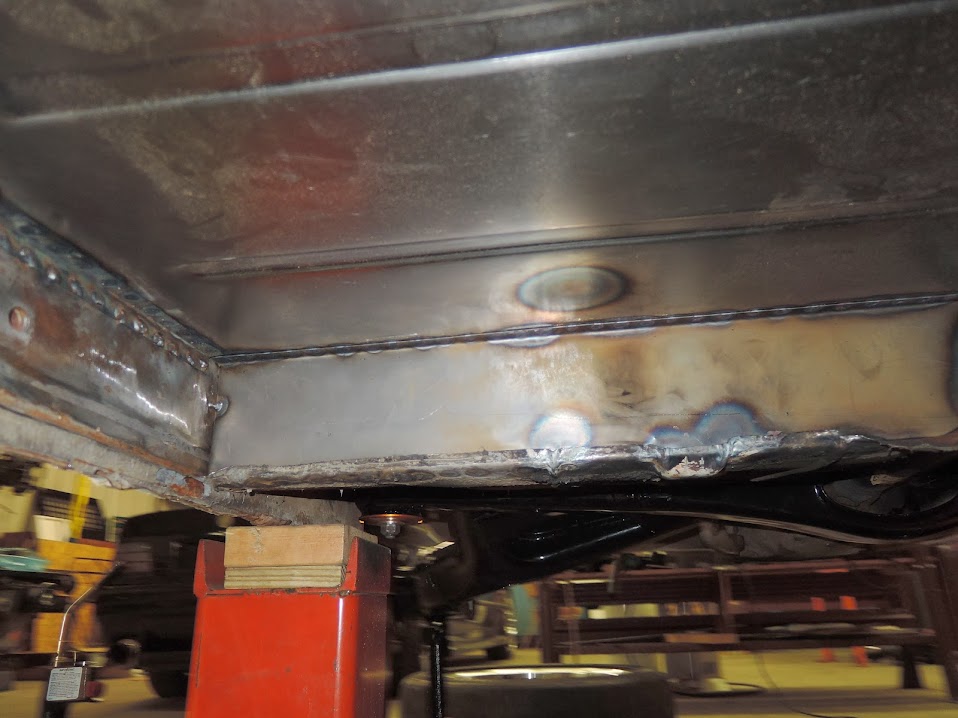
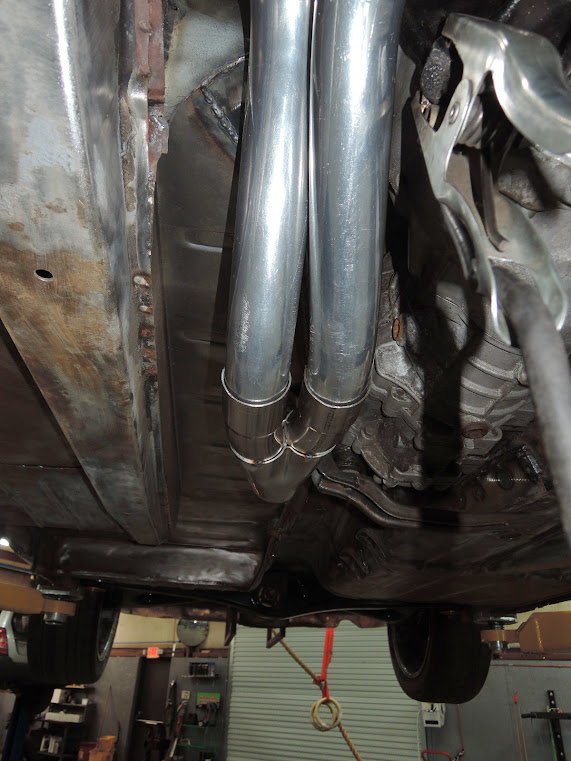
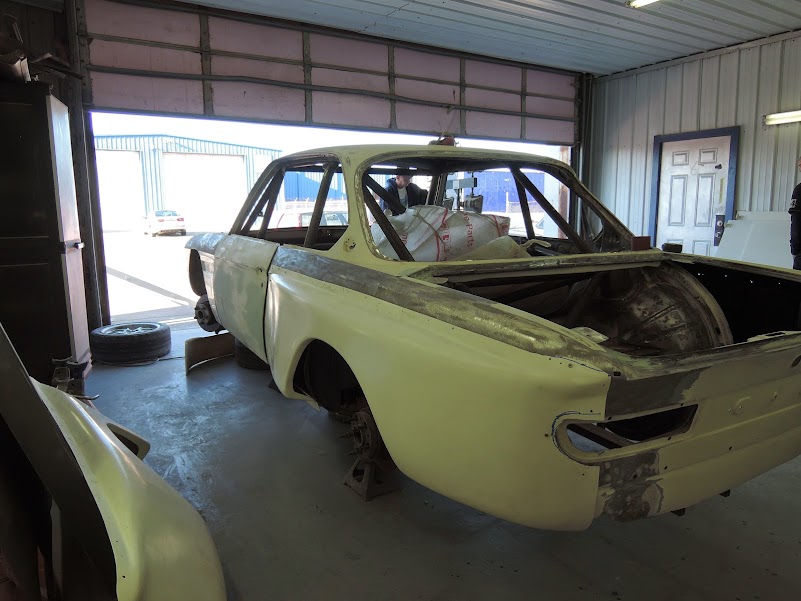
notice how nicely the exhaust is tucked into the car giving me the ground clearance I wanted
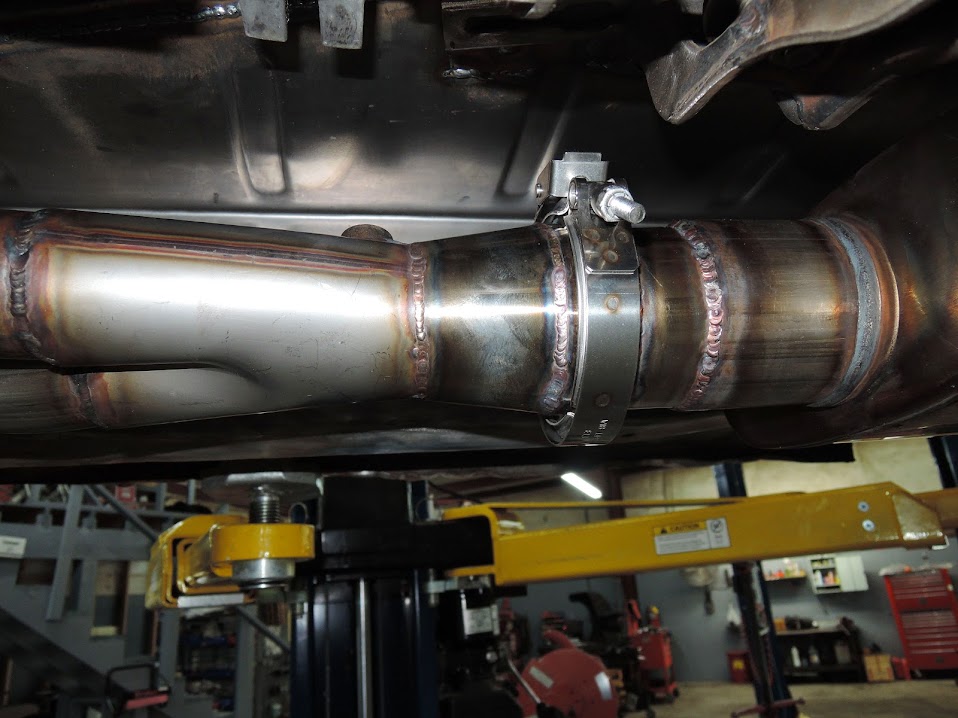
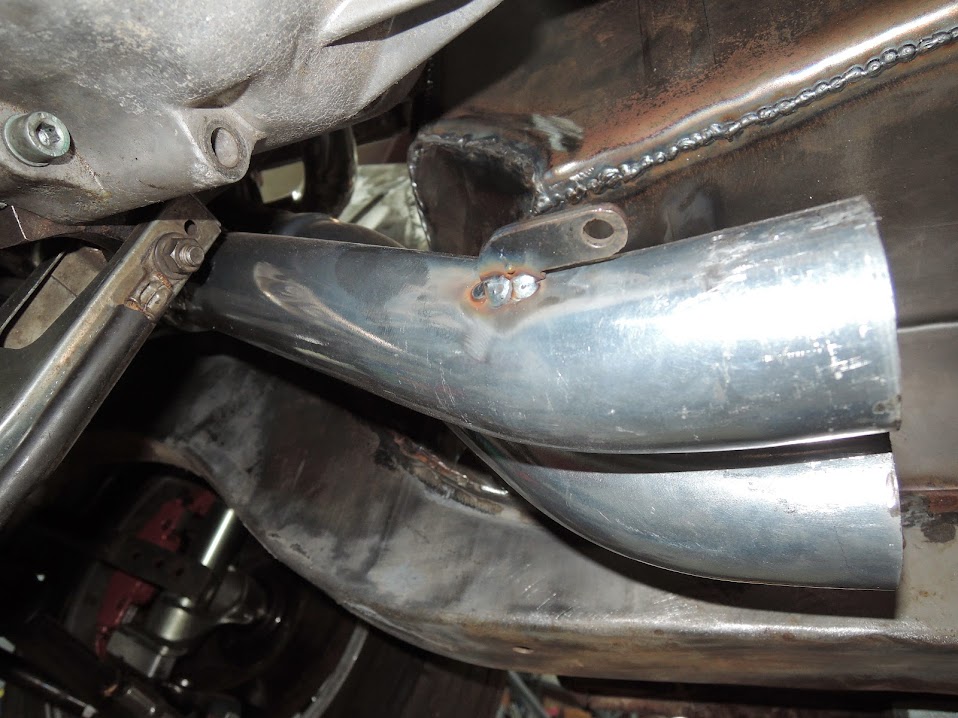
close up of v band connector to the back part of the exhaust
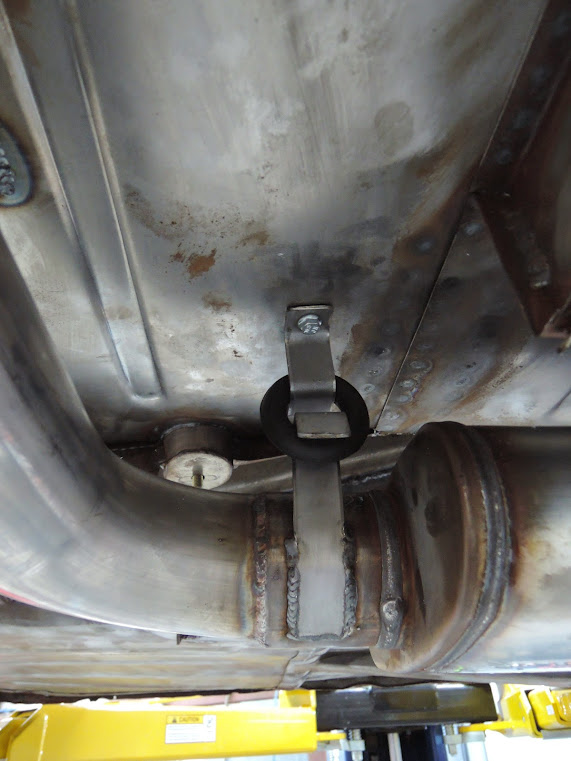
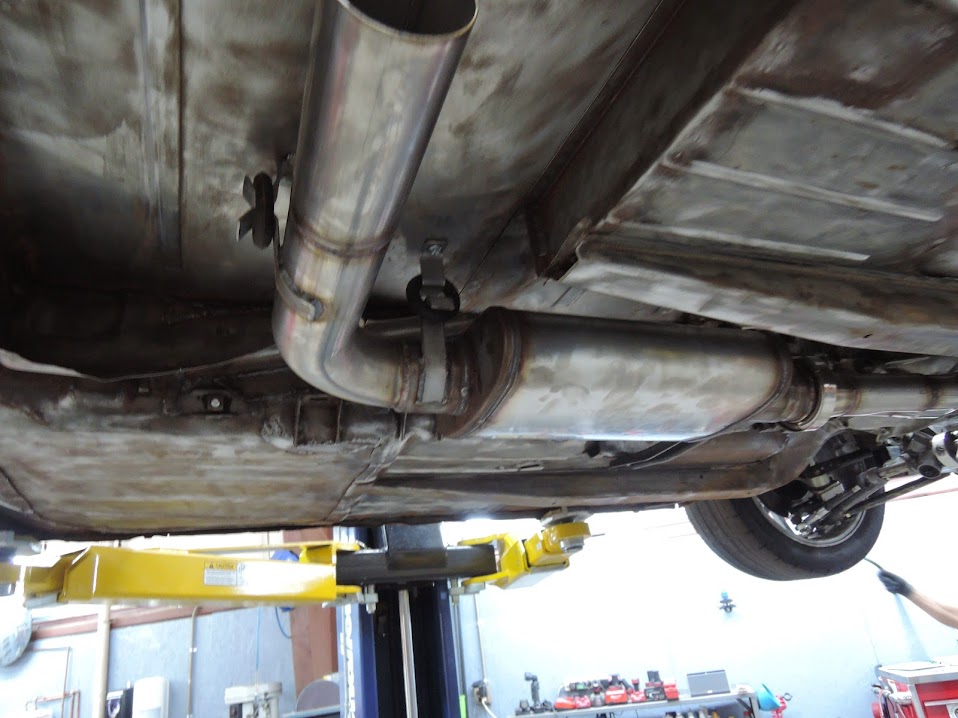
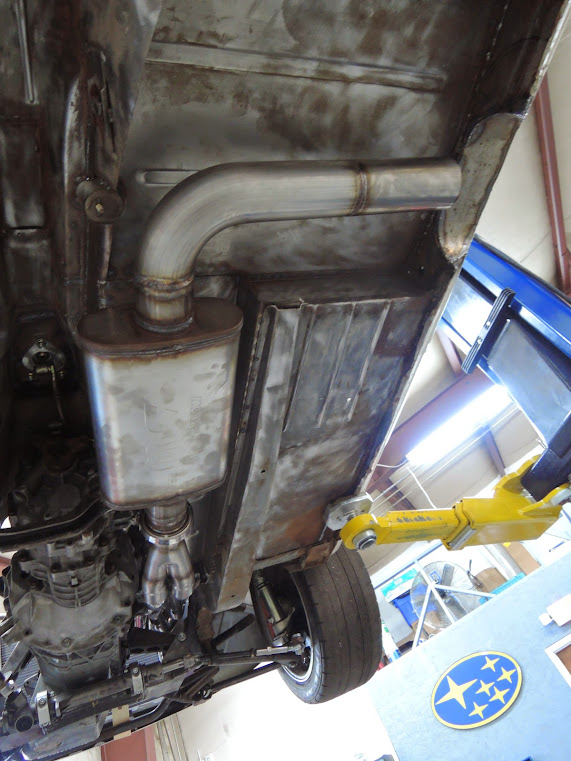
close up's of the hangers
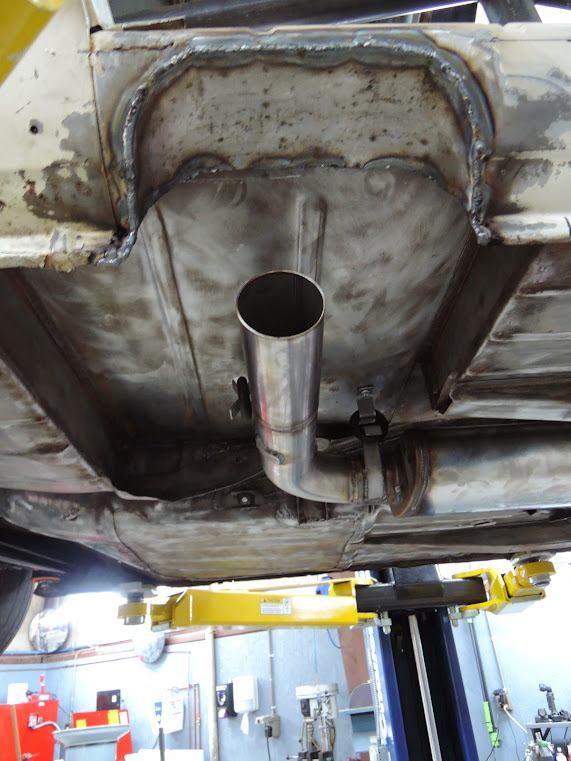
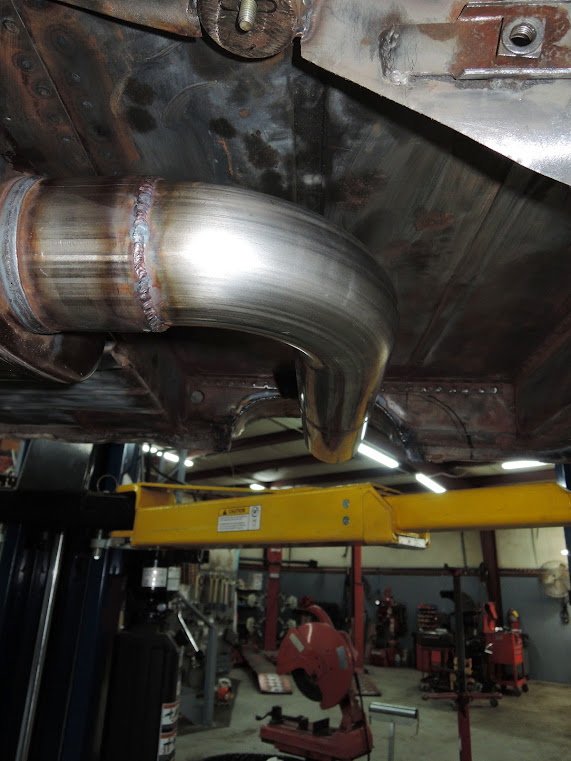
exhaust lining up with the side exit though the rocker panel
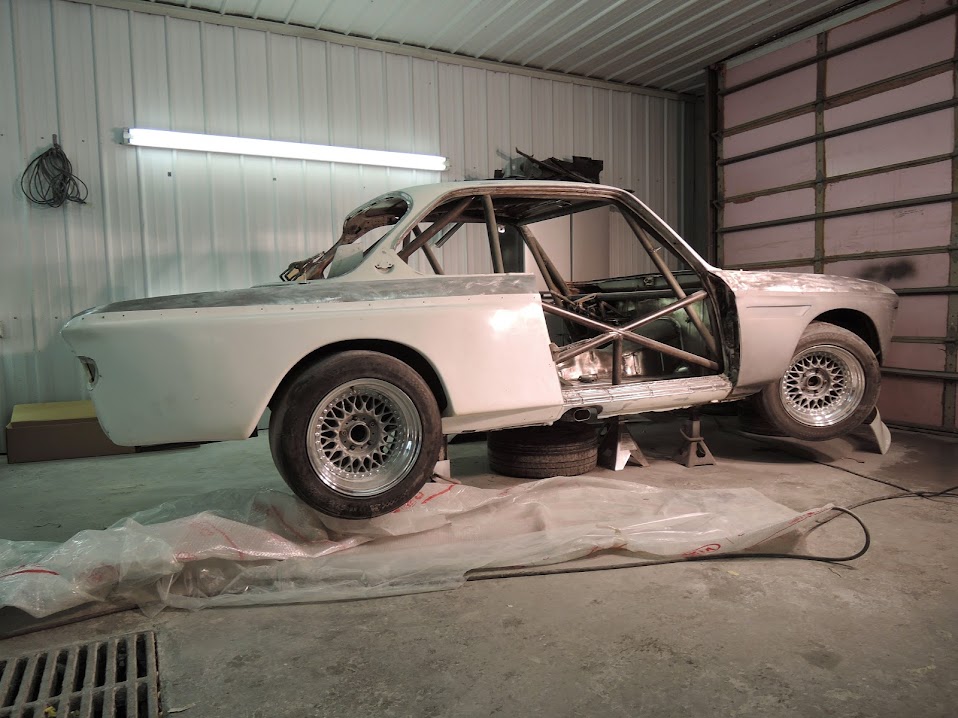
I dropped the car off at the body shop a few days ago, and am very excited at the progress that is already being made .
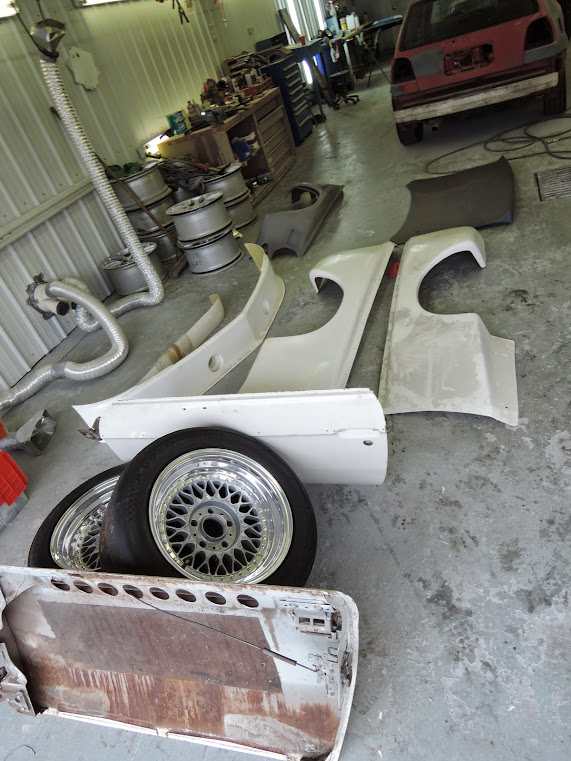
the body panels , the doors , and a bunch of trim

before I took the car up to the body shop , I basically disassembled the entire car , pulled the drivetrain out, the interior the fuel cell, etc, etc
and boxed it up .
now the exciting stuff
the panels screwed into place and cut to shape ,
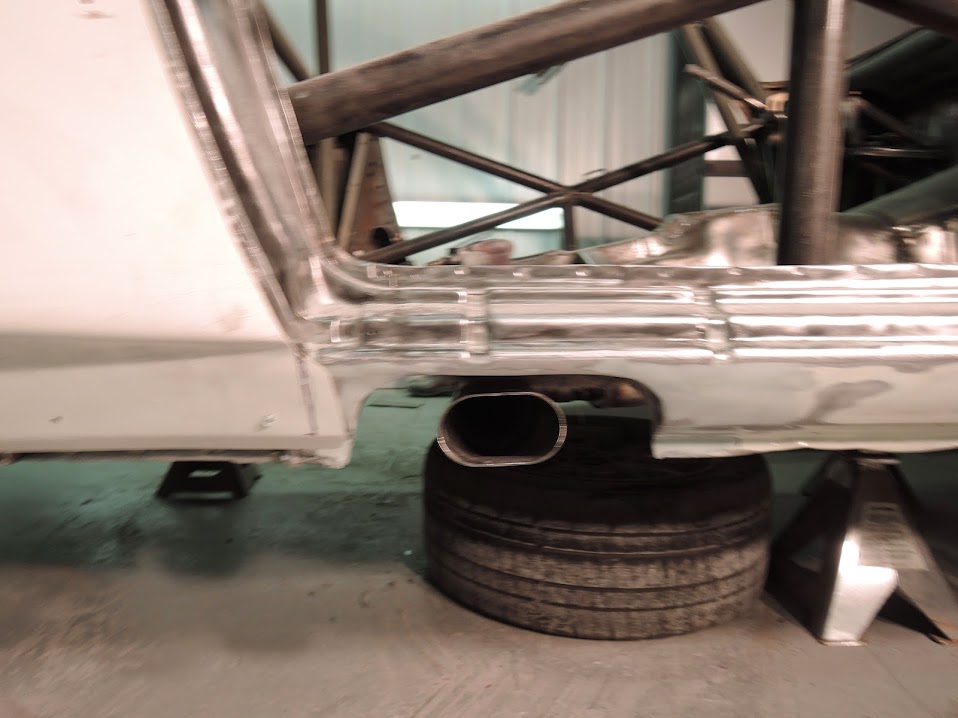
the exhaust exit smoothed out
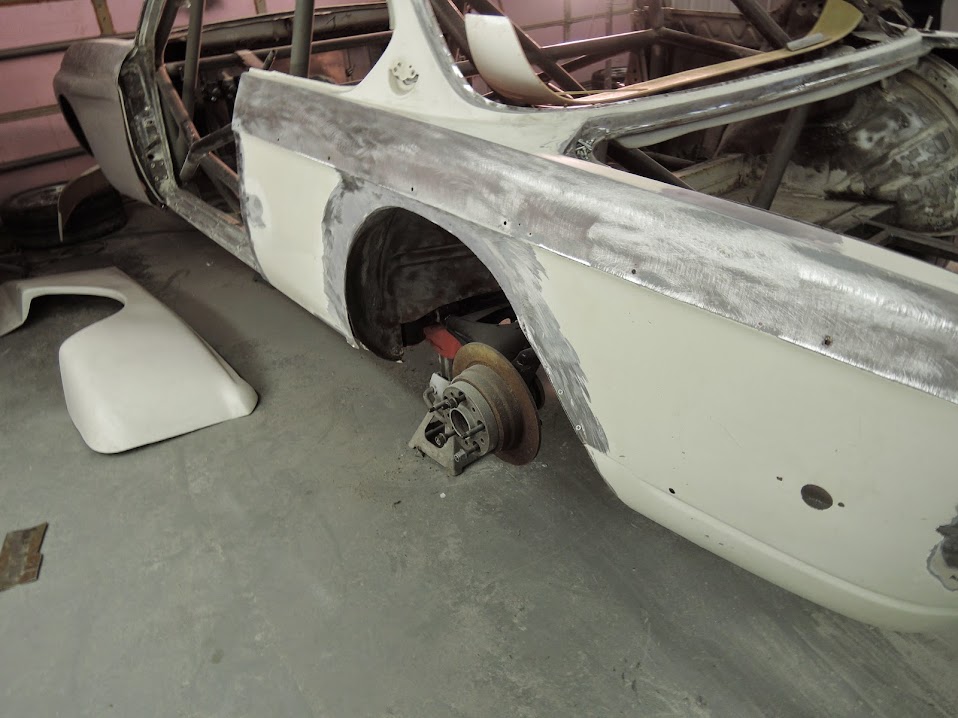
detail of the work that will be covered by the installation of the body panels . smoothed out and finished trimming of the wheel wells and some rocker repair
the body panels , the doors , and a bunch of trim
before I took the car up to the body shop , I basically disassembled the entire car , pulled the drivetrain out, the interior the fuel cell, etc, etc
and boxed it up .
now the exciting stuff
the panels screwed into place and cut to shape ,
the exhaust exit smoothed out
detail of the work that will be covered by the installation of the body panels . smoothed out and finished trimming of the wheel wells and some rocker repair
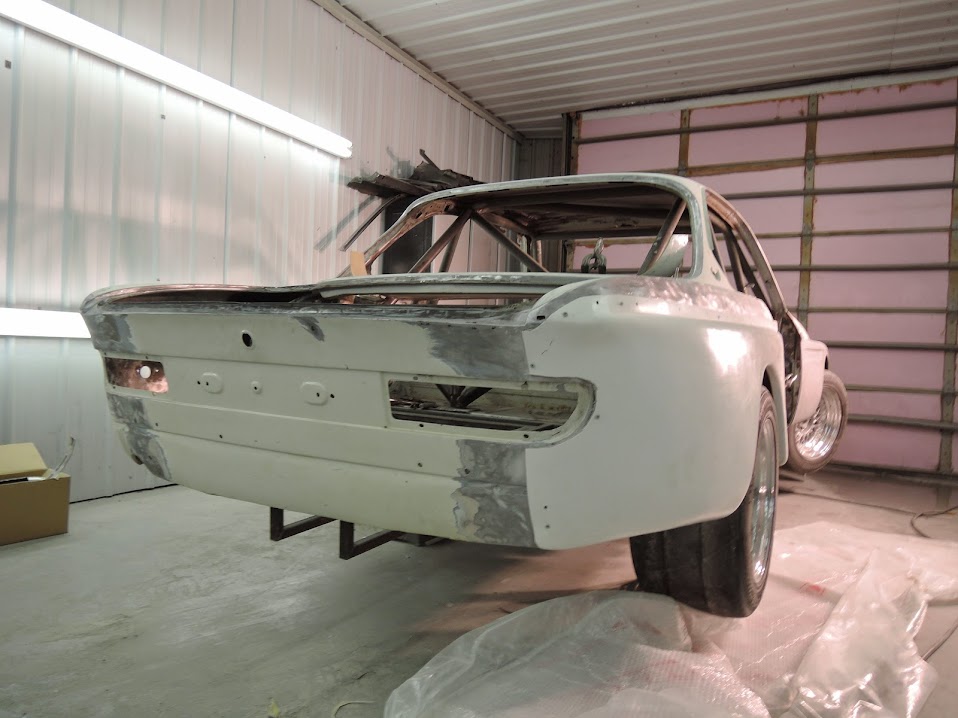
more updates from the body shop ,
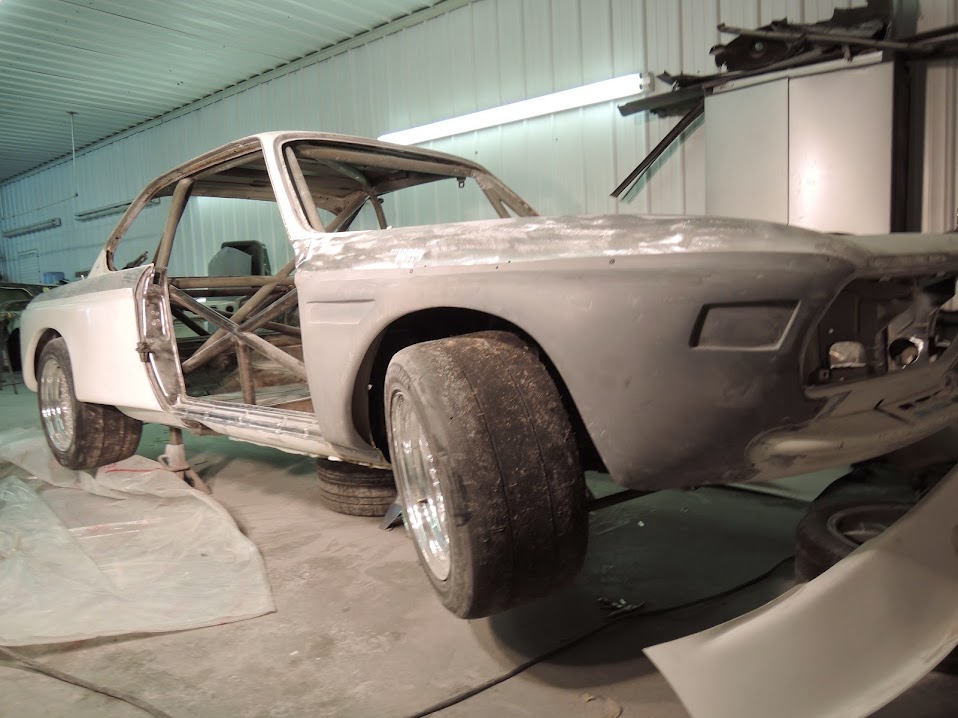
the wheel arches smoothed out and cleaned up
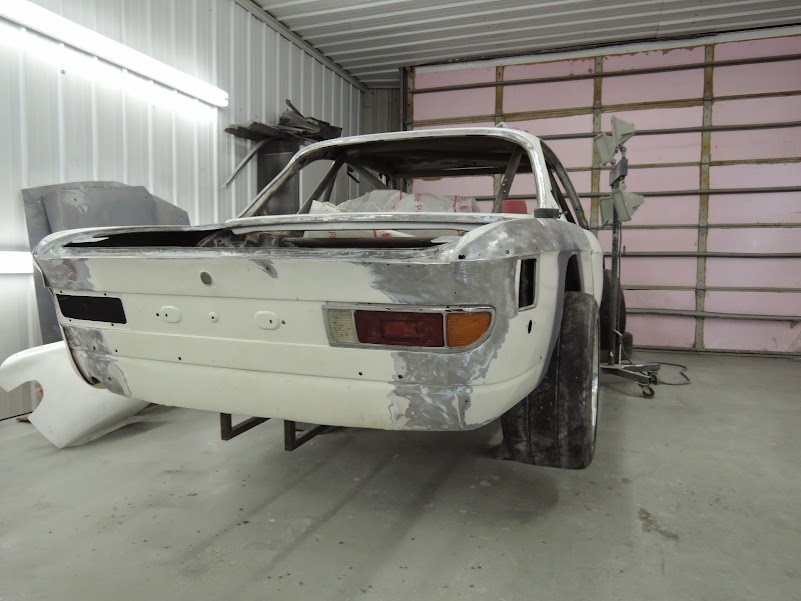
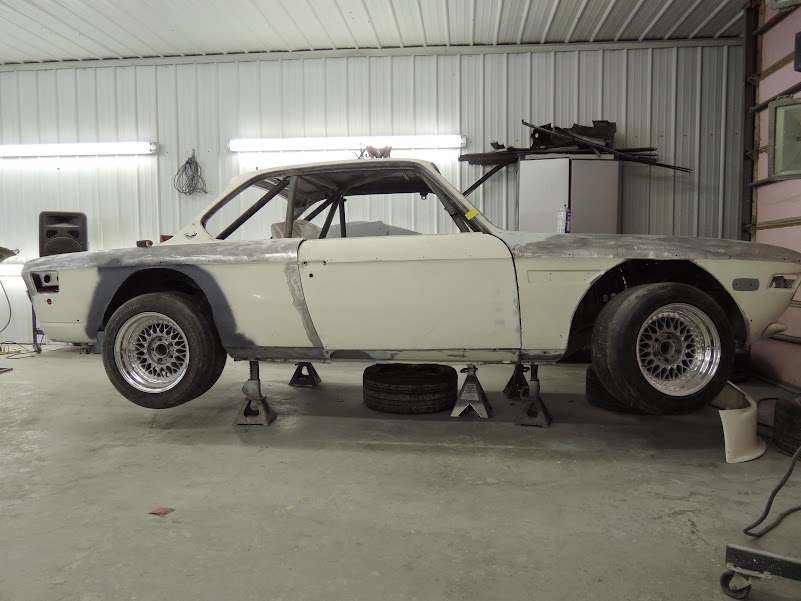
some extra wide meaty tires ! quite noticeable without the flares on
doors getting ready for paint and test fit back on the car
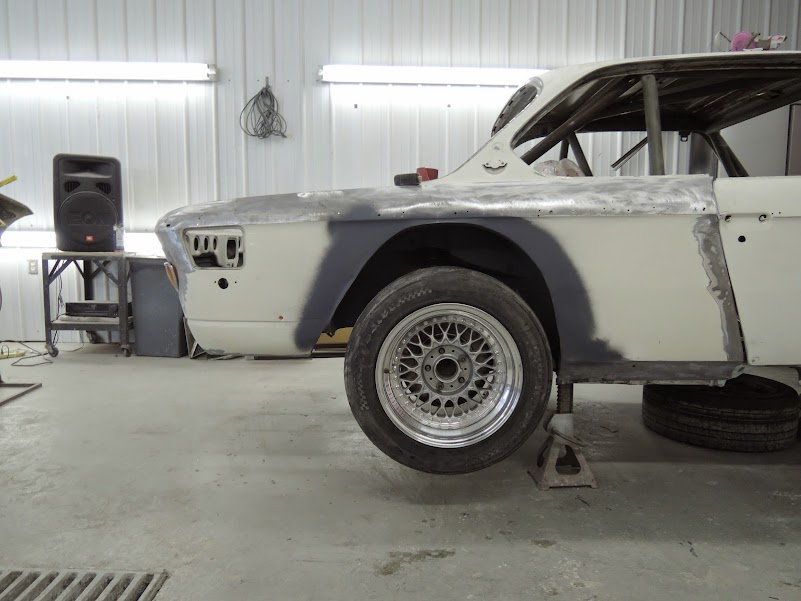
work starting on the driver side flares
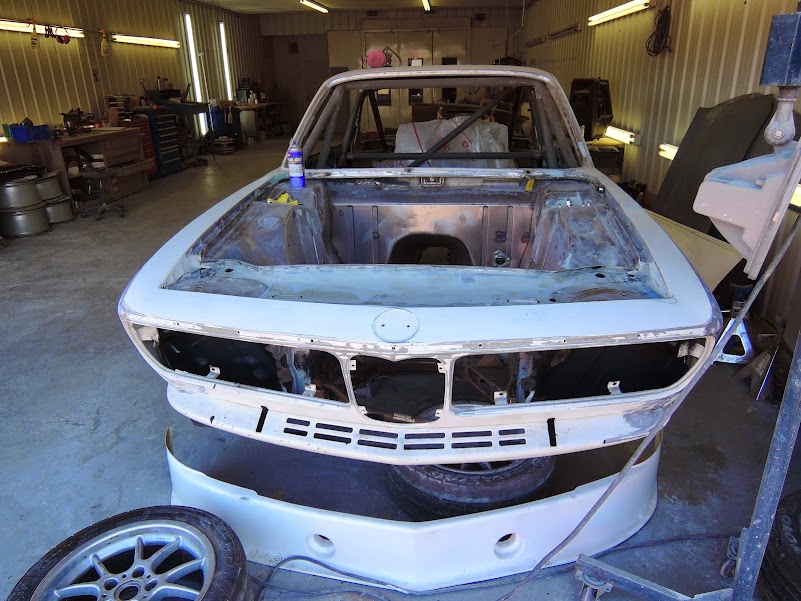
sanding and smoothing up the front
the wheel arches smoothed out and cleaned up
some extra wide meaty tires ! quite noticeable without the flares on
doors getting ready for paint and test fit back on the car
work starting on the driver side flares
sanding and smoothing up the front
This is amazing! I am particularly interested in how the rear wheel well is bridged to the flares and any duct work that goes back there. Thanks again for posting- feel like I'm a fly on the wall!