Transmission swap and engine compartment refresh Winter 2023-2024

boonies

Boonies
Site Donor $$
Messages
1,144
Reaction score
817
Location
US - Philadelphia suburbs
I launched the winter project a few weeks ago with the removal of the original 4 speed. That process went very well overall.

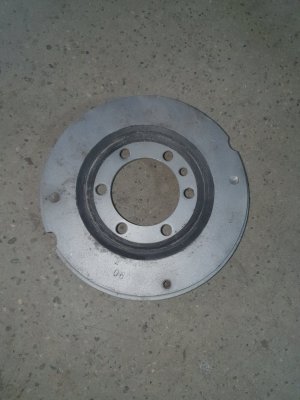
The driveshaft was easily removed and the only “surprise” was the guibo was about to grenade. Not sure of the age, but my timing was perfect.

I had my son give me a hand lifting the 5 speed into position (nice to have him here, but with the transmission jack it was easier than I expected and could have done it by myself. I have measured for the new driveshaft so that will be ordered this week. Not needed for a couple of months though.

With the transmission out of the way I was able to complete the removal of non-OEM under-coat that was applied when rust repair was completed on the car in the early 1990’s. Using an ocilating tool I was able to remove the undercoating and then used die grinders to clean up areas that needed some more aggressive cleaning.

There were a few surface rust spots along the frame rails and the larger panel sections that had been replaced had some surface rust under the paint layer. All that was removed, sanded and then rust converter used to treat the bare metal.

Over the past few days I have then applied direct to metal epoxy primer to the areas that were cleaned (rear seat forward). The next step will be SEM undercoat.

Once the undercoat is completed I plan to roll the car off the lift ramps and remove the engine.

IMG_6006.JPG
IMG_6100.JPG
IMG_6107.JPG
IMG_6125.JPG
 

Krzysztof

Well-Known Member
Site Donor
Messages
1,659
Reaction score
793
Location
Poland
Huge amount of work.

Which blade You have been using for oscillating tool?

Is the polyurethane original material or it was also applied in 90's?
 

boonies

Boonies
Site Donor $$
Messages
1,144
Reaction score
817
Location
US - Philadelphia suburbs
I have been using a scraping blade similar to the one below. The oscillating tool I am using is a Fein Multi-master, but many others now make them. It is tiresome working overhead, but the tool makes fast work of the largest areas. Final prep happens with either the battery or air die grinders with abrasive discs, and then a pre-paint clean and rust neutralizer.

I believe the black under-seal was added in the 90's, underneath that the tan colored material is, I believe, the original under-seal. I believe I read here that the original primer was tan, and the under-seal was gray. I am replacing with a white epoxy after cleaning and will apply SEM under-seal over all. The plan is to do the front portion of the car this winter and pull the rear axle assembly next winter and will then refresh the remaining under-seal when the rear differential and axle assemblies are out for refresh.


1703442457568.png
 

rsporsche

Moderator
Site Donor $$
Messages
10,685
Reaction score
3,714
Location
Atlanta, GA
yes, that's correct Steve. now comes all the fun of getting out a nice stiff toothbrush to clean all of those little cavities and other specialty tools to get it all clean so it will paint beautifully
 

Krzysztof

Well-Known Member
Site Donor
Messages
1,659
Reaction score
793
Location
Poland
Looks nice (despite the dirt of course).

So many of us would like to have such a nice preserved (from rust perspective) engine compartment in our coupes just to concentrate on degreasing and paint prep.
 

boonies

Boonies
Site Donor $$
Messages
1,144
Reaction score
817
Location
US - Philadelphia suburbs
Some progress made. The sub-frame is out, but not without some struggles with brake lines. The brake line connections on either end of the rubber lines were thoroughly seized. Repeated application of penetrating oil and fire did not resolve, so the cutting disk did. I was a little disappointed but had anticipated the lines would be tough as this was originally an east coast car and exposed to tough conditions prior to its pampered existence now. New lines from W&N are already on hand.

Heat was needed on the bottom bolts of the strut housings and I only lost one bolt there which I will need to source. The original spring spacers were still installed and were full of road sand. They will be cleaned and stored with other parts should the next owner (someday) wish to re-use them.

The rubber on the ball joints is completely perished and I was surprised to find that the joints themselves were in good shape. These will not be re-used as replacements are already on hand. I had not purchased a center link though, and found that the joints on it were frozen solid from rust so a new one was ordered last night.

More work planned today to separate the remaining components from the sub-frame to arrange for cleaning and powder coating.


Sub frame removed.JPG
Right side shows condition of ball joint rubber.JPG
Left side with spacer removed.JPG
 

Nicad

Well-Known Member
Site Donor
Messages
3,519
Reaction score
544
Location
Toronto
On the factory underseal, I had a Hell of a time getting it off, but eventually found that floor glue solvent worked decently at dissolving it. I have had second thoughts about stripping the whole underside. I don't have the fortitude, so will just remove a few suspect areas when I go under....one of these days. Did a test session on my back last week imagining it as home for a spell. Hopefully I'll be like a groundhog in Spring and emerge.
 

boonies

Boonies
Site Donor $$
Messages
1,144
Reaction score
817
Location
US - Philadelphia suburbs
The paint on the power brake pedestal really needed a refresh. The pedestal itself is integral to the pedal box, so...out with the pedal box.

Brake booster and pedistal.jpg
Pedal box from bottom engine compartment.jpg


The steering column needs to be removed (you may be able to loosen and set aside. I needed to remove because...

The top cover of the steering column is bolted to the pedal box by four bolts. I initially loosened all four then proceeded to remove them and found that the aluminum cover had cracked where both the front (closest to the firewall) were located. I thought I was was careful not to stress the cover itself and thus was surprised to find (or cause) the damage. Now, will need to have the part tig welded.

IMG_E0018.jpg
 
Last edited:

Breiti

Well-Known Member
Messages
165
Reaction score
185
Location
Mainz Germany
Ahrggg, that sucks.
Im so sorry dir you

I try to close the holes at my automatic one cause I swap to stick shift.
Horrible to weld.... I gave up.

Breiti
 

boonies

Boonies
Site Donor $$
Messages
1,144
Reaction score
817
Location
US - Philadelphia suburbs
Thanks @Breiti , I will take this one to a welder that I recently used to repair a crack on a transmission mount. He did a great job and hope that he will be able to finesse this one as it is relatively thin and I suspect that heat from the process could cause additional damage.
 

boonies

Boonies
Site Donor $$
Messages
1,144
Reaction score
817
Location
US - Philadelphia suburbs
Pedal box color. I will admit that I was surprised when I got it out into the light that the interior color was the "gray green" either RAL 7022 or 7043.

There is not a lot of paint left on the engine compartment side, but I thought it was black...Could two colors have been used? I think not, but look forward to other thoughts.

To show the comparison with black, you will see in the picture below a bracket used to attach wiring for the blinker (as I recall) is black and the pedal box is gray green.

@rsporsche, based on discussion we might want to update the color placement link.
Pedal box assy and position of bracket 2.jpg
 

Breiti

Well-Known Member
Messages
165
Reaction score
185
Location
Mainz Germany
That is what I saw in somebody's basement

As far as I know original BMW brand new, but I can't guarantee it.

Mine is def. not changed or repainted and it's black. (Mod 72)

Breiti
 

Attachments

  • 20231217_151238.jpg
    20231217_151238.jpg
    233.4 KB · Views: 51
Last edited:

Larry Louton

Well-Known Member
Site Donor $$
Messages
102
Reaction score
47
Location
Venice Florida
It was the belts keeping that balancer on. Invest in blue Loc-Tite young man. Stevehose got a lockplate from somebody.

Larry Louton
 
Top