Patricia A. Mayer's 3.0 CS / Paul Cain's Fjord project / The 300 mile Test Drive / VIII / Final Punch List

paul cain

Well-Known Member
Site Donor $$
Messages
684
Reaction score
1,345
Location
Orange County
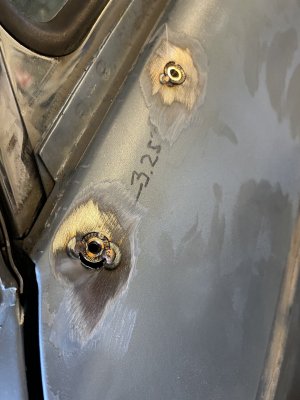
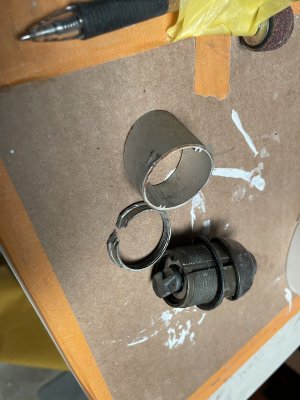
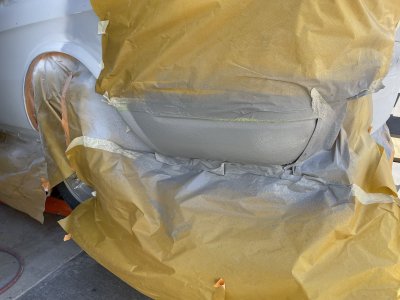
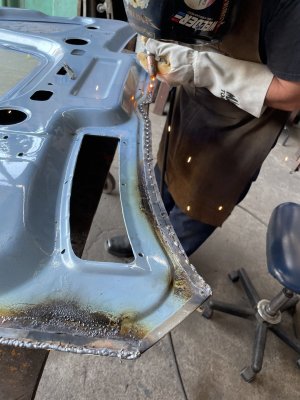
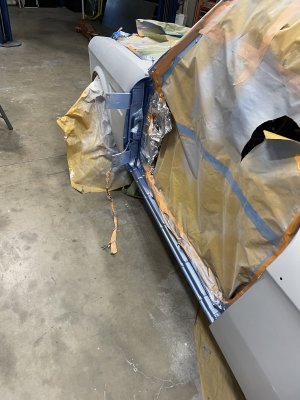
Image 1262 Moving the outside door mirrors to the Euro position in the corner of the door. These are stainless steel 3mm bolts fitted flush to the body and tack welded.

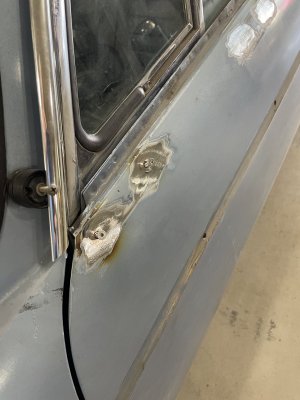
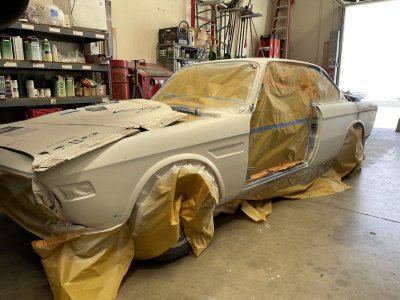
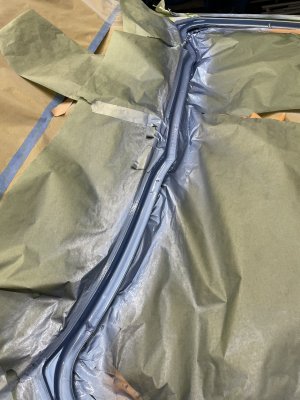
Image 1274 Welded in and ground flush. Also welded up the holes for the U.S. Market mirror locations.

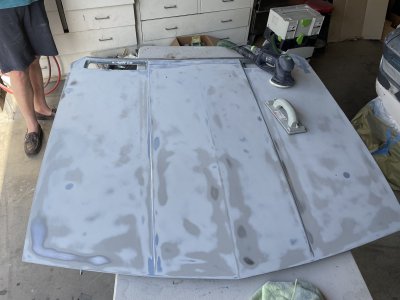
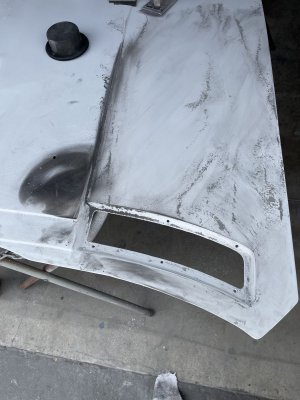
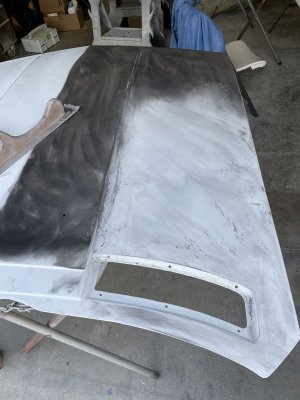
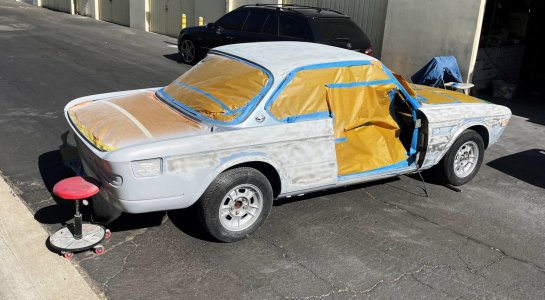
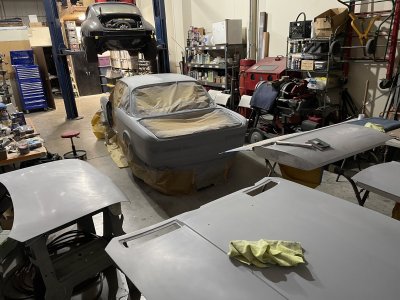
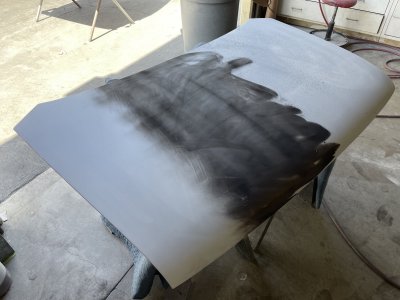
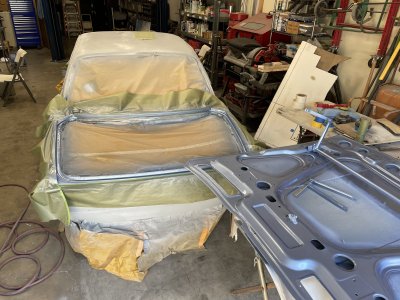
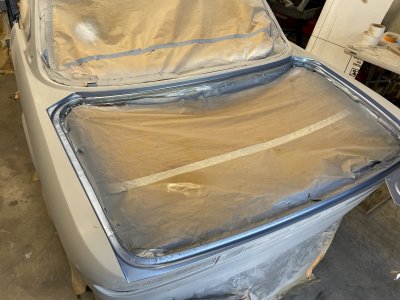
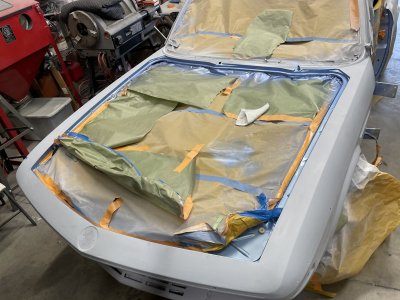
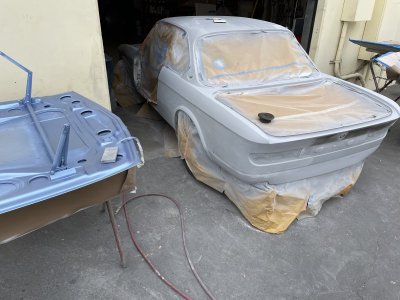
Image 1287 Top right corner is a Festool 125+ Sander with a full vacuum system. What a pleasure to work with. The plan on this repaint it to retain as much of the original BMW sealer and primer as possible. It is providing very good protection, is completely hardened and is very high quality. This image is after two steps: Sanding with the Festool 125+ using 180 grit to remove whats left of the clear coat and cutting through about 1/2 of the base coat. Then converting to a 10'' long flat sanding with 220 grit cross hatching to both flatten the panel and remove the remainder of the Fjord blue base coat.

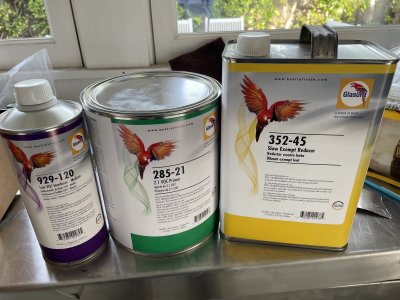
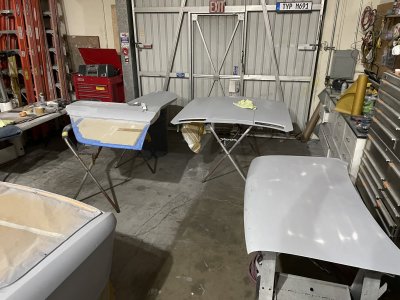
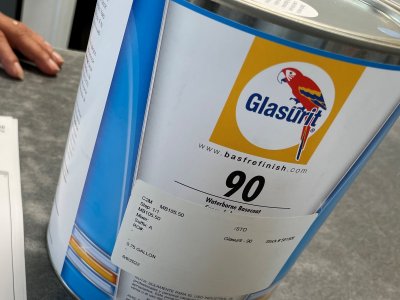
Then this weekend begin with one coat of Glasurit high build primer. Hoping to only two step the block sanding. First sand will be with 320 grit. I did the math, and $ / Oz. this stuff is about the same price as cocaine or women's make up.
 

Attachments

  • IMG_1262.jpg
    IMG_1262.jpg
    297.9 KB · Views: 314
  • IMG_1274.jpg
    IMG_1274.jpg
    255.9 KB · Views: 268
  • IMG_1287 (1).jpg
    IMG_1287 (1).jpg
    210.2 KB · Views: 225
  • Glasurit High Build Primer .jpg
    Glasurit High Build Primer .jpg
    309.8 KB · Views: 221

paul cain

Well-Known Member
Site Donor $$
Messages
684
Reaction score
1,345
Location
Orange County
Yesterday thanks to Rob Edwards (wind blocker in the video) and Mike Pelly we full prepped the four removable panels from the car and got two thin layers of DTM (direct to metal primer) down. Today was a first cut and guidecoat and blocking with the long board using 320 Grit. Sanding out the guide coat I find to be immensely gratifying, particularly at the higher grits like 400 and 600. We still have very long way to go. Hoping for only one coat of the Glasurit high build primer.


Attachments

  • guide coat.jpg
    guide coat.jpg
    295.2 KB · Views: 189
  • Lower Door Edges now pristine.jpg
    Lower Door Edges now pristine.jpg
    267.1 KB · Views: 171
  • sanding cross hatch with a long flat board.jpg
    sanding cross hatch with a long flat board.jpg
    275.6 KB · Views: 189

paul cain

Well-Known Member
Site Donor $$
Messages
684
Reaction score
1,345
Location
Orange County
Today was extremely productive. Rob Edwards brought up the Festool 125+ Sander. We did the entire roof in 9 minutes using 150 Grit paper. Check out the material removal vs. a conventional Makita hand sander.


Desperate time's call for desperate measures: I had to get all the chrome off the car and the trunk lock (ring) was frozen on. I'd applied PB Blaster the day before, but no luck.
Had to grind it off.

I am in the market to purchase one of these threaded rings that fit to the trunk lock. Anyone have one laying around? Much appreciated.
 

Attachments

  • Panels with high build primer Round 1.jpg
    Panels with high build primer Round 1.jpg
    337.3 KB · Views: 168
  • rough sanding the clear coat off.jpg
    rough sanding the clear coat off.jpg
    304.9 KB · Views: 177
  • WTB Threaded Ring.jpg
    WTB Threaded Ring.jpg
    327.3 KB · Views: 181

adawil2002

Well-Known Member
Site Donor $$
Messages
5,188
Reaction score
3,050
Location
Brunswick, Maine
Electric or air random orbit with a vacuum will always win over a quarter sheet "buzzy" sander which is for fine finishing.
 

Candia4441

Well-Known Member
Site Donor $
Site Donor $$
Messages
929
Reaction score
311
Location
California
Today was extremely productive. Rob Edwards brought up the Festool 125+ Sander. We did the entire roof in 9 minutes using 150 Grit paper. Check out the material removal vs. a conventional Makita hand sander.


Desperate time's call for desperate measures: I had to get all the chrome off the car and the trunk lock (ring) was frozen on. I'd applied PB Blaster the day before, but no luck.
Had to grind it off.

I am in the market to purchase one of these threaded rings that fit to the trunk lock. Anyone have one laying around? Much appreciated.
Hi Paul, I part one E3 But I don't remember that I kept the lock I didnt have the key for the car that is very small item if you give me sum time I will look for it I hope I have it
 

paul cain

Well-Known Member
Site Donor $$
Messages
684
Reaction score
1,345
Location
Orange County
Spent the morning flattening the original primer with 180 grit on a hand block sander, also working all the small corners and drip rail, A and C pillars, etc. Then a few more hours of masking. Finally at 3 pm today, was able to put down a solid layer of white DTM primer. This will get lightly sanded with 320 grit before moving on to the Glasurit High build.
 

Attachments

  • 67582096573__4BA1D8BA-A243-4FB8-A46F-6B9C25BA749C.jpg
    67582096573__4BA1D8BA-A243-4FB8-A46F-6B9C25BA749C.jpg
    317.5 KB · Views: 180

paul cain

Well-Known Member
Site Donor $$
Messages
684
Reaction score
1,345
Location
Orange County
If you have ever applied Wurth Stoneguard / Rocker Schutz this stuff gets EVERYWHERE. It's heavy think material that comes out of a automotive spray bazooka with the precision and control of a 12 ga shotgun. It travels substantially farther than paint. You can't mask enough off. This is after two coats. First coat flashed off after about 20 min (80° F outside yesterday) and the second coat was very light. The gun is about 2.5 feet from the panel. 1 hour of prep. 13 seconds of application.

Starting to get into the second coat of Glausurit High Build primer on the rear quarters and the doors. With the welding done to cover up the U.S. bumper holes, even with smooth grinding it took two full passes to get the lower side panels absolutely flat. Ditto the holes for the U.S. side reflectors. It's only a 25mm hole but the body work effect is about 12 inches in diameter. Those two holes are difficult to get perfect.

Each coat of primer makes the next round substantially easier, as the panel(s) get flatter. Sanding off the original clear coat in every nook and cranny was 2+ hours. Sanding primer with 320 takes just under an hour for the rear quarter. 400 grit takes 15 min. This process will repeat itself with color sanding.
 

Attachments

  • 2 coats of stonegard after.jpg
    2 coats of stonegard after.jpg
    288.7 KB · Views: 159
  • Shutting down for the night.jpg
    Shutting down for the night.jpg
    351.6 KB · Views: 149
  • starting the second coat of high build on a few  panels.jpg
    starting the second coat of high build on a few panels.jpg
    334.7 KB · Views: 153
  • Wurth Stoneguard  before and prepped.jpg
    Wurth Stoneguard before and prepped.jpg
    296.7 KB · Views: 175

paul cain

Well-Known Member
Site Donor $$
Messages
684
Reaction score
1,345
Location
Orange County
The Glasurit base coat has finally come available. This is normally a short lead time item. But toners, like everything else in the industrial world, is on much longer lead times and stocks are low. This is three quarts in a gallon container. It will be plenty to paint the car with a pint of touch up remaining.

Trunk panel on the final block sanding. This is after 1 coat of high build sanded with 320, this second coat high build will be sanded twice, with 400 grit, then 600. The black powder is guide coat, used to verify you have eliminated every low spot. It's fast and effective and it tells no lies.

Doors, hood and trunk jambs are all painted. Tomorrow the matching jambs will get painted.


Attachments

  • Base coat only.jpg
    Base coat only.jpg
    324.8 KB · Views: 151
  • Fjord base with clear.jpg
    Fjord base with clear.jpg
    392.4 KB · Views: 151
  • Guide coat at 400 grit.jpg
    Guide coat at 400 grit.jpg
    252 KB · Views: 153
  • base coat Fjord.jpg
    base coat Fjord.jpg
    215.3 KB · Views: 167

paul cain

Well-Known Member
Site Donor $$
Messages
684
Reaction score
1,345
Location
Orange County
We added the extra length to the hood back on May 25th. Here is the final result in Fjord blau. Did I mention it is the absolute best color for a Coupe?
 

Attachments

  • longer hood now.jpg
    longer hood now.jpg
    250.8 KB · Views: 136
  • Adding material to the back edge.jpg
    Adding material to the back edge.jpg
    297 KB · Views: 163

paul cain

Well-Known Member
Site Donor $$
Messages
684
Reaction score
1,345
Location
Orange County
I was not happy with the shallowness of the second coat on the rear valence Stoneguard. So I put down a third coat for a more factory look. Its now ready for base coat.

Big day today. 4.5 hours of masking and about 30 min to put down the Fjord base coat on the jambs. The only way to 'jamb' a CS coupe is with the door off. Its a masking nightmare X2 as you have will have to remask everything inside the door jamb when you paint the exterior panel. There are no shortcuts sanding the nooks and crannies of the forward jambs on the body.
 

Attachments

  • IMG_1393.jpg
    IMG_1393.jpg
    211.9 KB · Views: 155
  • IMG_1394.jpg
    IMG_1394.jpg
    260.2 KB · Views: 136
  • hood gutter.jpg
    hood gutter.jpg
    370.5 KB · Views: 137
  • IMG_1384 (3).jpg
    IMG_1384 (3).jpg
    362.2 KB · Views: 137
  • IMG_1387 (1).jpg
    IMG_1387 (1).jpg
    289.2 KB · Views: 141
  • IMG_1388.jpg
    IMG_1388.jpg
    305.7 KB · Views: 135
  • IMG_1389.jpg
    IMG_1389.jpg
    315.9 KB · Views: 139

paul cain

Well-Known Member
Site Donor $$
Messages
684
Reaction score
1,345
Location
Orange County
The D.O.T. Exorcism is complete. The final prep before paint, while returning the body back to the original European bumper configuration. This includes removal of the D.O.T. side marker holes.
 

Attachments

  • Back to Euro.jpg
    Back to Euro.jpg
    307 KB · Views: 137

coupedegrace

Well-Known Member
Site Donor
Messages
691
Reaction score
657
Location
Portland, Oregon
We added the extra length to the hood back on May 25th. Here is the final result in Fjord blau. Did I mention it is the absolute best color for a Coupe?
Wow - I have to say that adding length to the hood seems a bit like magic to me. It's nice that you have just that much more metal to show off that beautiful fjord paint too!
 

Candia4441

Well-Known Member
Site Donor $
Site Donor $$
Messages
929
Reaction score
311
Location
California
I was not happy with the shallowness of the second coat on the rear valence Stoneguard. So I put down a third coat for a more factory look. Its now ready for base coat.

Big day today. 4.5 hours of masking and about 30 min to put down the Fjord base coat on the jambs. The only way to 'jamb' a CS coupe is with the door off. Its a masking nightmare X2 as you have will have to remask everything inside the door jamb when you paint the exterior panel. There are no shortcuts sanding the nooks and crannies of the forward jambs on the body.
Hi Paul, are you in construction business like me I am Fire protection contractor I see lots of ladder pipe machine
 

paul cain

Well-Known Member
Site Donor $$
Messages
684
Reaction score
1,345
Location
Orange County
Hello Albert, These photos are from my buddy (Mike) hobby shop, where I am lucky enough to have access and use. Mike shares this unit with a Porsche guy (Todd) who is an electrical contractor-hence the pipe equipment that gets in the way of the automotive restoration tools ;). I am recently retired from a career in electronic sensors (air bags, steering angle, etc.)
 

Drew Gregg

Well-Known Member
Site Donor
Messages
1,581
Reaction score
1,216
Location
Ft. Lauderdale
Wow - I have to say that adding length to the hood seems a bit like magic to me. It's nice that you have just that much more metal to show off that beautiful fjord paint too!
Adding extra length to the hood was a real work of art. The gap on the back of my hood to the windshield frame is 3/8" to 7/16". Yours was about 3/4". What will the gap -front & back- be when the hood is in place? Now I'm curious what those gaps are on other coupes. The gap on the front of my hood is about 5/16".
 

paul cain

Well-Known Member
Site Donor $$
Messages
684
Reaction score
1,345
Location
Orange County
Drew, thanks for your words of encouragement. The gap on the front and sides will remain as stock, this varies between 5-7mm on these three sides. Target gap for the rear edge is to be the same at about 6mm (~.24 inches).

There was an original BMW brochure, as I recall it was for the 2800CS. The hood and trunk gaps in this press car were comically large and inconsistent. I looked through my library tonight but could not find it. But it was memorable, that BMW used this as brochure worthy back in the day. Maybe someone else recalls seeing this image? It might have been in black and white or it was a white E9.
 

Bmachine

Well-Known Member
Site Donor $
Site Donor $$
Messages
3,542
Reaction score
1,794
Location
Northern California coast
I was not happy with the shallowness of the second coat on the rear valence Stoneguard. So I put down a third coat for a more factory look. Its now ready for base coat.

Big day today. 4.5 hours of masking and about 30 min to put down the Fjord base coat on the jambs. The only way to 'jamb' a CS coupe is with the door off. Its a masking nightmare X2 as you have will have to remask everything inside the door jamb when you paint the exterior panel. There are no shortcuts sanding the nooks and crannies of the forward jambs on the body.
Paul, what is the reason for painting the engine bay and trunk outer areas as well as the door jambs separately?
 

paul cain

Well-Known Member
Site Donor $$
Messages
684
Reaction score
1,345
Location
Orange County
Paul, what is the reason for painting the engine bay and trunk outer areas as well as the door jambs separately?
Bmachine,
Short answer: its much lower risk to paint damage

Long(er) answer: there are two ways to paint a car. 1) like the factory where you paint the entire body and then assemble everything to the finished surface.

or 2) where you 'jamb' the internals and do all of your mechanical assembly, saving the exterior painting for absolutely last. I've done them both ways and prefer this 'jamb'ing' method as I can get all the testing and de-bugging out of the way and not have to work around precious outside panels. I have about 220 miles on this project, mostly to completely finish the punch list of leaks, tuning, buzzing exhaust, carb adjustments, etc. The goal is to get it, as the British would say 'fully sorted' before painting the outside.

This second method involves a staggering amount of masking and re-masking but allows perfect control to lay down paint in tight spots (like behind the door hinges) without amateurish overspray or bald spots. The first is not much easier as it involves a lot of post paint panel protection. Like all projects, its a trade off. Hope this helps.
 
Top