My Next Vintage Racing Project

lafngrvy

Well-Known Member
Site Donor $
Messages
544
Reaction score
695
Location
near McMinnville, OR
Finally got some time to work on the 700. I had the new Dunlop tires mounted up and put them on the car. What do you think?
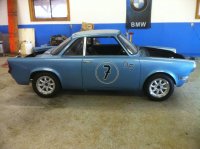
700OnWheels.jpg

I also fired up the new fuel pump and found I had several leaks in the 20 year old rubber fuel line. When I pulled the hose off the fuel pressure regulator here is what I found:
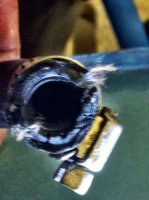
FuelLine_2.jpg

So I decided to replace the entire fuel line with 3/8" aluminum line. Here's what came out sitting on the new line ready to go in.
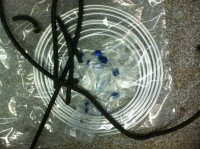
FuelLine_1.jpg

The 5 X 13" Panasports for my rain tires arrived yesterday as well. The new Avon rain tires should be here next week. All I have left to do is install the fire system and the Master shut-off switch.
 

lafngrvy

Well-Known Member
Site Donor $
Messages
544
Reaction score
695
Location
near McMinnville, OR
Shop time has been hard to come by. I was able to spend a few hours working on the 700 today.

Now I have greater incentive. The 700 along with the CSL have both been accepted for Monterey this year! I will also have the TiSA there for Carmel and Legends of the Autobahn on Friday. Will be a busy week!

Here is the latest on the 700:

700_2.jpg

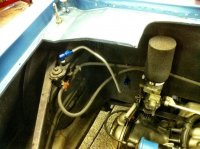
I was able to complete the replacement of the old rubber fuel line with aluminum hard-line. Here is the final section from the firewall to the fuel pressure regulator. Tested it, and no leaks. ;-)

700_1.jpg

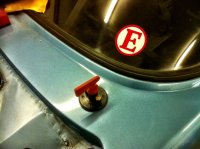
I was also able to complete installation of the master battery cut-off switch. I located it on the right side just behind the rear window which was close to all the main wiring in the engine compartment.

All I have left on my list is the fire system.
 

lafngrvy

Well-Known Member
Site Donor $
Messages
544
Reaction score
695
Location
near McMinnville, OR
Maiden Voyage

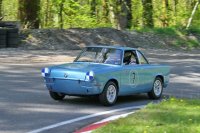
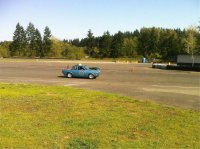
I was able to make it to the SOVREN Spring Sprints up in Seattle last weekend with the 700.

We had a carb issue that plagued us all day Saturday that had us chasing our tails. The problem turned out to be the float was hanging up on the side of the float bowl. Sometimes it would hang up with the float holding the needle closed so no fuel would be in the float bowl, and other times it would hang up with the float down and fuel would flood over the air bleed and down the venturi. It was hit or miss. In either case the left cylinder would not fire. When you only have 2 cylinders, having one not firing is a distinct disadvantage.

Late Saturday we finally figured out what was happening and replaced the float and needle and seat assembly and the car ran much better. I was able to make the last race of the day, albeit down 3 laps. After just 2 laps of driving with 2 cylinders firing, there was a shummozzle in turn 2 between a couple of FV's and the pace car was sent out while they cleaned up the mess.

Sunday dawned with high hopes. The car ran well for all three races, though we picked up a high speed miss above 6500 RPM during the second race. I think it is a jetting issue. By the end of the day my lap times had improved by over 4 seconds from Saturday's only serious run.

Still we finished the weekend in one piece and were able to drive it on the trailer. Not too bad for our first time out with the car. The next race is the Portland Historics in early July. Between now and then the car will get a safer roll bar, new seats, and some outside mirrors so I can see the competition coming up behind me more easily.


700@Seattle_2.jpg


700@Seattle_1.jpg
 

Nicad

Well-Known Member
Site Donor
Messages
3,521
Reaction score
545
Location
Toronto
Very productive winter. Car looks great, hope you see the checkered flag in both cars.
 

aalto

Active Member
Messages
66
Reaction score
5
Location
vancouver
The car looks great. Looking forward to seeing you and the car at the Portland historics. If the weather's without threat of rain i'll be driving the coupe down for the weekend.
 

Nicad

Well-Known Member
Site Donor
Messages
3,521
Reaction score
545
Location
Toronto
What a Beautiful Day and Track. Looks fun. I bet you are looking for more HP now.
 

lafngrvy

Well-Known Member
Site Donor $
Messages
544
Reaction score
695
Location
near McMinnville, OR
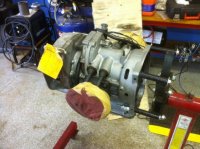
I got the Martini engine up on the stand and cleaned up. I have unpacked all the boxes that came with the engine, and layer everything out on the workbench. The first step will be to compete the disassembly of the block and evaluate what is inside.

Here's what Im starting with:

Martini_1.jpg

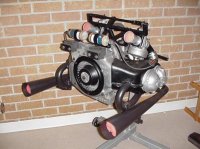
Here's a complete Martini engine:

martini_4.jpg

700 cc and 85 HP.
 

lafngrvy

Well-Known Member
Site Donor $
Messages
544
Reaction score
695
Location
near McMinnville, OR
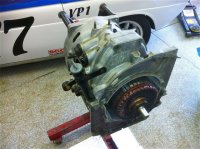
Made considerable progress today on tearing the engine down. The manual called for a couple of special tools and pullers, but I was able to make do with what I had. Here is how the day ended:

Martini_5.jpg

I am stuck now. Removing the dyna-start armature with out the special Matra puller has so far proved impossible. There is not enough room between the outer circumference of the armature and the side of the housing to fit a regular puller arm down and hook behind the armature. Any suggestions?

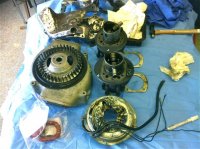
Here's tha table full of parts I have so far:

Martini_6.jpg

I have already wire-brushed the cylinder shrouds so I can repaint them. The heads, valve train, carbs, etc. are on the workbench out of the frame.
 

pamp

Well-Known Member
Messages
1,017
Reaction score
3
Location
Comox, B.C. CANADA
Old school

Excuse my poor memory....been 30 years since I had one of these apart.
The armature is on a tapered shaft. Seems to me we would put the retaining bolt back in to a couple of turns short of tight, then give the bolt a sharp rap with a heavy hammer. This relieves the taper and the armature will jump, much like a tie rod end if you follow me. EZ...no puller needed. I could be wrong, I would need to look in person to be sure as how to proceed. Best to you and this impressive "little car"
 
Top