I don't have any more pedal assys. I'd search the E3 network and pounce when the next E3 gets dismantled.I assume you'll be using an OEM Clutch pedal for the swap. There wouldn't happen to be a few more of those in a stash somewhere would there? I'm loving the attention to detail and finish work.
You are using an out of date browser. It may not display this or other websites correctly.
You should upgrade or use an alternative browser.
You should upgrade or use an alternative browser.
Finishing School for a Fjord 3.0 CS / 100 projects to improve a Coupe / Countdown
- Thread starter paul cain
- Start date
Project 7 Apply Wurth StoneGuard to floor pans and undercarriage. The prior owner's body shop did an exemplary job of welding in the Pelly Pans. They used brushable seam sealer around the perimeter which sealed them off well, but was incorrect. There was a paper thin layer of underbody sealant then applied over the top.
I am a big fan of the Wurth brand of Stoneguard as it has the correct texture, is very controllable in application, is paintable and has tough rubbery skin when dried. Grey Stoneguard from worth was the absolute best, unfortunately its gone NLA. Black is the only option today. This will get addressed in 7.1
I am a big fan of the Wurth brand of Stoneguard as it has the correct texture, is very controllable in application, is paintable and has tough rubbery skin when dried. Grey Stoneguard from worth was the absolute best, unfortunately its gone NLA. Black is the only option today. This will get addressed in 7.1
Attachments
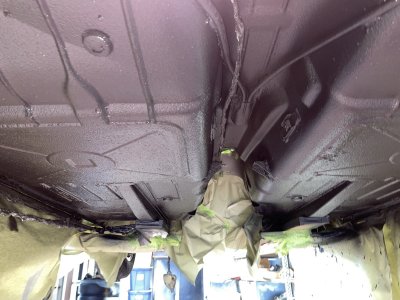
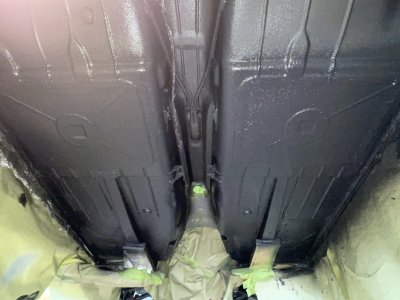
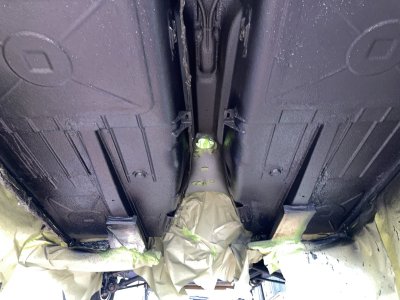
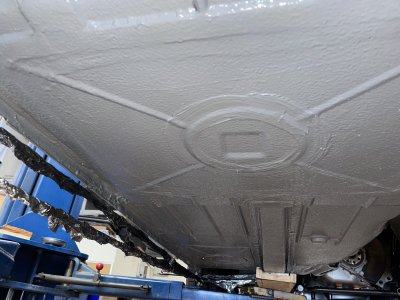
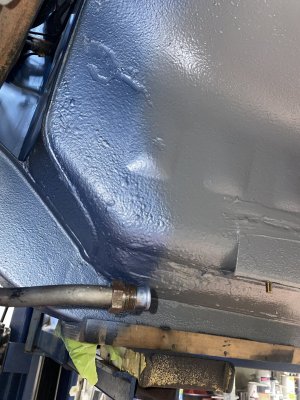
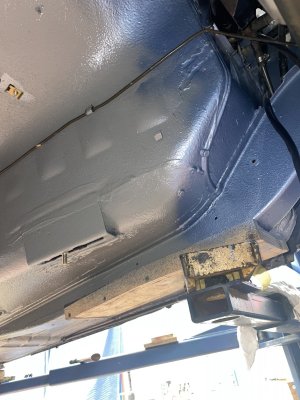
Project 7.1 Coating the undercarriage with Wurth Stoneguard in matte grey. This is a single stage automotive paint that I had color matched to the original Stoneguard on Patricia Mayers Car. In these images it is still wet, it dries to more of a satin finish. Last image is the ref. of Patricia Mayer's original floor pan.
Attachments
-
 71762395923__862BF819-0207-4537-B811-5658D433DCC0.jpg294.9 KB · Views: 133
 -
 71762397662__E9303B25-8B4C-4367-8178-A95D71A1FCC4.jpg330.5 KB · Views: 126
 -
 71762400148__503B4A3F-A213-4705-9843-08DCAC9BAD1E.jpg305.7 KB · Views: 125
 -
 71762402906__CFD84DD1-3685-44C4-A477-DC45DF1F601A.jpg343 KB · Views: 121
 -
 Patrica Mayers Orig Stoneguard.jpg129.5 KB · Views: 139
Hi Paul, would you share the paint code for the matte grey paint that you used on top of the stoneguard? As always the results are top notch!
Lance
Lance
I am impressed that you think I'd be that organized.Hi Paul, would you share the paint code for the matte grey paint that you used on top of the stoneguard? As always the results are top notch!
Lance
") Unfortunately, this is me and the color mixer at the paint supply store, standing over the open gallon of paint and holding samples up to the Patricia Mayer sample 'What do you think, more white?''
Unfortunately, this is me and the color mixer at the paint supply store, standing over the open gallon of paint and holding samples up to the Patricia Mayer sample 'What do you think, more white?'' What I can offer is that I can send you a color coupon of this on a spray out card, something that you can take to your paint supply store. Let me know if you are interested?
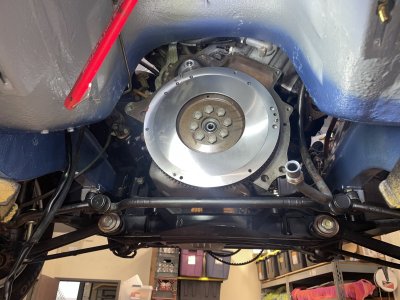
Project 6.1 - installing the flywheel and the clutch assy. I am using the OEM Fichtel & Sachs clutch assy, with a new pilot bearing. Lots of careful placement of the Clutch spline plug to ensure that it's absolutely on center. Then careful tightening and then torquing. This went very smoothly.
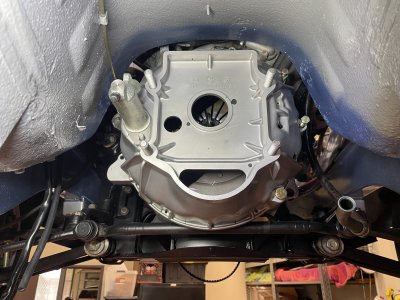
Here is the third dry fit of the bellhousing. I do a number of these test fits because I am still fabricating the hard hydraulic lines and the anchor points for the soft rubber line.
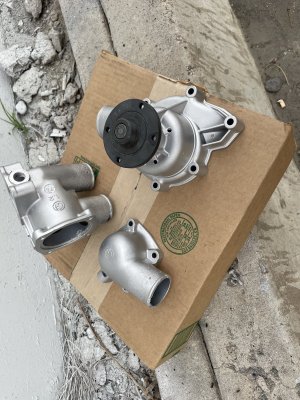
As a lunch time activity, I went to my favorite parts finisher: www.partsreborn.com and had the thermostat housing and water pump vapor honed. Then I applied one thin coat of Cerikote clear satin for lasting protection.
Here is the third dry fit of the bellhousing. I do a number of these test fits because I am still fabricating the hard hydraulic lines and the anchor points for the soft rubber line.
As a lunch time activity, I went to my favorite parts finisher: www.partsreborn.com and had the thermostat housing and water pump vapor honed. Then I applied one thin coat of Cerikote clear satin for lasting protection.
Attachments

Last edited:
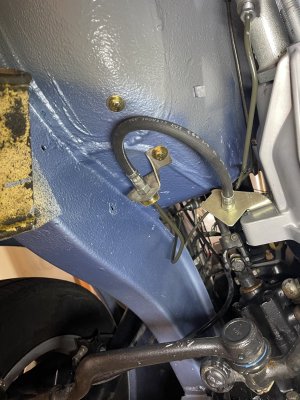
Project 6.2 - Replace the Automatic Transmission with a 5 spd Overdrive The .2 is to fabricate and install the clutch hydraulics. I was working solo, so I used allen headed bolts to secure them in the footwell, while carefully tightening them on the engine compartment side. Flairing work on the hard lines will be finished on Monday.
Attachments

Last edited:
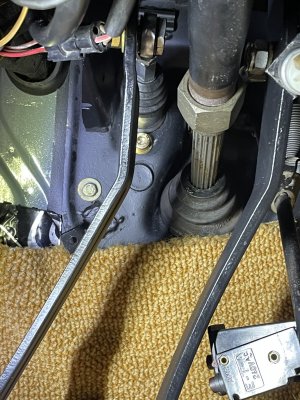
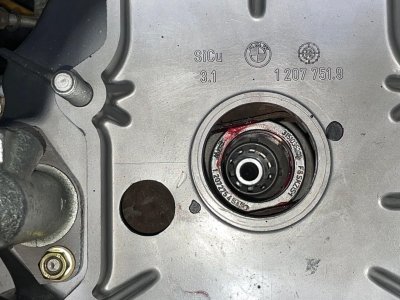
In desperation I will use the shotgun approach:Sunday quiz for the experts:
What's wrong with this image?
1) There is one shiny and one dull nut made of different metals. Diversity of metals is not a value in engineering.
2) The brake pedal should not be on the same plane as the clutch (Don dixis).
3) There is an hexagonal spacer type part with a small nut and no washer in between.
4) The carpet is too clean.
5) The picture has no caption.
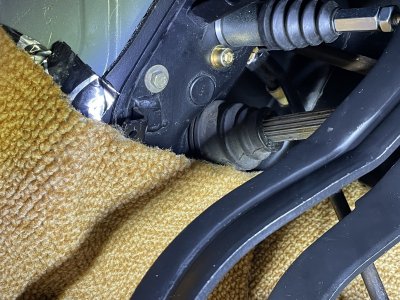
Isn't the rubber boot around the steering column shaft installed backwards? It seems to me that, Installed this way, first, the ribbed section is rubbing against the rubber and, second, this would allow water to sit inside that rubber boot.Sunday quiz for the experts:
What's wrong with this image?
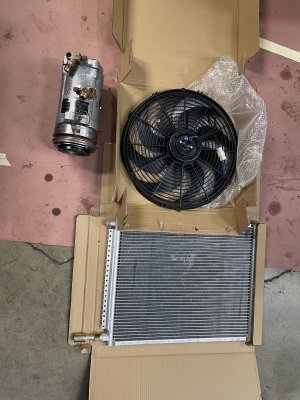
| Project 8: Rebuild the Air Conditioning System |
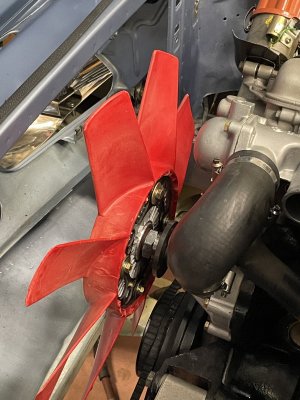
I've experienced @HBChris ('s) modified air conditioning system as was very impressed in it's ability generate cold air. It's a big improvement over the original system with that FisherPrice childs fan that the factory installed in front of the condenser.
These are the key components in the upgrade: the new condenser and a proper curved blade fan that moves a substantial amount of air and is quieter that the original. The OEM Bosch axial was rebuild last year and was a left over from the Porsche 928 restoration project. Its the same part no. as used on BMW's.
Isn't the rubber boot around the steering column shaft installed backwards? It seems to me that, Installed this way, first, the ribbed section is rubbing against the rubber and, second, this would allow water to sit inside that rubber boot.
Isn't the rubber boot around the steering column shaft installed backwards? It seems to me that, Installed this way, first, the ribbed section is rubbing against the rubber and, second, this would allow water to sit inside that rubber boot.
Attachments
@Bmachine, nails it within minutes! Yes, the boot is on backwards. Today's project it to try and remove shaft and flip it around. It currently is not sealed and lots of hot air was entering the interior.Sunday quiz for the experts:
What's wrong with this image?
This is one of many comical examples of incorrect assemblies on this car. The PO had the body shop do the reassembly. This shop did a spectacular job on the body and paint work, however they picked up whatever hardware was on the floor to do the reassembly. This was a few years after the car was disassembled. These are all easy fixes and very gratifying to get right.
Project 6.3: Install the Getrag 265 Transmission. Lots of aligning efforts were undertaken to get the clutch disc exactly on center. The bellhousing was preinstalled with throwout bearing assy in place. Two sets of hands and the gearbox slid into place. Clutch hardlines were reinstalled. I used a 5/16's fuel line that had the correct flair on the end for the master cylinder feed line. Three quick bends and it was in place. The single hose clamp on this line will go in tomorrow.
Attachments
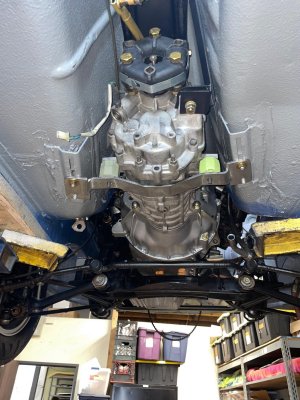

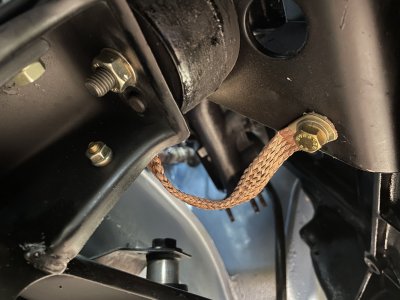
You can't have enough good ground ties to the chassis. This is not stock. It's a second ground to chassis strap that I added. Over the next few months I will remove every ground strap attached to the chassis and clean the terminal and the surrounding area on the body, reattaching with fresh hardware. Nothing sorts out electrical gremlins like a foundation with really good grounds.
Attachments
Clearly, another gold standard resto in the making!
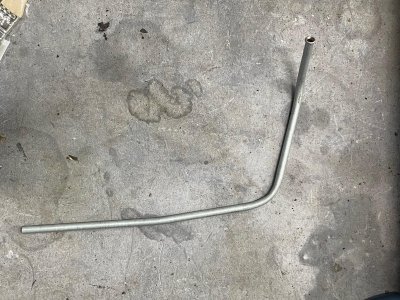
| Project 10: Rebuild the cooling system with more modern BMW Parts |
Attachments
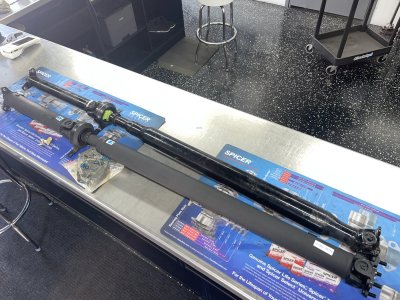
Around 1/2” difference in length?