Finishing School for a Fjord 3.0 CS / 100 projects to improve a Coupe / Countdown

paul cain

Well-Known Member
Site Donor $$
Messages
681
Reaction score
1,341
Location
Orange County
Paul
What did you use to polish the belt line? Did the beltline have a coating on it? I am assuing you just applied the cermic coating to the beltline with a towel?
This is the best aluminum polish I've found.
No, beltline trim did not have any coating on it, hence the oxidation over time.
Yes, I used a microfiber as shown in image 0022 above to apply the ceramic coating. I use the corner as you have to cut it off when it dries hard.
 

Attachments

  • IMG_0033.jpg
    IMG_0033.jpg
    252.6 KB · Views: 105

paul cain

Well-Known Member
Site Donor $$
Messages
681
Reaction score
1,341
Location
Orange County
Project 74: Replace the missing anchor point / eyelet on the spare tire well and spare mounting bracket inside the tire well.

The PO's body shop did a fine job of blending in the new spare tire well. Unfortunately they did not install the original eyelet / tiedown on the outside of the well. Nor did they install the spare tire mounting bracket inside the well. Both of these are now welded in. The eyelet has a coating of Wurth stoneguard on it and will be painted grey. The in side mount will be be painted a matching Fjord.
 

Attachments

  • IMG_0032.jpg
    IMG_0032.jpg
    312.8 KB · Views: 76
  • IMG_0031.jpg
    IMG_0031.jpg
    326 KB · Views: 57
  • IMG_0055.jpg
    IMG_0055.jpg
    268.3 KB · Views: 41
  • IMG_0056.jpg
    IMG_0056.jpg
    257.7 KB · Views: 60

paul cain

Well-Known Member
Site Donor $$
Messages
681
Reaction score
1,341
Location
Orange County
Project 75: Refresh the finish on the seat belts. In a prior life someone had covered the seat belt cable with the plastic corrugated jacketing for wire harnesses (image 0050.jpg). I am not fond of that material. The seat belt buzzer switch I will never use again. So it was off with the jacketing and removing the wires. I used 3M brand 3/4 inch shrink tube to 'recover' the cable. 5 minutes with the heat gun and the new skin looked like new. I masked and repainted the black receptacle with SEM Vinyl / Plastic satin black. Last step was the new button stickers. I got these about 5 years ago for a restoration on an early Porsche 928 (with very similar seatbelts). These stickers were on Ebay and they are tricky to apply as they need to go on straight. Short and sweet, seatbelts are finished.
 

Attachments

  • IMG_0053.jpg
    IMG_0053.jpg
    509.1 KB · Views: 73
  • IMG_0052.jpg
    IMG_0052.jpg
    292.1 KB · Views: 61
  • IMG_0053.jpg
    IMG_0053.jpg
    509.1 KB · Views: 58
  • IMG_0051.jpg
    IMG_0051.jpg
    666 KB · Views: 63
  • IMG_0049 (1).jpg
    IMG_0049 (1).jpg
    334.1 KB · Views: 61
  • IMG_0050.jpg
    IMG_0050.jpg
    390.9 KB · Views: 69

Drew Gregg

Well-Known Member
Site Donor
Messages
1,574
Reaction score
1,210
Location
Ft. Lauderdale
Project 75: Refresh the finish on the seat belts. In a prior life someone had covered the seat belt cable with the plastic corrugated jacketing for wire harnesses (image 0050.jpg). I am not fond of that material. The seat belt buzzer switch I will never use again. So it was off with the jacketing and removing the wires. I used 3M brand 3/4 inch shrink tube to 'recover' the cable. 5 minutes with the heat gun and the new skin looked like new. I masked and repainted the black receptacle with SEM Vinyl / Plastic satin black. Last step was the new button stickers. I got these about 5 years ago for a restoration on an early Porsche 928 (with very similar seatbelts). These stickers were on Ebay and they are tricky to apply as they need to go on straight. Short and sweet, seatbelts are finished.
Glad to see the button stickers were pressed into service.
 

Stevehose

Well-Known Member
Site Donor $$
Messages
13,011
Reaction score
5,686
Location
Sarasota, FL
Project 64 Install 16'' Alpina style wheels and Michelin Pilot Sport tires.

No dessert until you finish your vegetables.

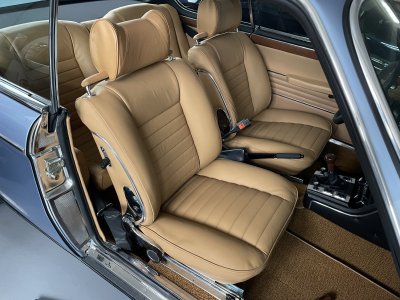
I've delayed the installation of these tires and wheels as I've set it as sort of reward / milestone. The game was I had to fully finish the center console and dash assy. This means full functionality of everything inside the console. The delay has been wiring in both the original Blaupunkt Frankfurt, the new mono speaker (thank @HBChris). The A/C fan speed switch, restoring the center console and getting the shift surround correctly fastened so reverse and 5th gear selection don't slam the console side to side. That project finished today so I installed tires and wheels.

I repainted the centers with the correct Alpina black inserts showing about 4 mm on the face of the wheel. I use an 8 1/2 x 11 sheet of label paper. I then put an exacto blade in a protractor and cut out 162mm ID stencils. I am still using catalyzed satin black paint so you have to remove the stencil within minutes of the paint application otherwise you will have a real mess on your hands. Here is the result.
Which silver and clear coat did you use? And was the clear satin or gloss?
 

Wobdog

a.k.a Mike
Site Donor $$
Messages
527
Reaction score
465
Location
Los Altos Ca
Which silver and clear coat did you use? And was the clear satin or gloss?
I painted mine myself and used Wurth Silver Wheel paint 0893-339-108 was great match. I clear coated with 2K 368 0061 but would recomend something better like Cearkote. Came out great but is not as durable as I woiuld have liked. PM me if you need more specifics
 

Stevehose

Well-Known Member
Site Donor $$
Messages
13,011
Reaction score
5,686
Location
Sarasota, FL
I painted mine myself and used Wurth Silver Wheel paint 0893-339-108 was great match. I clear coated with 2K 368 0061 but would recomend something better like Cearkote. Came out great but is not as durable as I woiuld have liked. PM me if you need more specifics
Will look into Cerakote, am familiar with Wurth thanks.
 

Ohmess

I wanna DRIVE!
Site Donor $
Messages
4,892
Reaction score
2,714
Location
Aiken, SC
I painted mine myself and used Wurth Silver Wheel paint 0893-339-108 was great match. I clear coated with 2K 368 0061 but would recomend something better like Cearkote. Came out great but is not as durable as I woiuld have liked. PM me if you need more specifics
Please post details here so we all can benefit from specifics about Cerakote product.
 

paul cain

Well-Known Member
Site Donor $$
Messages
681
Reaction score
1,341
Location
Orange County
Project 78: Recover seats. The seats that came with the car had been recovered by the PO. The seat foam and horsehair replacement material was not up to standard. Digging deep, the decision was taken to replace the seat covers with GAHH covers and completely redo the foam and packing material.
 

Attachments

  • IMG_0092.jpg
    IMG_0092.jpg
    374.3 KB · Views: 45

paul cain

Well-Known Member
Site Donor $$
Messages
681
Reaction score
1,341
Location
Orange County
Project 80: Install a bluetooth receiver with amp for 'second' audio system. This will drive the two 6x9 Blaupunkt speakers in the rear speaker shelf.
 

Attachments

  • IMG_0079.jpg
    IMG_0079.jpg
    383.3 KB · Views: 58

eriknetherlands

Moderator
Site Donor
Messages
2,775
Reaction score
2,008
Location
Netherlands, Eindhoven area
Project 79: Finish completing the correct tools in the tool kit.

Oooh, all sooo nice and shiny!
I'm drooling...

Isn't the pin (Tommy bar?) of a later bmw vintage? In the pictures in bmw's period brochures, a pin with a non reduced end is depicted.
And the pliers are called "alligator style" in our tool FAQ, I think also of later vintage.

Who helps the man out?
 

paul cain

Well-Known Member
Site Donor $$
Messages
681
Reaction score
1,341
Location
Orange County
Oooh, all sooo nice and shiny!
I'm drooling...

Isn't the pin (Tommy bar?) of a later bmw vintage? In the pictures in bmw's period brochures, a pin with a non reduced end is depicted.
And the pliers are called "alligator style" in our tool FAQ, I think also of later vintage.

Who helps the man out?
Eric,
Good catch! Here is an updated image.
 

Attachments

  • IMG_0097.jpg
    IMG_0097.jpg
    413 KB · Views: 42

paul cain

Well-Known Member
Site Donor $$
Messages
681
Reaction score
1,341
Location
Orange County
Project 81: Refit the trunk floor board. Cut and resize for proper gaps, recover.
 

Attachments

  • IMG_0100.jpg
    IMG_0100.jpg
    255.7 KB · Views: 47

paul cain

Well-Known Member
Site Donor $$
Messages
681
Reaction score
1,341
Location
Orange County
Sorry out of sequence.

Project 77: restore the original jack, lug wrench and wheel chalk.

Question for the experts: Which jack is correct for a 433XXXX VIN no.?
 

Attachments

  • IMG_0099.jpg
    IMG_0099.jpg
    914.8 KB · Views: 44

paul cain

Well-Known Member
Site Donor $$
Messages
681
Reaction score
1,341
Location
Orange County
Project 82: Accumulate the original Factory documentation that was available thru BMW Dealerships
 

Attachments

  • IMG_0098.jpg
    IMG_0098.jpg
    531.9 KB · Views: 48

paul cain

Well-Known Member
Site Donor $$
Messages
681
Reaction score
1,341
Location
Orange County
Project 83: Install the GAHH Carpet Kit. This kit uses good German quality loop carpeting. It is not exactly like the original but it is close. 90% of the pieces fit well. The one area that needed some custom cutting and rebinding was behind the pedals in the pedal box.
 

Attachments

  • IMG_0101.jpg
    IMG_0101.jpg
    749 KB · Views: 37
  • IMG_0102 (1).jpg
    IMG_0102 (1).jpg
    381 KB · Views: 34
Top