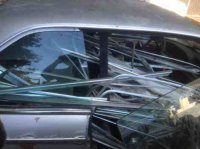
And so the saga begins....

xing6666

Well-Known Member
Messages
98
Reaction score
17
Location
Fort Lauderdale, FL
With much assistance from our very own Hack mechanic, I snatched up this project 1971 CSi for a full restoration. It was loaded up last week and will be arriving today at the metal shop. I will be keeping this thread up to date with the rebuild process and photos.

I'm pretty excited, I have to say. I did a partial restoration on my m635, but nothing at this level, so I'll be looking to make sure everything is right with this car as it goes back together. Still haven't decided whether or not to do a restoration or a CSL tribute, or the color, but I have some time for that. Looking forward to taking you all with me on this journey!
 

Attachments

  • image.jpg
    image.jpg
    96.3 KB · Views: 185

Peter Coomaraswamy

Well-Known Member
Site Donor $$
Messages
3,787
Reaction score
896
Location
Austin, TX
By the looks of the surroundings you live in the Northeast?, therefore you should have lots of time in the near future for your project. This is definitely one of those times when the journey is as much fun as arriving at your destination-regardless of which way you go! Good luck- and people have been doing tribute Shelby's, GTO's, Cudas', etc with great results so I don't see why a CSL would work any less. In this instance the word "tribute" has even more meaning in my opinion-
 

xing6666

Well-Known Member
Messages
98
Reaction score
17
Location
Fort Lauderdale, FL
By the looks of the surroundings you live in the Northeast?, therefore you should have lots of time in the near future for your project. This is definitely one of those times when the journey is as much fun as arriving at your destination-regardless of which way you go! Good luck- and people have been doing tribute Shelby's, GTO's, Cudas', etc with great results so I don't see why a CSL would work any less. In this instance the word "tribute" has even more meaning in my opinion-

Nope - South Florida. :) Vehicle rolled in today... initial inspection revealed (not unexpectedly) rust. We will be addressing every area and ensuring any rust is gone for good.

dayone1.jpg


dayone2.jpg


dayone3.jpg


dayone4.jpg


So it begins........
 

xing6666

Well-Known Member
Messages
98
Reaction score
17
Location
Fort Lauderdale, FL
Day Two: Unloading and Evaluation

Got the car into the shop and up on rollers, ready for a thorough inspection for work that needs to be done to rid the car of all traces of rust. The car was absolutely PACKED with parts, including a shocking number of new old stock parts including a bunch of stuff that's NLA. New with part number frame rails, rocker panels, floor pans, britework/trim, etc etc - all which will come in great handy for this restoration.

daytwo1.jpg


Car all unloaded and parts laid out and ready for cataloging.

daytwo5.jpg


And then the rust ID and work estimates begin. We identified 24 areas that need to be addressed - some small, some quite large. One fender is off and the other one was new, but the shock-tower and inner fender was patchwork. As such, the already repaired fender is coming back off and the entire shock tower and inner engine bay wall will be recreated from scratch. Rocker panels are being replaced with new old stock parts as are the floors. The good news is that everything is repairable - nothing is so far gone that it's not worth working with.

daytwo2.jpg


daytwo4.jpg


How I feel inside:

daytwo3.jpg


And now I need some help from the audience. Can some one help me ID the parts in the pictures below? The first picture is a tray of some sort. I do not know if this part is an e9 part - there were some 2002, e28, e30 parts (and strangely, a Jeep Liberty part) mixed in, so it's possible this does not apply.

idhelp1.jpg


I'm pretty sure the black pieces go behind the doors - I can not, however, figure what the green panels are. I have not looked hard yet, but since I'm not going to be at the shop for a little while, I figured I'd ask you all out there.

idhelp2.jpg


More when I have it!
 

DWMBMW

Well-Known Member
Site Donor
Messages
911
Reaction score
1,051
Location
Miami, Florida
green panels are access panels above the front headlights inside the engine compartment.
 

Stevehose

Well-Known Member
Site Donor $$
Messages
13,116
Reaction score
5,817
Location
Sarasota, FL
The pieces below the light panels look like the baffle plates that fit the inner fenders behind the front wheels


green panels are access panels above the front headlights inside the engine compartment.
 

Peter Coomaraswamy

Well-Known Member
Site Donor $$
Messages
3,787
Reaction score
896
Location
Austin, TX
I see a water pump and the piece that looks like it is attached to the front inner fender guard looks like the piece that keeps the front direction signal housing in place. I don't know what the little pieces taped to the fender liners are- maybe they were missing on mine- and... yes! we have found Waldo!

Looks like a heck of a project Xing but it seems there are allot of parts there- this should be fun!

If you get opportunity to lay out all the parts we could really have fun identifying them- I think we have broached this subject before :)
 

xing6666

Well-Known Member
Messages
98
Reaction score
17
Location
Fort Lauderdale, FL
LoL - yea about the water pump, I knew what that one was, it just snuck into the picture. Very oddly, it's not for this car or any big or little six engine that I'm familiar with anyway. No part number or anything on the bag, I'll have to look more carefully at the part some other time.

You might get your wish about a huge forensic parts ID session :). About a third of the parts were in bags with the BMW part numbers attached, so I have those cataloged, but the rest are currently loosely organized into piles by mechanical, interior, exterior, etc. I will likely need a lot more help with the pieces that are still up north - apparently I am the proud owner of four sets of e9 wheels, three complete interiors of varying condition, dashboards, gauges, more new old stock parts and an entire parts car stuffed with trim pieces. I took a bit of a gamble with this purchase, but I think it's very well paid off. It's gonna take me a VERY long time to dissect everything but every minute is gonna be a blast. I just hope my wife doesn't leave me in the process LOL...
 

xing6666

Well-Known Member
Messages
98
Reaction score
17
Location
Fort Lauderdale, FL
Figured I'd throw up a pic of the parts car stuffed with trim and other crap :D. It's gonna be like opening the worlds rustiest Christmas present!!!

ImageUploadedByTapatalk1411088345.350092.jpg
 

dave v. in nc

Well-Known Member
Site Donor $
Messages
3,049
Reaction score
1,232
Location
North Carolina, USA
rusty xmas

Took me a second try but I finally have one that allows me to restore/preserve smelly carpet and rotten wood parts (no valve covers in the dishwasher, tho..)...so before you pitch old carpet pieces and de-laminating wood parts into the crapper, drop me a note for a chance...I'm glad that you are bringing the whole posse home with such vigor!
Dave V. in NC
 

xing6666

Well-Known Member
Messages
98
Reaction score
17
Location
Fort Lauderdale, FL
First cut! Front floors are out! Not terribly surprisingly, we discovered somewhat rusty frame rails... Thankfully we've got a set of brand new old-stock rails handy which will be going on to replace everything.

daythreefloorcut.jpg


Replacement floor pans which will be going in once everything's cleaned up.

daythreefloorpans.jpg
 
Last edited:

jmackro

Well-Known Member
Messages
2,471
Reaction score
731
Location
San Juan Capistrano, Ca.
Looking at the first photo in the thread above, I'd advise removing the console section around the gearshift as well as the parking brake lever before any welding begins. Weld spatter could ruin those parts pretty quickly.

Best of luck with the project. It is a bit ambitious, but if you do it properly (and it looks like you are), the result will be terrific.
 

xing6666

Well-Known Member
Messages
98
Reaction score
17
Location
Fort Lauderdale, FL
Looking at the first photo in the thread above, I'd advise removing the console section around the gearshift as well as the parking brake lever before any welding begins. Weld spatter could ruin those parts pretty quickly.

Best of luck with the project. It is a bit ambitious, but if you do it properly (and it looks like you are), the result will be terrific.

Yes, absolutely! The removing of the floors was investigatory in regards to the condition of the frame/floor rails. Everything will be coming out of the compartment there including the dashboard (except for maybe the steering wheel... we'll have to see).

I'm pretty psyched though - I think the honeymoon stage will wear off when we start delving deeper... lol
 

xing6666

Well-Known Member
Messages
98
Reaction score
17
Location
Fort Lauderdale, FL
Drivers side rocker panels were already replaced, however while it was done to a perfectly reasonable body shop standard, it is not to a restoration standard. Lots of screws, ever-so-slightly misaligned and the body sealer was a bit messy.

The rocker panel is coming off again, being realigned and reinstalled for a proper, seamless fit.... with no screws.... :)

daythreerocker.jpg
 
Top