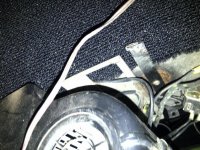
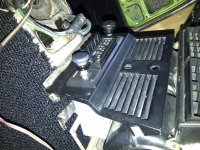
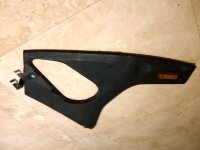
Lateral of central console for AC version renew process

deQuincey

Quousque tandem...?
Site Donor
Messages
8,417
Reaction score
2,430
Location
BIO - 43°15'46.5"N 2°56'03.7"W
I have learnt something about these parts, the lateral console Wood panels are in fact of two types of Wood,

a poor agglomerated Wood for the non AC versión, and plywood for the AC versión

these parts usually suffer when in the car, but much more prone to damage when removed, the AC versión panels are particularly delicate as there is a huge opening that leaves a thin Wood arm in the bottom,

usually these áreas need to be recovered , so here is the process, it is a long and tedious process using Wood mastic and lots of patience:

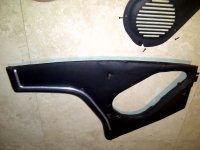
this piece was gone (see up right corner)


the other piece, inner side:


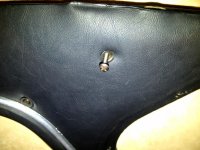
replacing the foam:


the thin rail around the opening:


replacing the foam:


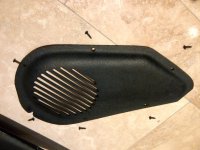
fixing points:


Ohmess

I wanna DRIVE!
Site Donor $
Messages
4,887
Reaction score
2,707
Location
Aiken, SC
So here's a thought for you. Your work is so nice, I would be willing to bet that if you made two of everything like this, you could sell the second set for the cost of the parts for the two and get your repair costs covered.
 

deQuincey

Quousque tandem...?
Site Donor
Messages
8,417
Reaction score
2,430
Location
BIO - 43°15'46.5"N 2°56'03.7"W
So here's a thought for you. Your work is so nice, I would be willing to bet that if you made two of everything like this, you could sell the second set for the cost of the parts for the two and get your repair costs covered.

good one, dear Ohmess, but I would be willing to bet that if i make that, i will be getting a divorce too ;-):oops:
 

Ohmess

I wanna DRIVE!
Site Donor $
Messages
4,887
Reaction score
2,707
Location
Aiken, SC
good one, dear Ohmess, but I would be willing to bet that if i make that, i will be getting a divorce too ;-):oops:

Yes. Thank God my wife doesn't know how much time I spend longing to be with Annabelle!
 

Tundra

Well-Known Member
Messages
320
Reaction score
4
Location
South
Center console side panels

Has anyone recovered the side panels of the center console in a color other than black? Tan perhaps? to match tan interior. Any pictures? Curious to see what it would look like.
 

DWMBMW

Well-Known Member
Site Donor
Messages
906
Reaction score
1,042
Location
Miami, Florida
DQ,

I still have my center console out from when I installed new carpet the other weekend. I will take some pics tomorrow morning and post them for reference. The original screws for the grille are smaller. Be careful not to tighten your screws which are larger too tight as the grilles get very brittle and crack easily. Your posts have been very helpful to everyone and I'd be more than happy to post any pics of the factory a/c you need.

Doug
 

deQuincey

Quousque tandem...?
Site Donor
Messages
8,417
Reaction score
2,430
Location
BIO - 43°15'46.5"N 2°56'03.7"W
DQ,

I still have my center console out from when I installed new carpet the other weekend. I will take some pics tomorrow morning and post them for reference. The original screws for the grille are smaller. Be careful not to tighten your screws which are larger too tight as the grilles get very brittle and crack easily. Your posts have been very helpful to everyone and I'd be more than happy to post any pics of the factory a/c you need.

Doug

thank you very much Doug,

yes the grilles are brittle, and of course i applied only a bit of pressure with the screws
i have not detailed this, but i remade the holes from behind, i prepared an extended surface to reinforce, using an epoxi glue to create a layer of material which spreads the force exerted by the screws evenly

i will appreciate very much those pics of a factory AC setup
 

DWMBMW

Well-Known Member
Site Donor
Messages
906
Reaction score
1,042
Location
Miami, Florida
IMG-20150514-00712.jpg

IMG-20150514-00713.jpg

IMG-20150514-00714.jpg

IMG-20150514-00716.jpg

IMG-20150514-00717.jpg

IMG-20150514-00718.jpg

IMG-20150514-00719.jpg

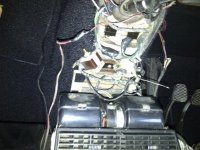
A few pics. Let me know if you need more detailed pics of any specific areas or attachments. I'll be reinstalling the console this weekend.
 

bavbob

Well-Known Member
Site Donor
Messages
3,372
Reaction score
1,585
Location
Boston, Ma
deQ, how are the aluminum strips held on since I have to remove mine to do some repairs?

BTW, small areas, well for now, I have used black seam sealer after gluing the edges of the tear with Gorilla crazy glue gel. The seam sealer can be smoothed by putting a dab or paint thinner on your finger tip and then rubbing. The thinner evaporates quickly so I usually have a little cup or small spray bottle filled with it. When I get the contour I want, I tap it with my finger to get some texture ( tried an old piece of vinyl to press down on it, never works). I use thinner to smooth seam sealer in general after I try to get that factory look ...which I never "seam" to get.
 

deQuincey

Quousque tandem...?
Site Donor
Messages
8,417
Reaction score
2,430
Location
BIO - 43°15'46.5"N 2°56'03.7"W
deQ, how are the aluminum strips held on since I have to remove mine to do some repairs?

BTW, small areas, well for now, I have used black seam sealer after gluing the edges of the tear with Gorilla crazy glue gel. The seam sealer can be smoothed by putting a dab or paint thinner on your finger tip and then rubbing. The thinner evaporates quickly so I usually have a little cup or small spray bottle filled with it. When I get the contour I want, I tap it with my finger to get some texture ( tried an old piece of vinyl to press down on it, never works). I use thinner to smooth seam sealer in general after I try to get that factory look ...which I never "seam" to get.

there are small nails fixed to the alu strips
you should be careful avoid bending them
 

mark99

Well-Known Member
Site Donor
Messages
1,505
Reaction score
260
Location
Kirkland WA
I had these side parts recovered so I also had to reinstall the aluminum trim part
I found it rather difficult, you want to get the trim close to the raised part so it looks even, but too close and it won't sit down properly
Here is what I did to get the nails in:
You need to press very evenly or the trim will bend and if it kinks you might not be able to fix it
I marked on the trim with tape so I would know where the nails where, and the part next to the nails
Cover the trim with a thin cloth so it won't scratch
Put a smooth board over the trim, about the size of the trim
Then you can tap on the board to drive the nails in and have even pressure along the trim
Make sure all the nails are straight
But not easy, I spent several hours doing this
 
Top