Hoist lifting points

pamp

Well-Known Member
Messages
1,017
Reaction score
3
Location
Comox, B.C. CANADA
I am soliciting opinions on what are the preferred/proper lifting points for the E9 using a two post lift. Any photos would be helpful and thanks to all in advance. Looking at those shots from the "coupe in Ventura"...whoa...damage for sure.
 

Stevehose

Well-Known Member
Site Donor $$
Messages
13,003
Reaction score
5,679
Location
Sarasota, FL
I jack the frame rails in front and the round circle area at the end of the connecting arm behind the rear wheel - no suspension components or rocker parts.
 

pamp

Well-Known Member
Messages
1,017
Reaction score
3
Location
Comox, B.C. CANADA
On the lift

OK,
At the price of possibly embarrassing myself...Obviously the car has been on the hoist many times in her lifetime, this is the first time I have lifted the car myself. The guilt...yeah, I will admit to numerous lift operations at the shops of others, scares me...and I have been a little less than attentive as to where the lift picked my car on the few occasions she has been lifted since in my care. That said... Steve "the round circle" not sure what you mean. What I built were a couple of simple pads of hardwood oak from a board of 1 X 4...4 X 4 square, stacked X 2, with a 2 X 1 pad center. This catches the subframe inboard of the bushing point.
Library-5995.jpg


Or I suppose one might build a metal pad to catch this lifting point... Would there be interest if I were to fabricate this?
100_1869.jpg

I believe this an important issue, getting a good look at my car from this point of view, I see quite a bit of damage due to errant lifting. As there are many new owners and members to the cult, myself included, I think to always keep this in mind when the baby is lifted...sensitive bits.
 
Last edited:

alanmcg

Well-Known Member
Messages
375
Reaction score
3
Location
Seattle
nice

is that the new floor lift pamp? show us the set up!

you know your coupeitis may have gone too far when you have a floor lift in your garage!

i love it.
 

pamp

Well-Known Member
Messages
1,017
Reaction score
3
Location
Comox, B.C. CANADA
The lift

S$#@^& Alan,
Same as Sven! You guys need to hook up more often...
OK...MaxJax mid-rise lift by Dannmar. I will give my critique once I am sure I will not meet the untimely demise...Death by lift. Fun yet not for the faint of heart. "coupeitis"
Major addict...twelve step program...0 to 240 km...easy does it.
 
Last edited:

deQuincey

Quousque tandem...?
Site Donor
Messages
8,418
Reaction score
2,431
Location
BIO - 43°15'46.5"N 2°56'03.7"W
nice question in this post !


hello pamp,

the front hoist point is superb, but, IMHO, i have doubts on the rear one


100_1869.jpg


i am not sure of this point you present here, i think there is no reinforcement there, is only the rear floor panel, right ? is there any strong chassi area ? is there a reinforcement ?

waiting for your answers

regards
 

Sven

Well-Known Member
Site Donor $
Messages
1,145
Reaction score
110
Location
Seattle
Allen,

I would shift the wood block and rubber pad outwards by 3-4 inches so it is centered under the main suspension arm bolt (seen in the photo). The wood is really bearing at the 'U' shaped end flange of the fore/aft bracket with the bolt at the middle. The wood block would keep the wider rubber pad of the Danmar from hitting the pinch weld seam.
BTW, Alan has had his car on my lift.

safe lifting,
 

Stevehose

Well-Known Member
Site Donor $$
Messages
13,003
Reaction score
5,679
Location
Sarasota, FL
That's the spot I was describing also


Allen,

I would shift the wood block and rubber pad outwards by 3-4 inches so it is centered under the main suspension arm bolt (seen in the photo). The wood is really bearing at the 'U' shaped end flange of the fore/aft bracket with the bolt at the middle. The wood block would keep the wider rubber pad of the Danmar from hitting the pinch weld seam.
BTW, Alan has had his car on my lift.

safe lifting,
 

pamp

Well-Known Member
Messages
1,017
Reaction score
3
Location
Comox, B.C. CANADA
Hoist

Yeah Sven,
I kinda figured Alan had seen your set up but I guess he did not know that you had been my inspiration as well mentor, providing invaluable help and guidance though the install process
for which I am hugely grateful, can't thank you enough.
I did initially build this block...
100_1870.jpg

to catch the location of the nut for the bolt for the subframe bushing. But I was nervous about doing any damage to the kinda' thin looking strap. If this is what you guys are doing with out any problems I will give it a try.
dequincy...the last shot is the pick point for the road jack. Whether this is a stout point I am unsure and was waiting for feedback from others with knowledge greater than my rookie
self.
 

pamp

Well-Known Member
Messages
1,017
Reaction score
3
Location
Comox, B.C. CANADA
Hoist 2.0

OK...re-group, do-over.
Lift here...
100_1872.jpg

Using this here...
100_1873.jpg

Thanks for the input, don't know what you do not ask. I believe this is more what you guys had in mind...catch the center of the bushing point.
 

pamp

Well-Known Member
Messages
1,017
Reaction score
3
Location
Comox, B.C. CANADA
Lift pads

Thinking about making a run of these done by a woodworker...I suck. Be nice for any to throw in the trunk in case you run into trouble on the road and have to suffer a Les Schwaub
show for instance. Man, I see some damage on my baby from bad lifts in her past...
I did radius the hole a bit and now works perfect. Any interest in something like this? Say for a couple of bucks less than a red screwdriver? Certainly some refinement is in order...
 

pamp

Well-Known Member
Messages
1,017
Reaction score
3
Location
Comox, B.C. CANADA
The lift

Many thanks to all for their input. I will say that the last pad I put together works sweet, easy to align to the preferred point. Thanks to Sven and Steve for the inspiration and advise. The hockey puck? Very Canadian.
 

eriknetherlands

Moderator
Site Donor
Messages
2,768
Reaction score
2,004
Location
Netherlands, Eindhoven area
rear lift points; what if you have to replace them ?

Hi all,

I have to replace sections of the rear underbody, but it requires the removal of the rear subframe. To be able to do this, I cant use the lifting point on the rear axle as indicated in the thread (under the vertical pin).

I have sketched in the attached picture the advised rear lifting point (green), and the 2 alternatives i am considering (red and blue).

I am looking for advise which lifting point is best, or if other alternatives exist that are better. Any ideas?

Regards,
Erik.
 

Attachments

  • rear lift points options.JPG
    rear lift points options.JPG
    73.2 KB · Views: 321

61porsche

Well-Known Member
Messages
1,732
Reaction score
28
Location
Dallas
The repair manual has a suggested hardwood block that straddles both the inside and outside rockers rather than the points you indicate. Secondly, the body repair section has a frame shown. The important part of this to me would be that there could be three points on the rear. Two either side on the rockers and one after the differential is removed.

With that said and depending on how much area needs work, it would be best to level the car shell as to not introduce any or as little flex before and after welding.

As a suggestion similar to a diff mount repair, I would look at seeing if there was a way to reinforce the area under the rear seats as well if that's what you're doing.
 

Peter Coomaraswamy

Well-Known Member
Site Donor $$
Messages
3,787
Reaction score
896
Location
Austin, TX
Rear sub removal

Hi All,

I just rebuilt the rear sub frame- I lowered the rear of the car onto jack stands using one ear of the jack stand in the "lifting point 2" on the diagram (below). Then removed the sub frame, I then-rather swiftly, removed the bushing mounts from the sub frame and reattached them to the body where the bolts stick down. I put some spacers around the bolt and repositioned the lift pads so the sub frame was removed and the car was supported in the best possible place for work on the undercarriage.

Just an idea-
 

Attachments

  • rear out.jpg
    rear out.jpg
    92 KB · Views: 336

eriknetherlands

Moderator
Site Donor
Messages
2,768
Reaction score
2,004
Location
Netherlands, Eindhoven area
Rear lifting points; how too part 2

To 61 Porsche, Peter and others; thanks for your tips.

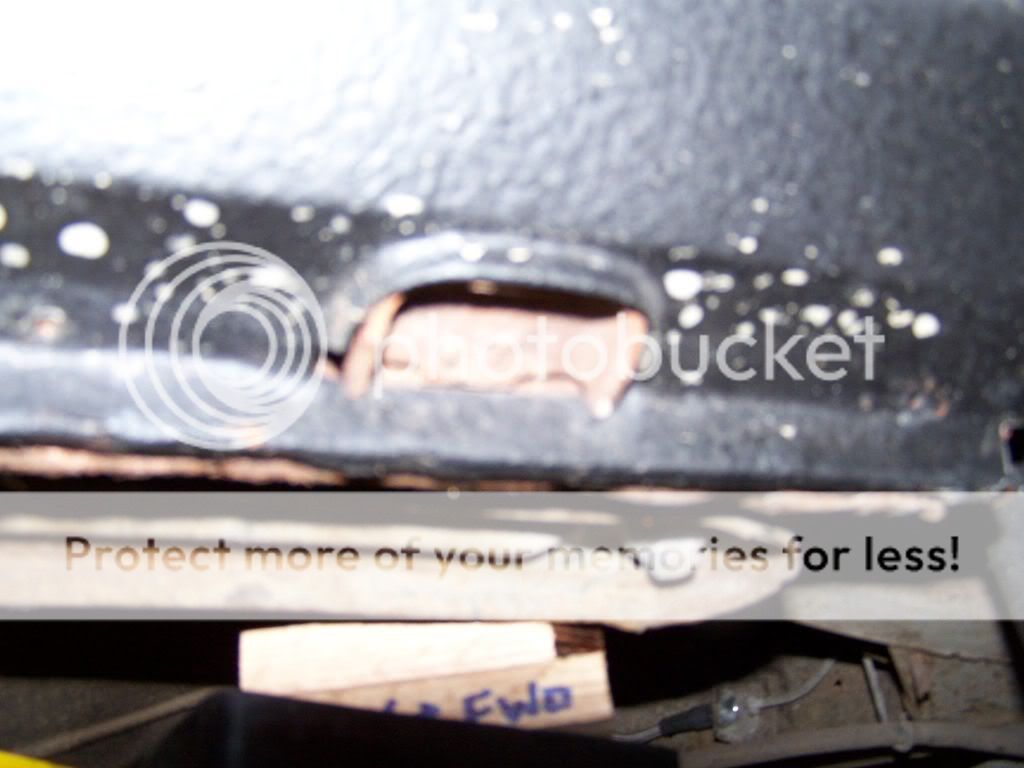
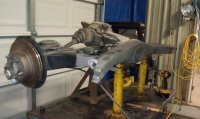
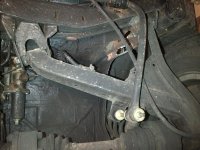
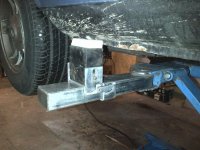
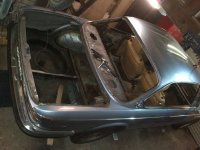
Here some pics of the lifting i'm conducting with your advise (rear right wheel pictured), and a shot of the underside (looking up) at the rear subframe mounting points where the floor under the rear seat is disappearing as we speak.

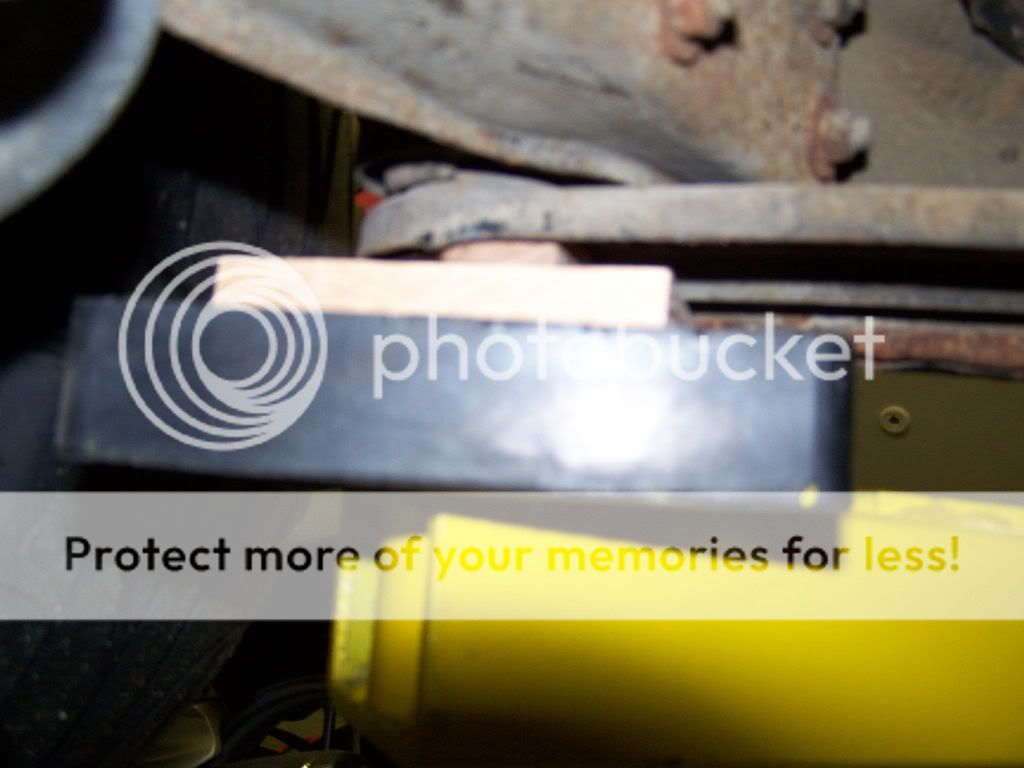
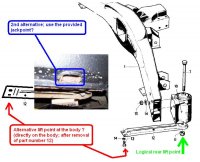
The lifting device keeps the car nicely horizontal, so no body torque. Thanks Porsche 61; I did not think about the negative effect of body twist during welding, but luckily my 4-point lifting device keeps it straight; the doors open although a bigger pull is needed.

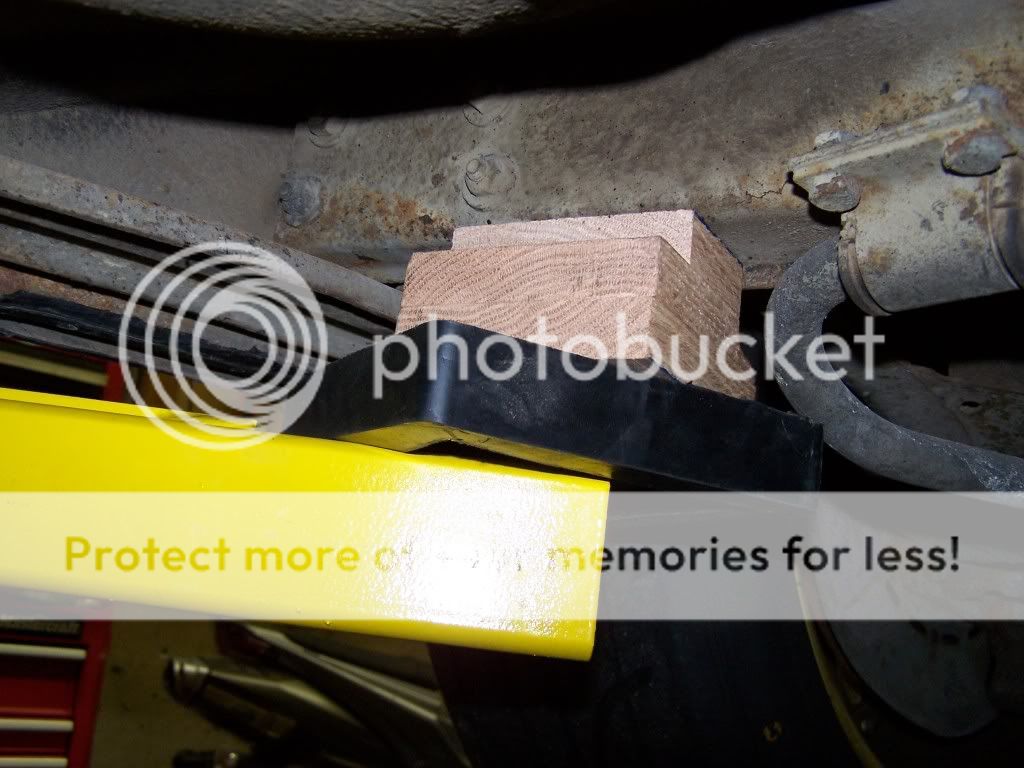
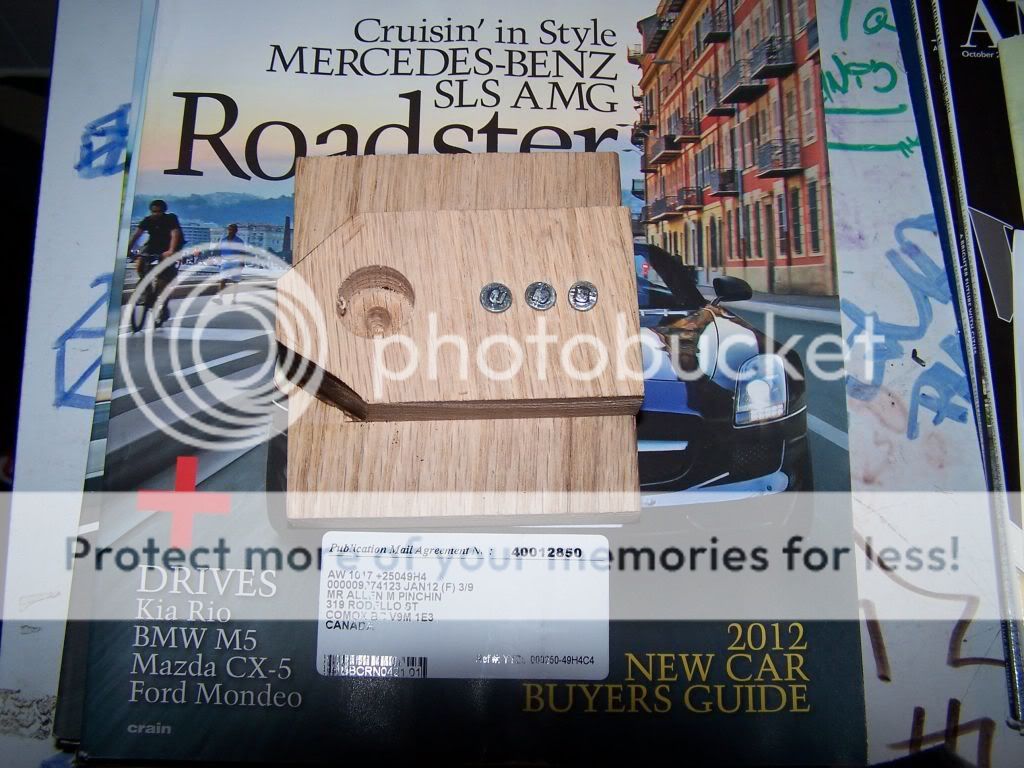
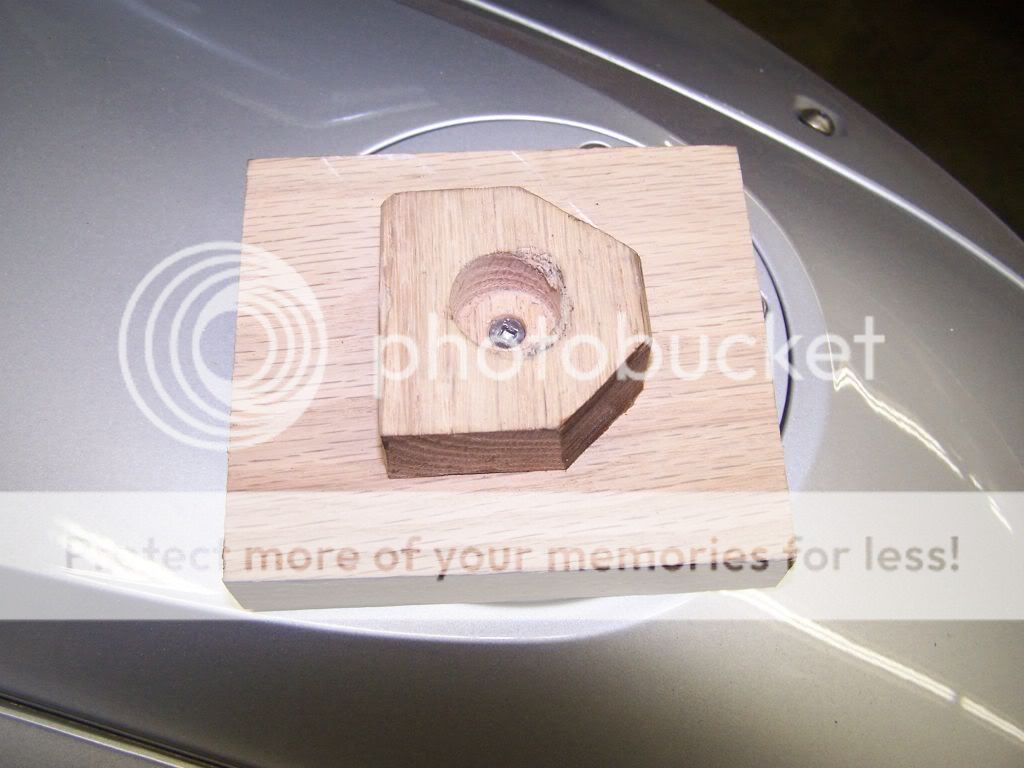
As you can see, i have been challenged by the advise of 61Porsche. I could not fit a hardwood block to stradle the inside and outside rocker, as the inside rocker at the rear goes straight up, having no edge to rest on.
So having no better idea :-?, i shaped a wood block to fill the jacking point, and lifted it up from there. It's been up now for a few days, and it's still holding up.

Why should we preferably not use the provided jacking points? Are these designed too weak, or are they prone to rust through and then become too weak? My rockers appear to be solid, the car was ovehauled some 10 years ago, and has been driven without the add-on sills since.

Porsche 61, 2 questions;
- you mention the "body repair section". What document is that / where to find it? I have the feeling that your comment is like a rainbow...at the end is a pot with...instructions! Always helpfull for a novice as me.
- you mention to reinforce the area under the rear seats. I indeed have removed all from the rear of the car, so it's accessible. What type(s) of reinforcement do you mean? I assume for lateral stifness, but how should i execute that?

Hoping to have him/her back on the road for the spring. I'm finding some other rust spots, i assume typical:
- in the trunk on the flange where the fueltank rests on (a may 1973 car)
- in the corners where the wheelhouse meets the bootfloor and the rearquarter skin; there seems to be a OEM puch through type hole there..Why for godsake? This is probably the reason why my luggage compartment was full of muddy water; spray from the rear wheel. This won't be easy to fix i think, as it's a joint of 3 panels. i suppose i have to cut open the wheelhouse from the side of the wheel to get good access.
- between the rear window and the bootlid is 2 cm of body visible, there are some small holes, about 3 mm diameter. Strange, because the metal around it is solid, and the holes are straight through. It almost seems they are drilled.
- I am also planning to reroute the water drain from the c-pillar badge and have it exit somewhere in the trunk

i'll probaby be posting some pics and questions as i progress, to get some feedback on how things should be done.

Regards,
Erik, The Netherlands.
 

Attachments

  • IMG-20120216-00049 small.JPG
    IMG-20120216-00049 small.JPG
    62.3 KB · Views: 306
  • IMG-20120216-00039 small.JPG
    IMG-20120216-00039 small.JPG
    56.8 KB · Views: 379
  • IMG-20120218-00066 small.JPG
    IMG-20120218-00066 small.JPG
    49 KB · Views: 420

Peter Coomaraswamy

Well-Known Member
Site Donor $$
Messages
3,787
Reaction score
896
Location
Austin, TX
beautiful car

Hello eriknetherlands!

I think the jacking points you configured are fine. My only thought, given the input from others on the forum is to get it back down on the ground as soon as possible. Regarding welding and flex during the operation, I have mostly worked on convertibles and it is imperative that the car be on "all fours" when welding anything. I don't think that is the same with the coupe but it could not hurt if you have the option. I did some repairs on the floor of my coupe while it was lifted but I was sure to measure everything- per input from the group. I did not notice any flex or change in measurements when I replaced the front floors. I'm off to the shop after work tonight to connect the brakes and maybe get the engine sealed and painted- ready for installation. I'll send some pics.

Good luck!
 

deQuincey

Quousque tandem...?
Site Donor
Messages
8,418
Reaction score
2,431
Location
BIO - 43°15'46.5"N 2°56'03.7"W
re freshing this point about hoist lifting points

i am about to carry on some winter works, that include constant velocity shafts and brakes

unfortunately i do not have a lift, but a floor jack and some stands

i found this picture in the blue manual:

apoyotrasero.jpg


do you think it will do ?
 

Sven

Well-Known Member
Site Donor $
Messages
1,145
Reaction score
110
Location
Seattle
deQ - I use the rear subframe bushing mounts to jack the car up with the lift. If I was using a single jack, I would use the same lift point and then place a jack stand under the sway bar "U" brackets with some padding (see arrow). My jack stands fit this shape nicely. Everything else on the rear subframe seems to be at an angle, and therefore not really suitable. It also keeps the stand away from where you will be working at the axel/hub.

Just one idea.
 

Attachments

  • JackPoint.jpg
    JackPoint.jpg
    65.2 KB · Views: 382
Top