Recycling at its best!Great thinking! I pass about 15 body shops on my way to the city each morning.
You are using an out of date browser. It may not display this or other websites correctly.
You should upgrade or use an alternative browser.
You should upgrade or use an alternative browser.
Deconstruction Thread: How to part-out an E9
- Thread starter Markos
- Start date
For the drive shaft, you may have to unscrew that hex cap on the rear piece? I didn't on mine but..
The clutch master was a 2 person job for me, my wife graduated from the usual clutch bleeding duty for that one
The clutch master was a 2 person job for me, my wife graduated from the usual clutch bleeding duty for that one
For the drive shaft, you may have to unscrew that hex cap on the rear piece? I didn't on mine but..
The clutch master was a 2 person job for me, my wife graduated from the usual clutch bleeding duty for that one
I tried that. I need a bigger adjustable wrench!
After trying a pipe wrench I concluded that I was no longer thinking straight, and sleep was in order.
Update:
Day 2 on the engine pull went very smooth. I spent a bit of time pulling off the accessory brackets and the oil filter flange/housing. I still need to remove the starter as well.
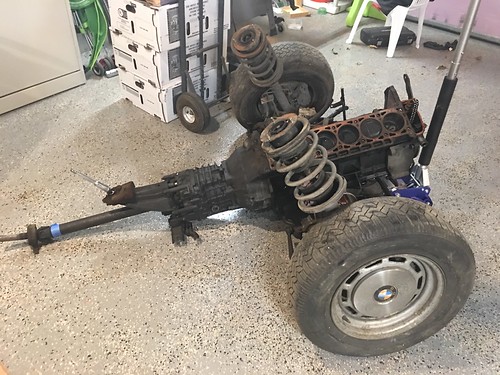
Jacking up the motor a bit straightened out the driveshaft and it pulled apart as planed. Before pulling it though I marked the alignment of front to back per Don's suggestion. My theory that the transmission would balance out the engine on the floor jack proved to be spot on. In fact it balances perfectly on the floor jack, even when raised.
This weekend I will use the transmission as leverage to flip the motor onto a pallet. Then I will pull the transmission and donate it to a local friend in need. I may keep the speedometer drive if he doesn't need it.
After that it will be time to pull apart the suspension and subframe. I will be keeping the strut housings to build front coilovers. I will be keeping and rebuilding the front brakes as well. The springs will likely get recycled. The adjustable front sway bar will go to the powder coater with the rear and modified strut housings.
Last edited:
My garage floor was so clean in the pic above! I was forewarned but I swear I dumped at least two quarts of 28 year old motor oil on the floor when I flipped the engine block. My wife wasn't too pleased. 
The block is on a pallet along with the booster core.
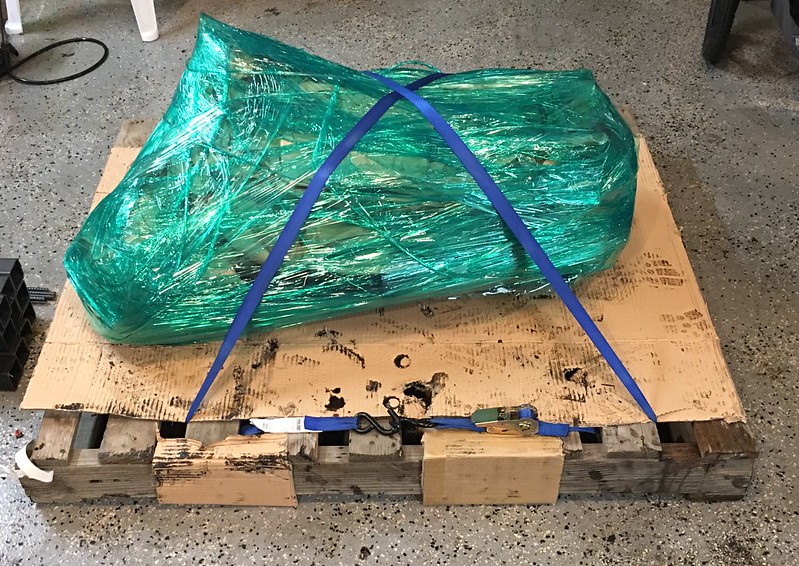
The Getrag 4spd is now in a box getting picked up by a local member tomorrow. I started to pull the speedo drive but lost motivation when I realized how difficult it was to remove the worm gear. I can get it from him later.
The subframe seems like it weighs a ton with the wheels and strut housings in place. I removed the struts/wheels and rolled them behind the shed for now. I've hit most of the castle nuts with PB Blaster. The subframe is back under the car to keep clutter down. Back at it on Monday.
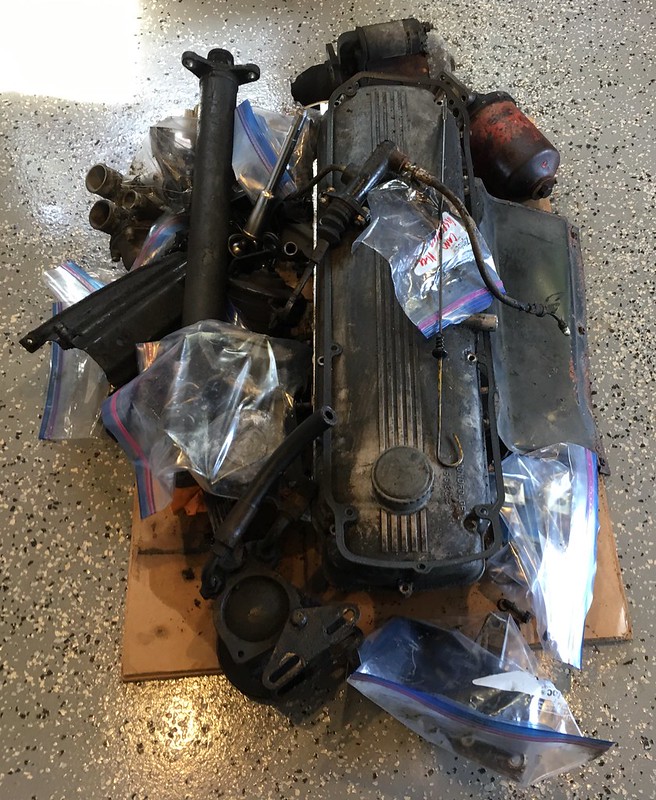
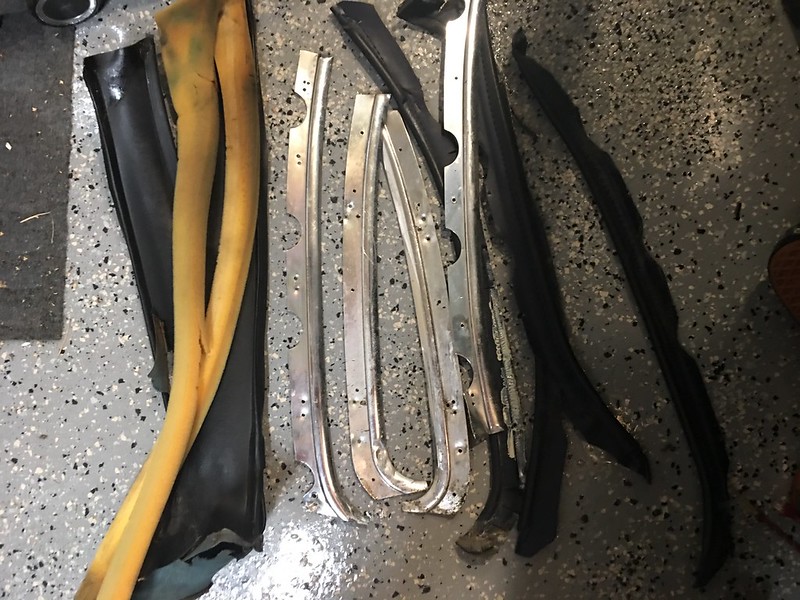
Meanwhile, I need to figure out what to do with this stuff:
CSI Block: $700
Total Sales: $3840
Play Money: $440
The block is on a pallet along with the booster core.
The Getrag 4spd is now in a box getting picked up by a local member tomorrow. I started to pull the speedo drive but lost motivation when I realized how difficult it was to remove the worm gear. I can get it from him later.
The subframe seems like it weighs a ton with the wheels and strut housings in place. I removed the struts/wheels and rolled them behind the shed for now. I've hit most of the castle nuts with PB Blaster. The subframe is back under the car to keep clutter down. Back at it on Monday.
Meanwhile, I need to figure out what to do with this stuff:
CSI Block: $700
Total Sales: $3840
Play Money: $440
Last edited:
Well I broke even and got lazy. I really need this car out of the garage before the rainy season starts (which is tomorrow).
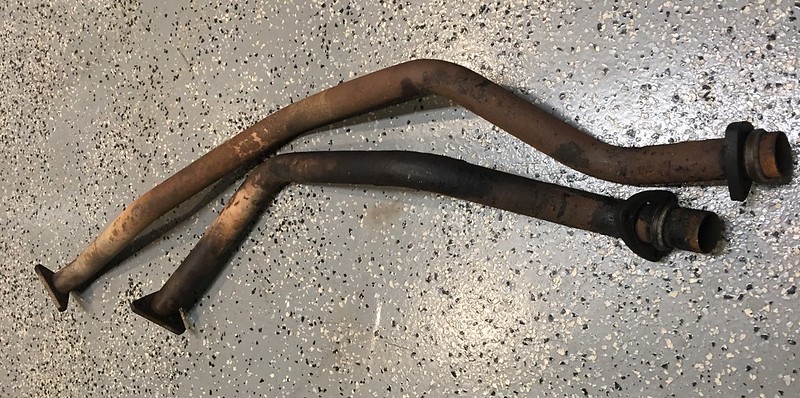
Off with the down pipes for an interested member.
Now I'm cheating a bit as the exhaust is mostly laying on the floor. The down pipes span between the exhaust manifolds and the first muffler. The coupling on the muffler end is held on by 13mm bolts with 12mm exhaust nuts (I just made that up - but you know those nuts...). On the manifold side, three 17mm bolts secure the down pipe to the manifolds. You will want tome PB blaster on that end. If you are east of the Mississippi, you will want PB blaster on both ends.
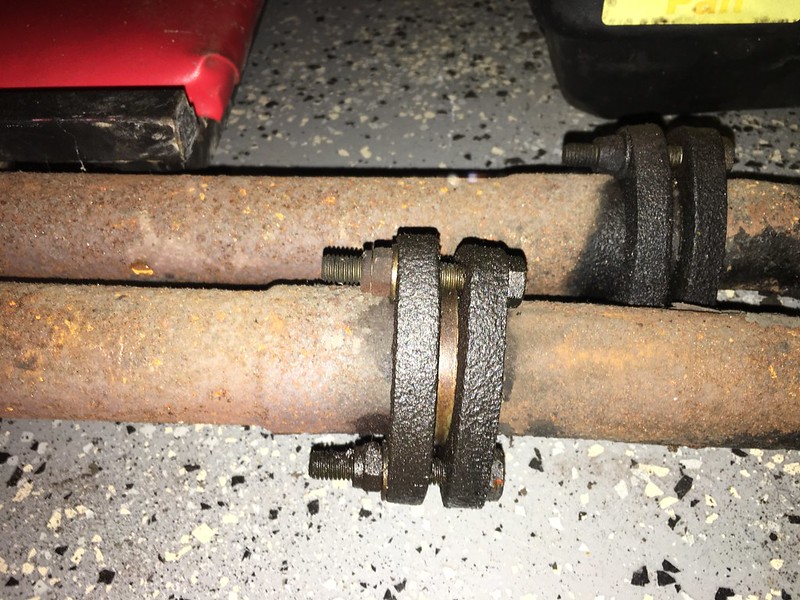
The side closest to the passenger is nice and easy. The pipe is pretty straight on both sides of the coupling. On the far pipe, there is a kink in the down pipe. Depending on how the flange is placed, it could be difficult to remove one of the bolts. If you are determined, you will use a 13mm socket with built-in universal joint. If you are *intelligent, you will remove that bolt last with a standard socket. You see, the flange rotates freely on the pipe. If you remove two bolts you can rotate the flange by hand to the position of choice. So if you have a clearance issue with one of the bolts, save it for last.
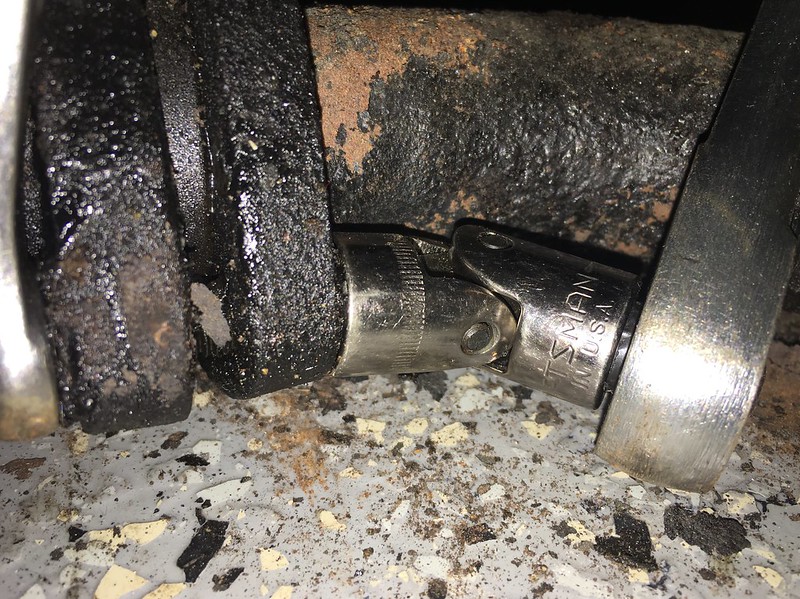
After all of the bolts are removed you may need to give the down pipe some twisting and tugging. It will come off with some persuasion.
Off with the down pipes for an interested member.
Now I'm cheating a bit as the exhaust is mostly laying on the floor. The down pipes span between the exhaust manifolds and the first muffler. The coupling on the muffler end is held on by 13mm bolts with 12mm exhaust nuts (I just made that up - but you know those nuts...). On the manifold side, three 17mm bolts secure the down pipe to the manifolds. You will want tome PB blaster on that end. If you are east of the Mississippi, you will want PB blaster on both ends.
The side closest to the passenger is nice and easy. The pipe is pretty straight on both sides of the coupling. On the far pipe, there is a kink in the down pipe. Depending on how the flange is placed, it could be difficult to remove one of the bolts. If you are determined, you will use a 13mm socket with built-in universal joint. If you are *intelligent, you will remove that bolt last with a standard socket. You see, the flange rotates freely on the pipe. If you remove two bolts you can rotate the flange by hand to the position of choice. So if you have a clearance issue with one of the bolts, save it for last.
After all of the bolts are removed you may need to give the down pipe some twisting and tugging. It will come off with some persuasion.
Last edited:
I might be interested in the valve cover
I might be interested in the valve cover
Thanks Mark. I think I’m going to keep it and have it ceramic coated.
Hey Mark. Congratulations on hitting the break even point. The parts car will be in the black from here on out. Say, what is the status of the rear panel sheet metal (rear clip and quarter panels)? Decent?
Hey Mark. Congratulations on hitting the break even point. The parts car will be in the black from here on out. Say, what is the status of the rear panel sheet metal (rear clip and quarter panels)? Decent?
The rear quarters are in good shape. the rear tail panel is a bit of a hack job. I wouldn’t use it.
Hi Mark
Do you still have the steel wheels and are they 15"?
Thanks Tim
I have three steel wheels and they are 14’s from ‘77 or so.
Just a reminder to PM me about inquiries. This thread isn’t intended to be a FS advertisement. Thanks!
PM sent.
Just a bit of accounting:
I’m dipping into the private stash on some of this but I’m compelled to help a friend in need. Fortunately for once the majority of this stuff is off the car.
2x Chrome Outer door handles (good) $100
2x Lower quarter window chrome (fair) $50
Fuse box door (fair): $50
Glovebox (poor): $25
3.0 Embmem (fair): $15
Hood Latch Receivers: $35
Door lock Rods: $0
Mirror Nuts: $10
Raised Roundel: $15
Seat Rails: $78
Other Accounting:
Downpipes & Center Muffler: $100
Total Sales: $4,318
Play Money: $918
Last edited:
Tonight was all about the drill. I snapped some photos of the first set of endeavors but then my battery went dead.
I had a bunch of parts on the car that needed to have the screws drilled. I saved it all up for a batch removal. Here's what I tackled and how it went. But first, I'll throw my thoughts on the various methods removings tripped screws:
1. Screw Extractor: This works well for screws that are stripped but not stuck. Little torque is required to free them, but the screwdriver or hex key just won't grab. If your screw stripped because it is majorly stuck, expect to have problem with a screw extractor (especially a small one). I've cracked countless screw extractors over the years.
2. Dremmel a slot into the top of the screw: This works well if the screw is raised and not recessed. Grind a slot in the top and use a standard screwdriver
3. Drill the head off: This method works well for recessed screws and raised screws. You cant to use a drill bit equal to or slightly larger than the diameter of the screw (not the diameter of the screw head).
4. Tack weld a nut onto the head screw: As described but I won't go into that one since many folks don't weld.
I rarely mess around with screw extractors. I generally go for option 3, removing the screw head. If you go slow and use the right drill bit, you can remove the head without damaging the mating material.
Like my driver's side door handle, I had to drill out the screws holding the handle to the actuating mechanism inside the door. The head will generally snap free before you hit the mating material. If it's getting close with no breakage you can stop and use vise grips to work the scerw head free.
This one was a bit more challenging. These suckers were all seized. The passenger side screws came off with ease but the driver's side felt like they were welded in place. I shot this multiple times with PB Blaster front-side and back. I suppose I could have soaked it overnight again, but I tried that a few months ago. Same deal - use a bit just larger than the screw diameter and the heads break free.
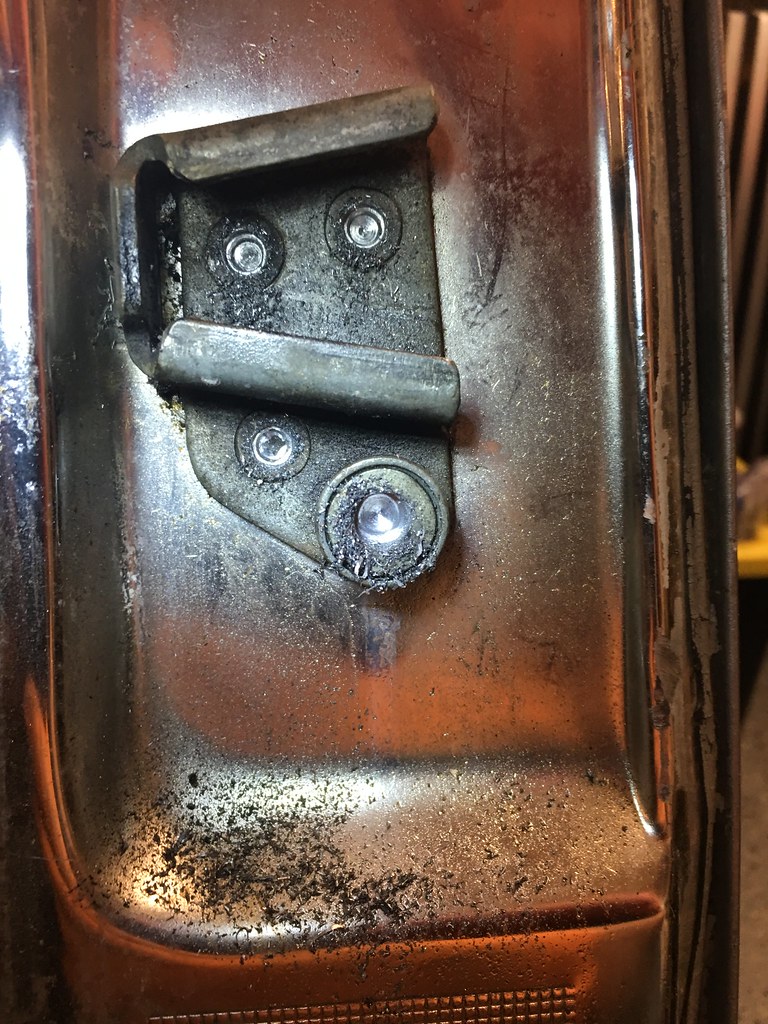
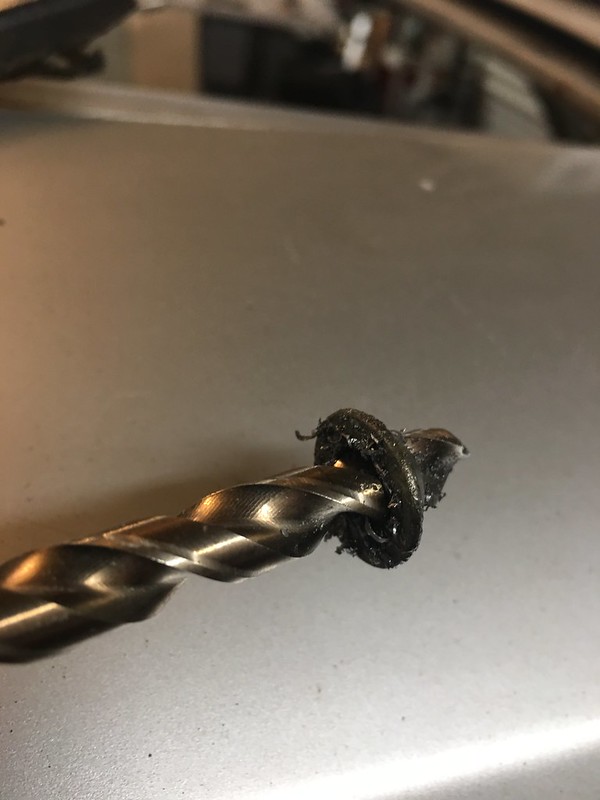
The thing about screws, it is the head that holds it in place. Once you remove the head you can generally unscrew the remaining by hand or with a spair of pliers.
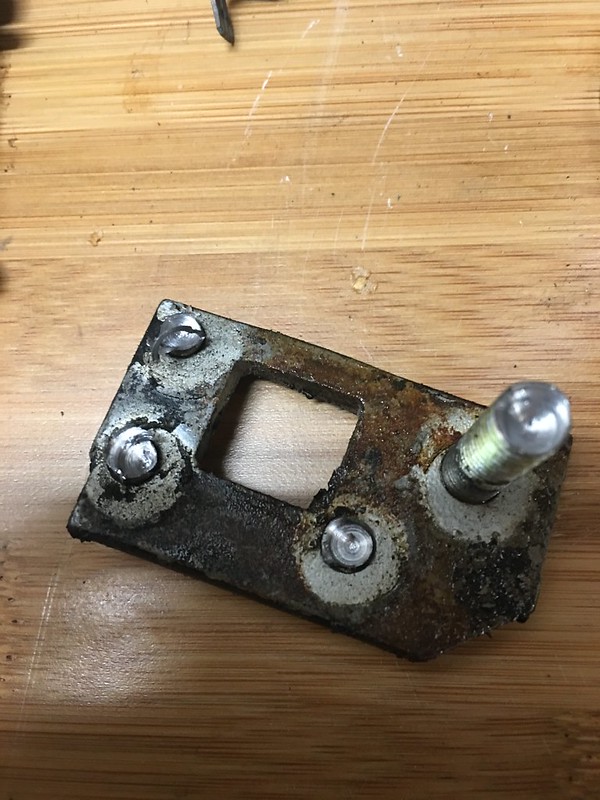
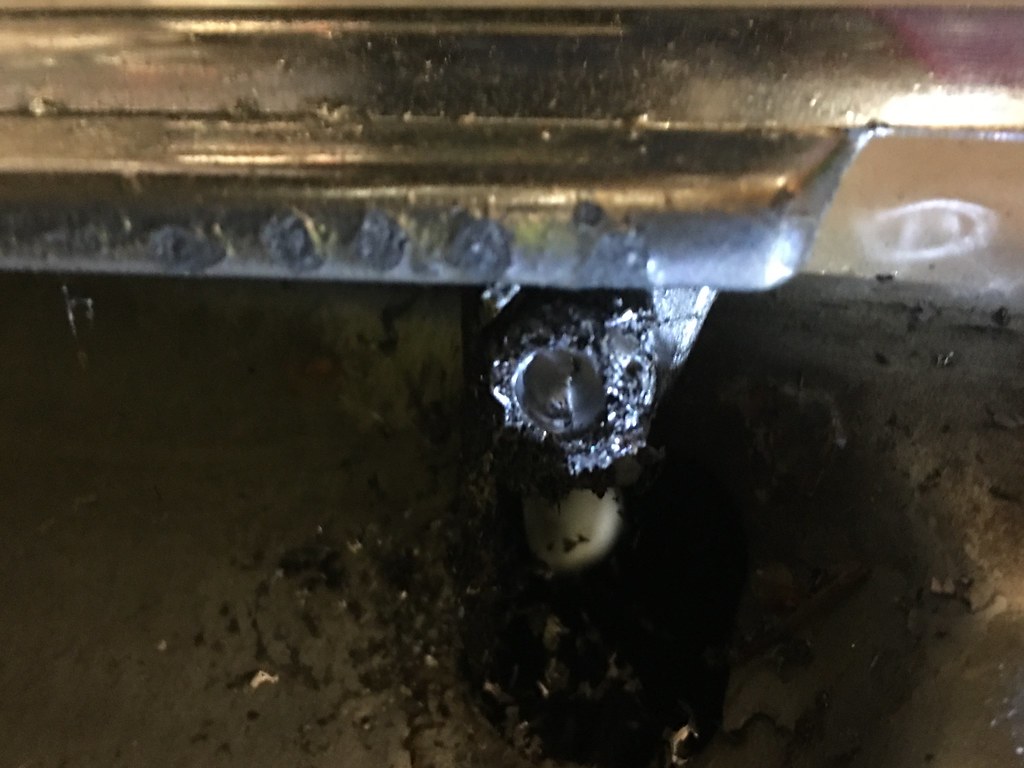
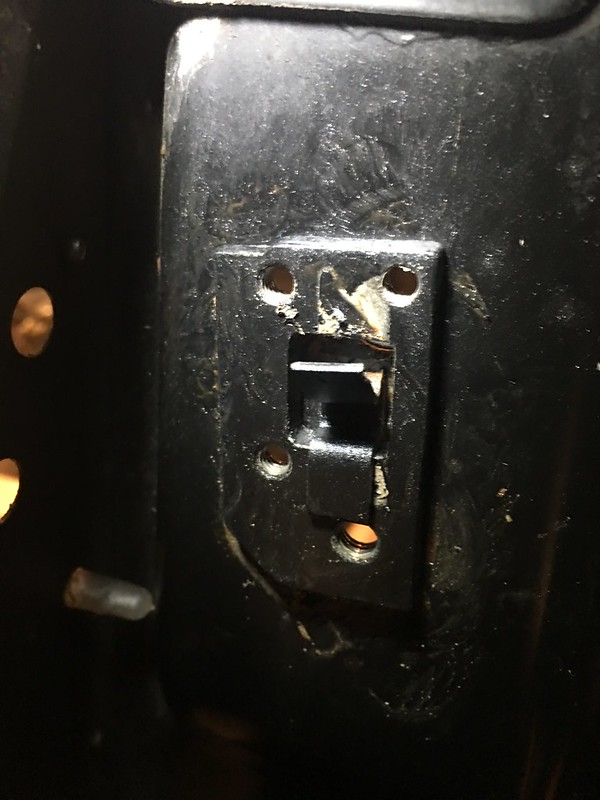
Sidebar - here is how you get the backing plate for the door receiver off. It's held in place by sheet metal tabs that must be bent. Bend the top one down then apply force the backing plate with a screwdriver from the door jam, through the body and onto the plate. The applied force will bend the lower tab, which is hard to reach with a screwdriver.
Now for the stuff that requires drilling from the factory. Removing the rivets that hold the door jam trim and welts in place. These plates were removed and installed at least one or two times prior on this car. Why they didn't reuse the same holes is beyond me.
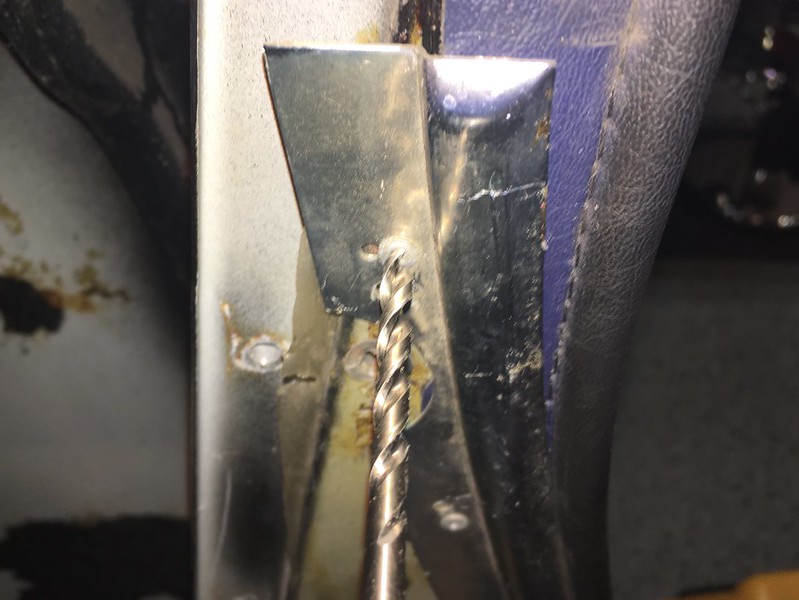
Aluminum trim starting to look like Swiss cheese. All of the trim welts, and aluminum door jam skins were wrapped up and put away
I had a bunch of parts on the car that needed to have the screws drilled. I saved it all up for a batch removal. Here's what I tackled and how it went. But first, I'll throw my thoughts on the various methods removings tripped screws:
1. Screw Extractor: This works well for screws that are stripped but not stuck. Little torque is required to free them, but the screwdriver or hex key just won't grab. If your screw stripped because it is majorly stuck, expect to have problem with a screw extractor (especially a small one). I've cracked countless screw extractors over the years.
2. Dremmel a slot into the top of the screw: This works well if the screw is raised and not recessed. Grind a slot in the top and use a standard screwdriver
3. Drill the head off: This method works well for recessed screws and raised screws. You cant to use a drill bit equal to or slightly larger than the diameter of the screw (not the diameter of the screw head).
4. Tack weld a nut onto the head screw: As described but I won't go into that one since many folks don't weld.
I rarely mess around with screw extractors. I generally go for option 3, removing the screw head. If you go slow and use the right drill bit, you can remove the head without damaging the mating material.
Like my driver's side door handle, I had to drill out the screws holding the handle to the actuating mechanism inside the door. The head will generally snap free before you hit the mating material. If it's getting close with no breakage you can stop and use vise grips to work the scerw head free.
This one was a bit more challenging. These suckers were all seized. The passenger side screws came off with ease but the driver's side felt like they were welded in place. I shot this multiple times with PB Blaster front-side and back. I suppose I could have soaked it overnight again, but I tried that a few months ago. Same deal - use a bit just larger than the screw diameter and the heads break free.
The thing about screws, it is the head that holds it in place. Once you remove the head you can generally unscrew the remaining by hand or with a spair of pliers.
Sidebar - here is how you get the backing plate for the door receiver off. It's held in place by sheet metal tabs that must be bent. Bend the top one down then apply force the backing plate with a screwdriver from the door jam, through the body and onto the plate. The applied force will bend the lower tab, which is hard to reach with a screwdriver.
Now for the stuff that requires drilling from the factory. Removing the rivets that hold the door jam trim and welts in place. These plates were removed and installed at least one or two times prior on this car. Why they didn't reuse the same holes is beyond me.
Aluminum trim starting to look like Swiss cheese. All of the trim welts, and aluminum door jam skins were wrapped up and put away
Last edited:
I wish my camera didn't die.
I removed the heater box. Held in place by four 10mm bolts. Don't attempt to remove the cables to the blend doors. The face plate can be removed from the cable pulls. That's the way to do it.
Next I removed the wiper motor. Is this thing really soldered in place? Mine was cut and spliced so I disconnected mine at that splicing point. I assume that if you want to replace the motor the proper way, you unbolt the motor from the mini wiper motor transmisssion. This isn't the first cut pigtail that I've found. The steering column stalks had been cut straight through as well.
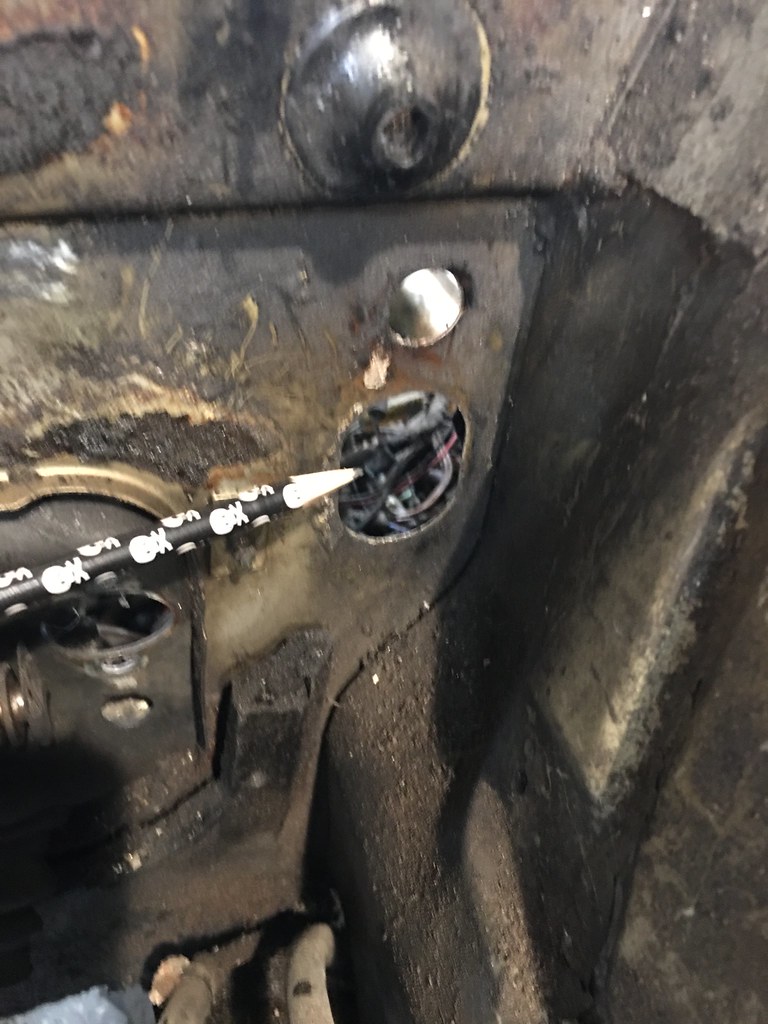
Next was the wiring. FYI - You can pull the entire engine-side chassis harness through the small hole in the firewall. This includes the various plugs and connectors including but not limited to the relay bases, the headlight sockets, the negative battery terminal, etc. The only thing that won't fit is the voltage regulator which you would simply ungplug anyway. Unplug the MC cap asw well.
wiring in the driver’s footwell:
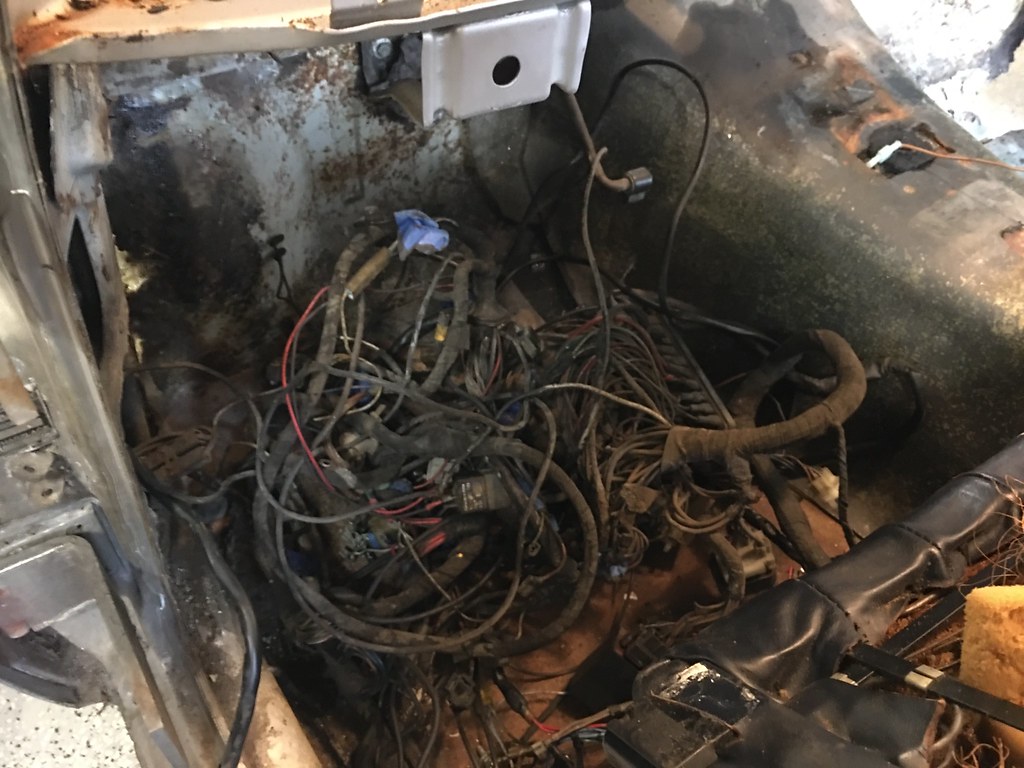
All came through here (sorry a bit blurry):
Finally, I removed the hood latch receivers, two 10mm bolts on each latch. One bolt is visible and one is under a gromet.
More tomorrow!
I removed the heater box. Held in place by four 10mm bolts. Don't attempt to remove the cables to the blend doors. The face plate can be removed from the cable pulls. That's the way to do it.
Next I removed the wiper motor. Is this thing really soldered in place? Mine was cut and spliced so I disconnected mine at that splicing point. I assume that if you want to replace the motor the proper way, you unbolt the motor from the mini wiper motor transmisssion. This isn't the first cut pigtail that I've found. The steering column stalks had been cut straight through as well.
Next was the wiring. FYI - You can pull the entire engine-side chassis harness through the small hole in the firewall. This includes the various plugs and connectors including but not limited to the relay bases, the headlight sockets, the negative battery terminal, etc. The only thing that won't fit is the voltage regulator which you would simply ungplug anyway. Unplug the MC cap asw well.
wiring in the driver’s footwell:
All came through here (sorry a bit blurry):
Finally, I removed the hood latch receivers, two 10mm bolts on each latch. One bolt is visible and one is under a gromet.
More tomorrow!
Last edited:
the wiper motor should have a plug for removal
the wiper motor should have a plug for removal
That’s good to know. This is just another example of botched work on this car.
A quick general comment here...
Markos, this is a really great thread. Excellent photos, well explained. It takes a long time to write copy and organize photos and I (among many I'm sure) really appreciate it. It is both helpful and entertaining! Thank you.
Markos, this is a really great thread. Excellent photos, well explained. It takes a long time to write copy and organize photos and I (among many I'm sure) really appreciate it. It is both helpful and entertaining! Thank you.
A quick general comment here...
Markos, this is a really great thread. Excellent photos, well explained. It takes a long time to write copy and organize photos and I (among many I'm sure) really appreciate it. It is both helpful and entertaining! Thank you.
Thanks Bo! I usually work on my car at around 11Pm them post at about 1AM, so my first draft can be pretty incoherent.
A driver just left my house with a bundle of parts. It is almost sawzawl time!