there you go Mark, 3d printing for the custom look - i like it. next you will be creating custom a/c panels with return air vents at the bottom and putting e12 rotary switches around the gauges for a/c control for the restomod cause.
You are using an out of date browser. It may not display this or other websites correctly.
You should upgrade or use an alternative browser.
You should upgrade or use an alternative browser.
3D Printing: AC Face Plate & Console Vent Covers
- Thread starter Markos
- Start date
there you go Mark, 3d printing for the custom look - i like it. next you will be creating custom a/c panels with return air vents at the bottom and putting e12 rotary switches around the gauges for a/c control for the restomod cause.
I do like those switches! No AC for me though so. Hopefully this is it for the center console stuff. I may model some other radio sizes. I have someone planning on using a Becker, so I need to check fitment.
An example of poor requirements. I'm in IT I should know better. I said "make the washer the same thickness as the back of the AC vents". He did exactly that. Had I substituted "thickness" with "height", I likely would have received a different outcome.

PAINT FLAT BLACK AND THEN USE A TOOTHBRUSH TO
FLICK PAINT ON
LOOK EXACTLY LIKE OEM
THEN POLISH W/ MEQUIRES 40
FLICK PAINT ON
LOOK EXACTLY LIKE OEM
THEN POLISH W/ MEQUIRES 40
PAINT FLAT BLACK AND THEN USE A TOOTHBRUSH TO
FLICK PAINT ON
LOOK EXACTLY LIKE OEM
THEN POLISH W/ MEQUIRES 40
I took your recommendation Alan. It worked well but I got a little overzealous. The flecks started to run. i had to start over. Shortly after I encountered some discrepancies so I haven't revisited the approach.
I found a couple other texture paints I might try
SEM 39853 Black Texture Coating Aerosol - 16 oz
and
Rust-Oleum Trunk Spatter Paint 251580
When I was in design school we would use something called 'hood and deck' that worked great, but I can't find it
(hood and deck like the hood and trunk lid, to give it a non reflective finish)
SEM 39853 Black Texture Coating Aerosol - 16 oz
and
Rust-Oleum Trunk Spatter Paint 251580
When I was in design school we would use something called 'hood and deck' that worked great, but I can't find it
(hood and deck like the hood and trunk lid, to give it a non reflective finish)
Perhaps you need a "how-to" video. I would like to watch that. Bet it is all in the wrist!I took your recommendation Alan. It worked well but I got a little overzealous. The flecks started to run. i had to start over. Shortly after I encountered some discrepancies so I haven't revisited the approach.
")
Darren Michael
Member
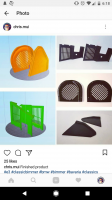
Before selling my AC Setup, I decided to send the E9 face plate out to a SolidWorks modeler to recreate. The part is in the mail and I should have a draft design by the end of next week.
I called for three designs. One with the standard radio opening, one that is blank, and one that has three gauge holes. The blank one may have lines in the back to facilitate the cut out of the radio on the future. I haven't checked if gauges will fit the space yet. My CSI was a rats nest of stereo wires in that area.
I intend to print with a professional 3D printer, and sell them with a markup to
cover the cost of the modeling. A BMW friend of mine runs a PolyJet printer, and has numerous printing contacts in the Seattle area. Technically they could be printed with powdered aluminum, perhaps for the concours crowd.
Oh - I also sent the AC grills. I haven't paid for those yet, but I will likely have them modeled also. I would imagine that those are much easier to sell.
Keep you posted!
Brilliant work Markos - so are those #D printed bad boys for sale!? Need the aircon console for CS
They will be Darren. The side grills are done. The last iteration deviated from where we needed to be. I need to start two iterations back and work with my modeler to get it right. He’s waiting on me right now...
I am interested in an a.c. face plate already hacked with large opening for din 1 radio. Condition not important as long as intact with the larger opening. Markos, is the one in the photos for sale? Can you will you pursue 3d face plate with din 1? Pm me anyone with available din 1 plate at fair price. Thanks jjs2800cs
thestein1016
Member
- Messages
- 20
- Reaction score
- 2
I think I might have missed it, but what material did you select. I did the following around a year ago using polypropylene however I had a few issues with warpage
I’m using laser sintered Nylon. It is comparatively “cheap” and has good thermal properties.
I would be in for left and right console vents as well. Let us know when and where!
I would be in for left and right console vents as well. Let us know when and where!
Shoot me a PM Gary. These are ready to print any time. I can point you to a few folks that can describe the product.
Sadly I am still behind on the other stuff...
PM sentShoot me a PM Gary. These are ready to print any time. I can point you to a few folks that can describe the product.
Sadly I am still behind on the other stuff...
Update:
AC Face Plate:
I'm finally getting the ball rolling on this. I just had a video call with my modeler. I am sending him a pristine original face plate for him to reference and finalize the 3D version. He will be working from the V3 version forward, and incorprating the successful changes in V4, and correcting some of the issues that V4 introduced
Defroster Vent:
He has a broken vent in his possession to play with. We both agree that it may just be best to make a full version of the vent versus a repair kit. My take is that folks won't want to hack up their original vents, even if they are broken. I'm a bit concerned about attaching the lower vent portion to the new upper vent. So - to start the model will be a full vent. He will be sending me a block model (rough wireframe) of the approximate material volume so that I can get a quote from the print shop. Much like the console sides, I don't anticipate that these will be cheaper than originals in good condition. The issue with both is the availability of good quality originals.
did you have the vent laser scanned?
Awesome! Keep up in the loop of the progress! I have a feeling I'll be needing some of those pieces!
did you have the vent laser scanned?
No. I looked into it and it is a bit cost prohibitive. Even if you get a good scan of the outside you will still need to model the inside, which means turn it into a drawing anyway.
The exposed portion of the vent needs to be very accurate. We have plenty of flexibility on the underside. It just needs to be directionally correct. The overall length and placement is important but the think just hooks up to an accordion hose. The level of precision required is far less than that of the AC face plate, or the parking brake handle.
I may send a good vent to my modeler if the broken one that he has isn’t sufficient. I’ll start with pictures.
that is true, you don't see it
If you model one surface you just offset it to make the other, inside / outside
I had pretty good luck with a photogrammetry process, Autodesk used to have a free version
I need to upgrade my computer to use the new local version
this Guzzi tranny was made with that process
The model is not really as good as it looks, the texture map makes it look 'real'
I rebuilt it
Anyway, something to consider