After a couple years of adjusting my own carbs and with much valuable input from 61porsche and others on this board, I have finally worked out a system that gets my Zeniths pretty darn smooth. For the experts' consideration:
Parts used:
Digital rpm/timing light - critical for seeing small changes in rpm from mixture adjustments - my old analog gauge I now realize was useless.
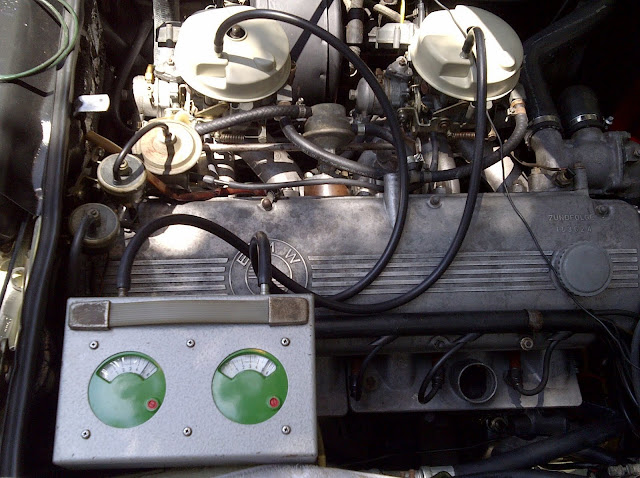
Vacuum gauge(s) - I have 2 but only use one for this procedure.
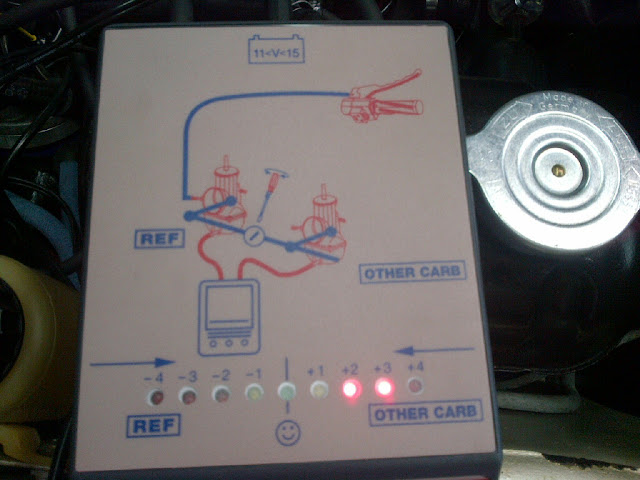
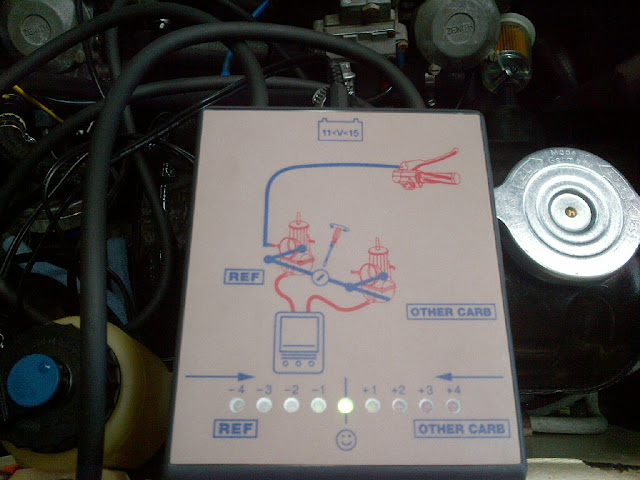
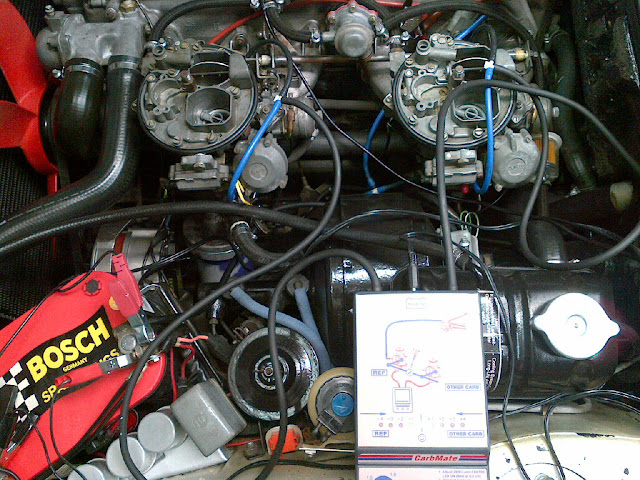
Carbmate TS-111 synchro device - shows vacuum balance electronically between the carbs - basically an electronic manometer with more accuracy and without the risk of sucking fluid into an unbalanced carb. Adjusts for sensitivity. This thing is great.
STE Synchrometer with home made adapter to fit on top of the carbs - had one for each carb but one blew up from a backfire last year so now have to switch it from carb to carb - no big deal.
Here's the procedure (feel free to suggest improvments to the process)
1. Ensure valves are adjusted and timing is set. Check for vacuum leaks and repair if so. I have a pertronix so I have it slightly advanced and have plugged the retard function.
2. I took Jerry's advice and have linked the vacuum ports of each carb to the corresponding port of the other via vacuum tubing - both ported and manifold connections - this smoothed things out considerably on its own.
3. With this in mind I teed the tube between the manifold vacuum ports (driver's side of carbs on mine) so that I have a fitting to attach the vacuum gauge and cap it when it's not used.
4. Attach vacuum gauge to the tee.
5. Disconnect the linkages to the carbs so they are independent.
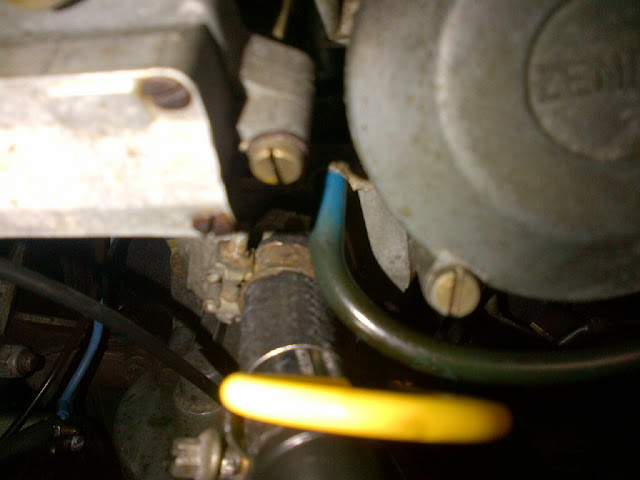
6. Close the butterfly valves via the set screws all the way (counter clockwise) so that no more valve movement happens when you turn the screws - then screw it back in just enough to detect the slightest of movements. The idea here is to get the carb to stay on the idle mixture circuit as much as possible.
7. Close the idle mixture screws until they stop all the way in (gently) - record how many turns it took for each carb so you have that to fall back on. Back the screws out 2 1/2 turns. I use a flexible driver from Sears with a screw driver bit taped in - this helps to access the screws behind the linkages when things get hot. A folded towel on the valve cover helps insulate.
8. Start the car, if it dies you can open the butterflies equally a little but only do so just enough to get it to idle - too much and you will suck gas into the venturi and mess everything up. Ask me how I know.
9. At idle, adjust the mixture screws (out is richer, in is leaner) and watch the rpm gauge and the vacuum gauge - small increments - one carb at a time and back and forth - I turn it out until the rpms and vacuum max out then back in until it stumbles then back out a little rich till smooth again. I watch the corner of the hood up in the air to determine the point of minimal shake. Combination of highest rpm and minimal hood shake. Using the vacuum gauge connected to both carbs minimizes gauge flutter and for me makes seeing small changes easier than having separate gauges - and is also visible proof that the connection between the carbs cancels pulsing vacuum and results in smoother operation. Using this technique I improved my vacuum reading from 15 to 18.5. My rpm here was about 800 +- 10 rpms but this probably will be different for everyone.
10. Once the idle mixtures are set disconnect the vacuum gauge and connect the Carbmate - it has a hose for each carb. Adjust the butterflies equally, keeping the LED display in the middle until you reach your desired rpm - I have A/C so I set it at 1050.
11. Check each carb with the Synchrometer to verify equal air passing through and adjust accordingly while keeping the Carbmate in synch also.
12. Idle should be smooth now with minimal missing/hood shake and puttering happily with a nice exhaust note.
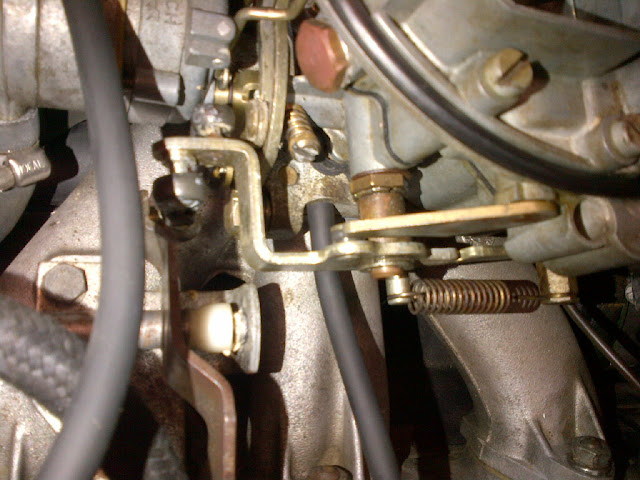
13. Reattach the linkages - making sure that when you do there is no movement of the butterflies and no change in rpm. Put a little white grease in the sockets before popping them back together. Adjust linkages accordingly if change is detected.
14. Rev the car to 3500-4000 rpm and watch the Carbmate - if one carb is out of balance at higher revs, twist the knurled linkage adjustment piece at the back carb linkage until it zeroes them out. This ensures balanced carbs throughout the rev range, not just at idle and makes a big difference when driving.
15. Carbmate should show balance at both idle and through the rev range if linkages are correctly adjusted. Revs should be smooth and responsive with no missing.
16. Disconnect devices, plug the vacuum tee, check all other vacuums for tightness and take it for a drive!
Parts used:
Digital rpm/timing light - critical for seeing small changes in rpm from mixture adjustments - my old analog gauge I now realize was useless.
Vacuum gauge(s) - I have 2 but only use one for this procedure.
Carbmate TS-111 synchro device - shows vacuum balance electronically between the carbs - basically an electronic manometer with more accuracy and without the risk of sucking fluid into an unbalanced carb. Adjusts for sensitivity. This thing is great.
STE Synchrometer with home made adapter to fit on top of the carbs - had one for each carb but one blew up from a backfire last year so now have to switch it from carb to carb - no big deal.
Here's the procedure (feel free to suggest improvments to the process)
1. Ensure valves are adjusted and timing is set. Check for vacuum leaks and repair if so. I have a pertronix so I have it slightly advanced and have plugged the retard function.
2. I took Jerry's advice and have linked the vacuum ports of each carb to the corresponding port of the other via vacuum tubing - both ported and manifold connections - this smoothed things out considerably on its own.
3. With this in mind I teed the tube between the manifold vacuum ports (driver's side of carbs on mine) so that I have a fitting to attach the vacuum gauge and cap it when it's not used.
4. Attach vacuum gauge to the tee.
5. Disconnect the linkages to the carbs so they are independent.
6. Close the butterfly valves via the set screws all the way (counter clockwise) so that no more valve movement happens when you turn the screws - then screw it back in just enough to detect the slightest of movements. The idea here is to get the carb to stay on the idle mixture circuit as much as possible.
7. Close the idle mixture screws until they stop all the way in (gently) - record how many turns it took for each carb so you have that to fall back on. Back the screws out 2 1/2 turns. I use a flexible driver from Sears with a screw driver bit taped in - this helps to access the screws behind the linkages when things get hot. A folded towel on the valve cover helps insulate.
8. Start the car, if it dies you can open the butterflies equally a little but only do so just enough to get it to idle - too much and you will suck gas into the venturi and mess everything up. Ask me how I know.
9. At idle, adjust the mixture screws (out is richer, in is leaner) and watch the rpm gauge and the vacuum gauge - small increments - one carb at a time and back and forth - I turn it out until the rpms and vacuum max out then back in until it stumbles then back out a little rich till smooth again. I watch the corner of the hood up in the air to determine the point of minimal shake. Combination of highest rpm and minimal hood shake. Using the vacuum gauge connected to both carbs minimizes gauge flutter and for me makes seeing small changes easier than having separate gauges - and is also visible proof that the connection between the carbs cancels pulsing vacuum and results in smoother operation. Using this technique I improved my vacuum reading from 15 to 18.5. My rpm here was about 800 +- 10 rpms but this probably will be different for everyone.
10. Once the idle mixtures are set disconnect the vacuum gauge and connect the Carbmate - it has a hose for each carb. Adjust the butterflies equally, keeping the LED display in the middle until you reach your desired rpm - I have A/C so I set it at 1050.
11. Check each carb with the Synchrometer to verify equal air passing through and adjust accordingly while keeping the Carbmate in synch also.
12. Idle should be smooth now with minimal missing/hood shake and puttering happily with a nice exhaust note.
13. Reattach the linkages - making sure that when you do there is no movement of the butterflies and no change in rpm. Put a little white grease in the sockets before popping them back together. Adjust linkages accordingly if change is detected.
14. Rev the car to 3500-4000 rpm and watch the Carbmate - if one carb is out of balance at higher revs, twist the knurled linkage adjustment piece at the back carb linkage until it zeroes them out. This ensures balanced carbs throughout the rev range, not just at idle and makes a big difference when driving.
15. Carbmate should show balance at both idle and through the rev range if linkages are correctly adjusted. Revs should be smooth and responsive with no missing.
16. Disconnect devices, plug the vacuum tee, check all other vacuums for tightness and take it for a drive!
Last edited: